Brakes - Noise From Rear
CLASSIFICATION: BR95-004REFERENCE: NTB95-103
DATE: October 18, 1995
1991-1995 SENTRA REAR BRAKE NOISE
APPLIED VEHICLES:
1991-1994 Sentra (B13)
1995 Sentra (B14) equipped with rear drum brake system.
SERVICE INFORMATION
If a Sentra customer complains of rear brake noise (squeak/squeal, grind/groan, or underwater" squeal noise), an improperly adjusted rear drum brake system can create such noises. In an effort to resolve these noises, the following steps should be performed.
SERVICE PROCEDURE
1. Remove rear wheels and inspect rear brake components for signs of excessive heat. (Discoloration of brake shoes and drums or flaking of brake lining material).
2. If no sign of excessive heat can be observed, clean the brake components with a vacuum dust collector.
3. Adjust the brakes according to the adjustment procedures listed in the section of this bulletin titled "REAR BRAKE ADJUSTMENT PROCEDURE".
4. If excessive heat to the rear brake components is observed, perform the following:
A. Inspect for damage to the parking brake housing and mounting brackets.
B. Inspect for corrosion on the brake cables and linkages.
C. Inspect the parking brake lever adjustment.
D. Replace the brake shoes and resurface the brake drums. (Refer to the current parts microfiche for the correct part numbers).
E. Adjust the rear brakes using the procedure on the following page.
REAR BRAKE ADJUSTMENT PROCEDURE
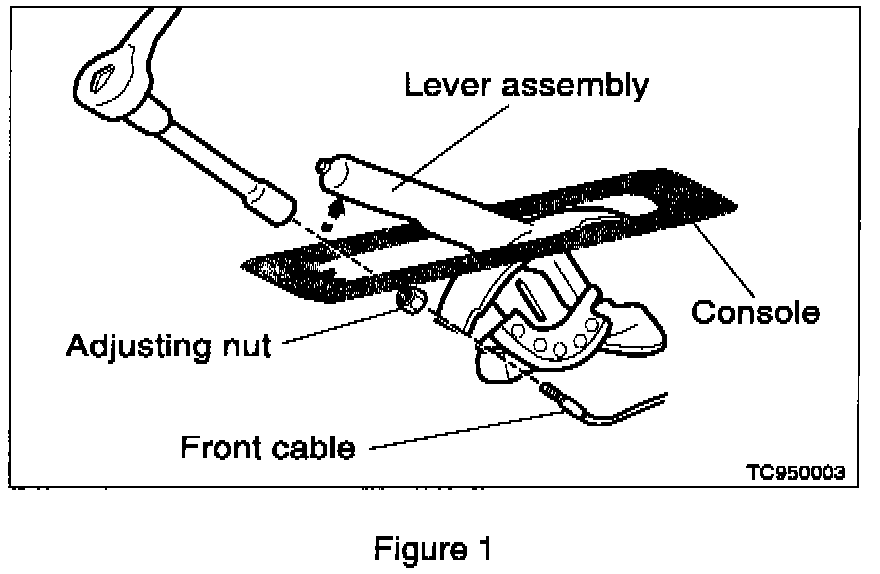
1. Release the parking brake lever and loosen the cable adjusting nut. The parking brake lever may need to be raised 4-5 clicks to allow access to the adjusting nut. (Refer to Figure 1). It is important that this step be performed otherwise the rear brakes cannot be properly adjusted.
2. With the rear wheels removed, adjust the rear brake shoe clearance until a slight dragging force can be felt when rotating the drum assembly.
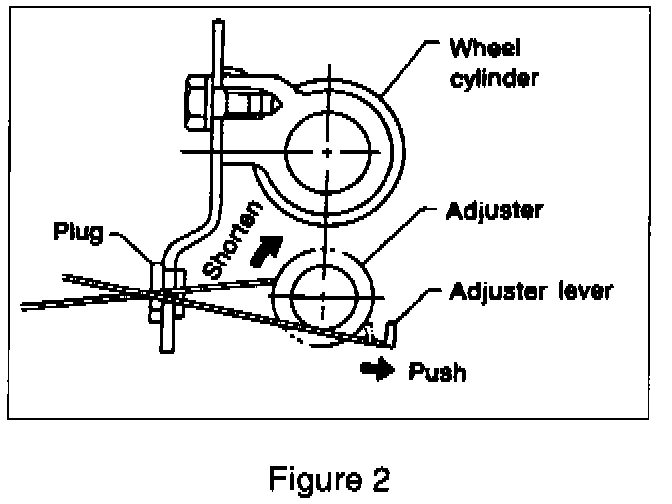
3. Turn the brake shoe self adjuster back twenty-two (22) clicks or remove the drum and rotate the self adjuster one (1) complete revolution in the direction that will increase the brake shoe clearance from the brake drum. (Refer to Figure 2).
4. Install the drums and wheels then perform the following steps for both rear brakes.
5. Start the engine and depress the brake pedal twenty (20) times. This will center the shoes in the drums.
6. Pull the parking brake lever with 20 kg force and count the number of clicks. The lever should move 7-8 clicks. If the lever does not move 7-8 clicks, loosen or tighten the cable adjustment nut to bring it into specification.
7. Repeat the above adjustment as necessary.

CLAIMS INFORMATION
If adjusting the parking brake ONLY:
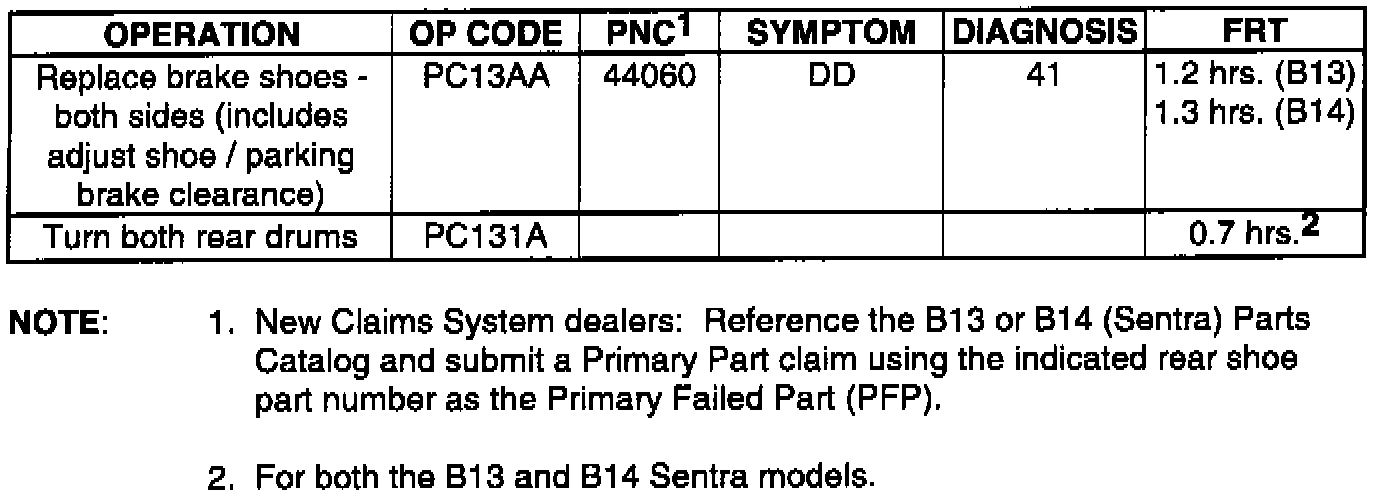
If REPLACING the rear brake shoes (includes adjust parking brake):