How to Install A Nissan Truck/Pathfinder Air Conditioner
FIGURE 1:
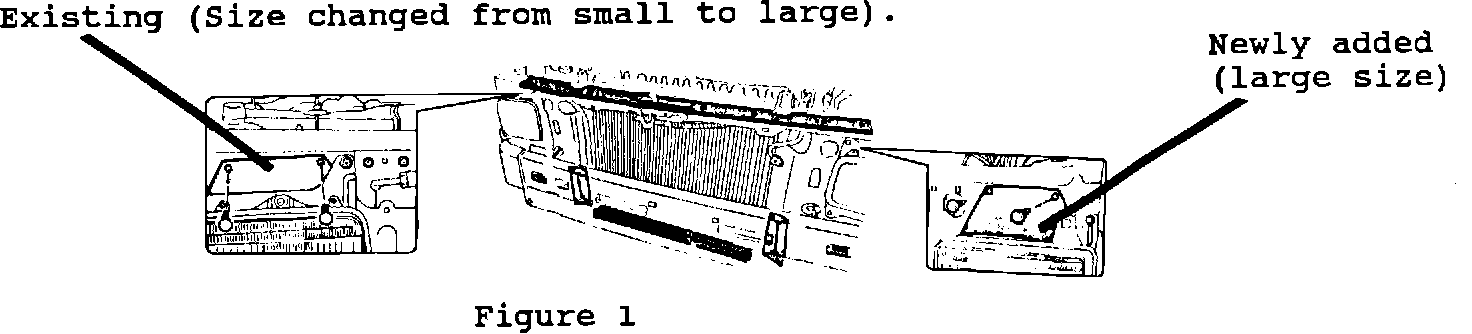
For A/C Systems B7000-08G01, B7000-09G02, B7000-08G11, & B7000-09G11
Installation Instruction Manual Supplement
4 AND 6 CYLINDER VEHICLES
1. Added to the A/C system: Air baffle over left headlight (large size).
Configuration change: Air baffle over right headlight (changed from small size to large size).
FIGURE 2:
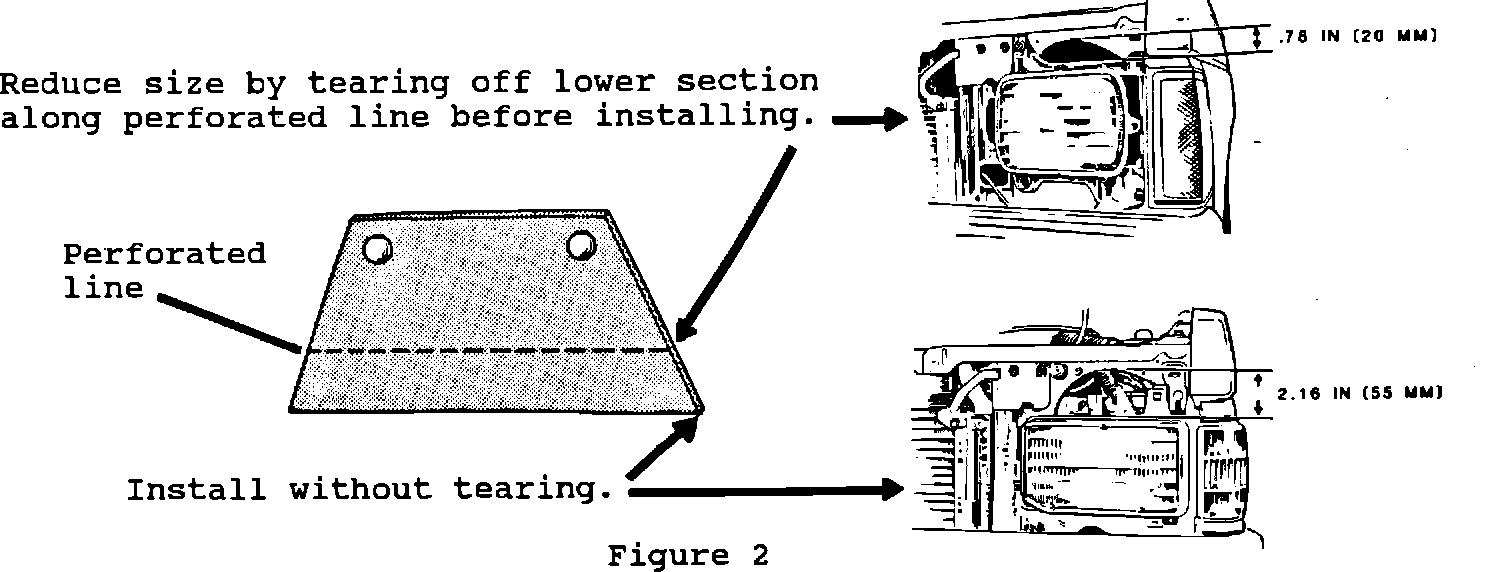
The A/C system now includes two large size air baffles. However, some vehicles require small size air baffles. Examine the headlight area of the vehicle as shown below to determine if the air baffle should be large or small. If large size air baffles are required, use the baffles as supplied. If small size air baffles a required, reduce the size by tearing off the bottom portion along the perforated line as shown below.
Caution: After installing the air baffles over the headlights, confirm that the baffles will not cover any part of the headlight glass area.
2. Deleted from the A/C system: Plastic cover for the [1][2]A/C relay and bracket. (Refer to Item 3 of this supplement).
FIGURE 3:
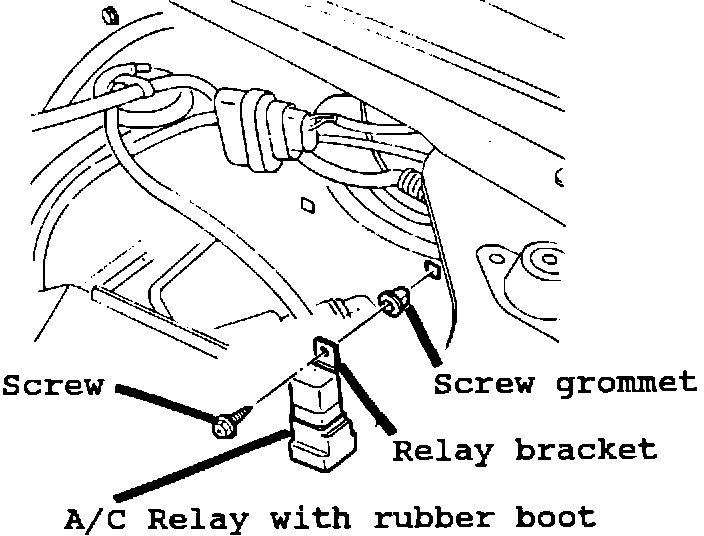
3. Configuration change: The [1][2]A/C relay now comes with a rubber boot already installed. Therefore, the plastic cover for the A/C relay is no longer used. (Refer to Figure 3 in this supplement).
FIGURE 4:
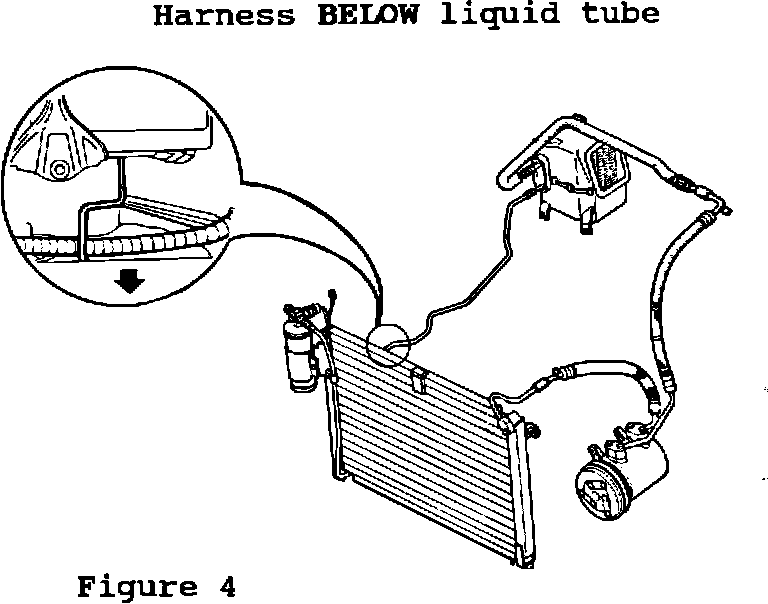
4. Installation procedure update: The main vehicle harness should be routed BELOW the liquid tube. (Refer to Figure 4 in this supplement).
FIGURE 5:
6 CYLINDER VEHICLES ONLY
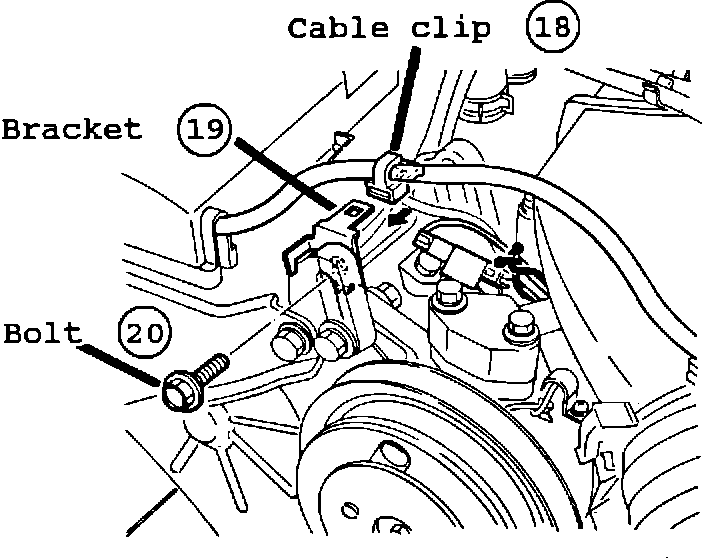
5. Added to the A/C system: Bracket assembly used to secure the high tension cable. Attach cable clip to bracket (if not already attached) and install bracket assembly to compressor bracket as shown below in Figure 5. Secure cable.
FIGURE 6:
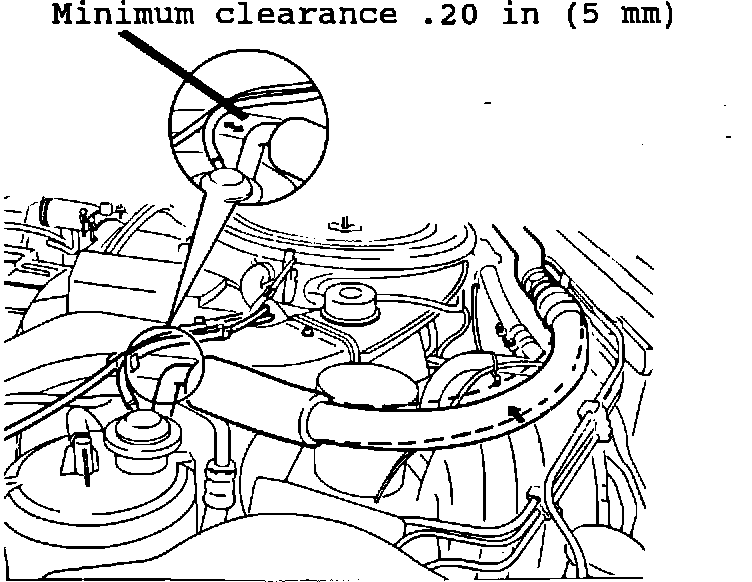
6. Installation procedure update: Confirm that clearance exists (minimum .20 in [5 mm]) between the canister vacuum hoses and the low hose (tube portion). If necessary, slide hose retaining clamp toward front of vehicle to achieve clearance.