M/T - Leak From The Breather Vent At The Firewall
Reference: TECHNICAL BULLETIN TS87-034 Date: February 20, 1987Classification: MT87-003 Section: Manual Transmission Models: 1986.5 - 1987 4WD Truck
TRANSMISSION VENT TUBE LEAKAGE
APPLIED MODEL: 1986.5 - 1987 D21 4WD Truck equipped with the Z24 engine
AFFECTED MODELS:
MODEL YEAR PLANT AFFECTED VEHICLE INFORMATION
Kyushyu, All
1986.5 Japan
Smyrna, Std. Bed - Before 1N6ND11Y ( ) GC-444448
4WD Truck & Tennessee Long Bed - Before 1N6ND12Y ( ) GC-444648
Pathfinder King Cab - Before 1N6ND16Y ( ) GC-441236
with Z24i
engine
1987 Kyushyu, Std. Bed - Before JN6ND11Y ( ) HW-000273
Japan Long Bed - Before JN6ND12Y ( ) HW-000176
King Cab - Before JN6ND16Y ( ) HW-001009
Pathfinder - Before JN8ND14Y ( ) HW-000051
Smyrna, No 1987 Smyrna Built Vehicles Affected
Tennessee
SERVICE INFORMATION
The manual transmissions in some of the Affected Models listed above may leak gear oil from the breather vent at the engine wall. This condition does not require transmission overhaul to correct.
Use the following Parts Information and Service Procedure to repair incident vehicles.
PARTS INFORMATION
NOTE: The breather tube kit listed below is the same part used on 2WD vehicles. However, when installed on 4WD vehicles, an additional 1/4 inch rubber plug is necessary.
PART DESCRIPTION NUMBER
Breather Tube Kit 38594-18W27
Rubber Plug (1/4 inch) *
* This part should be available at local auto parts or hardware stores.
Transmission Vent Tube:
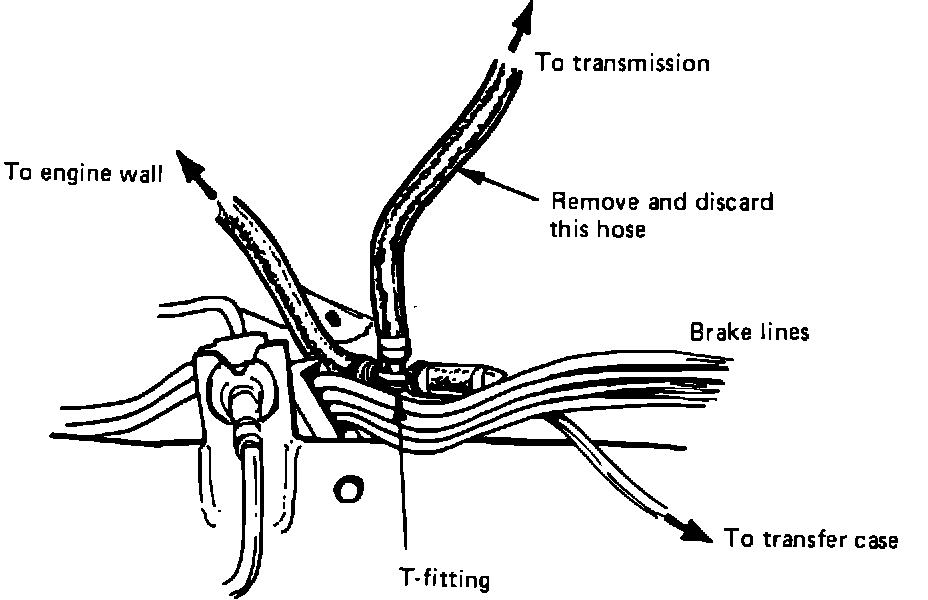
SERVICE PROCEDURE
1. Raise vehicle on a hoist.
2. Remove and discard the hose between the transmission breather vent and the T-fitting in the existing breather hose. Save 1 clamp from the removed hose.
3. Install a 1/4 inch plug on the T-fitting and secure with the saved hose clamp.
4. Slide a hose clamp over the long breather hose from the kit and attach this breather hose to transmission breather vent with the hose clamp.
Speedometer Cable Mounting:
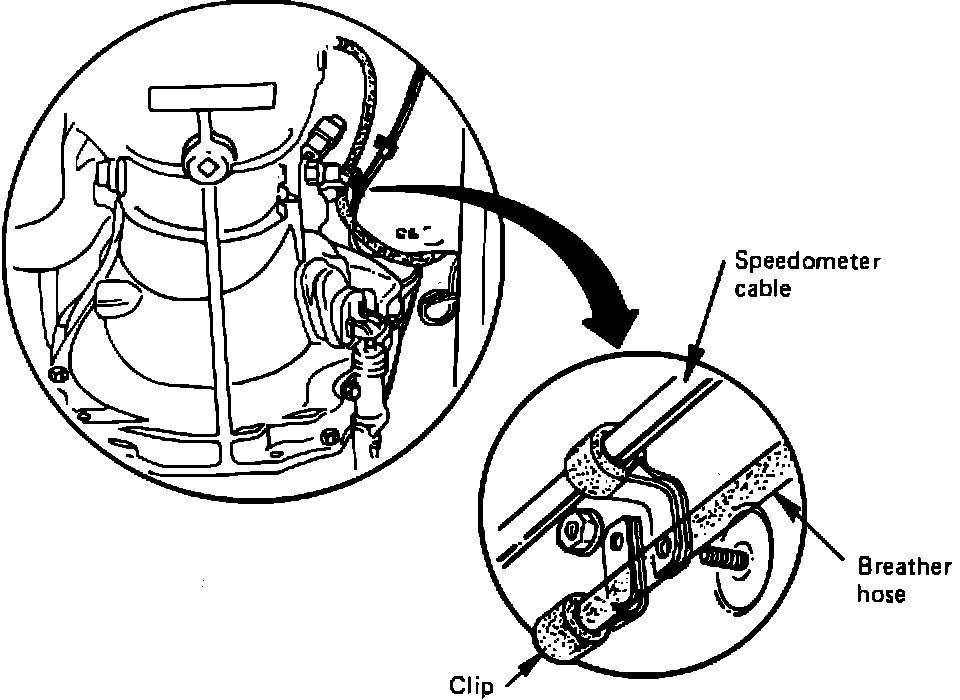
5. Remove the nut from the upper stud (speedometer cable mounting) on transmission tunnel (see illustration for location).
6. Slide the new clip over the end of the new breather hose and route the hose up the engine wall.
7. Attach the clip to the stud and tighten the nut while making sure that the breather hose does not sag at any portion.
8. Lower the vehicle and open the hood.
Hose Routing:
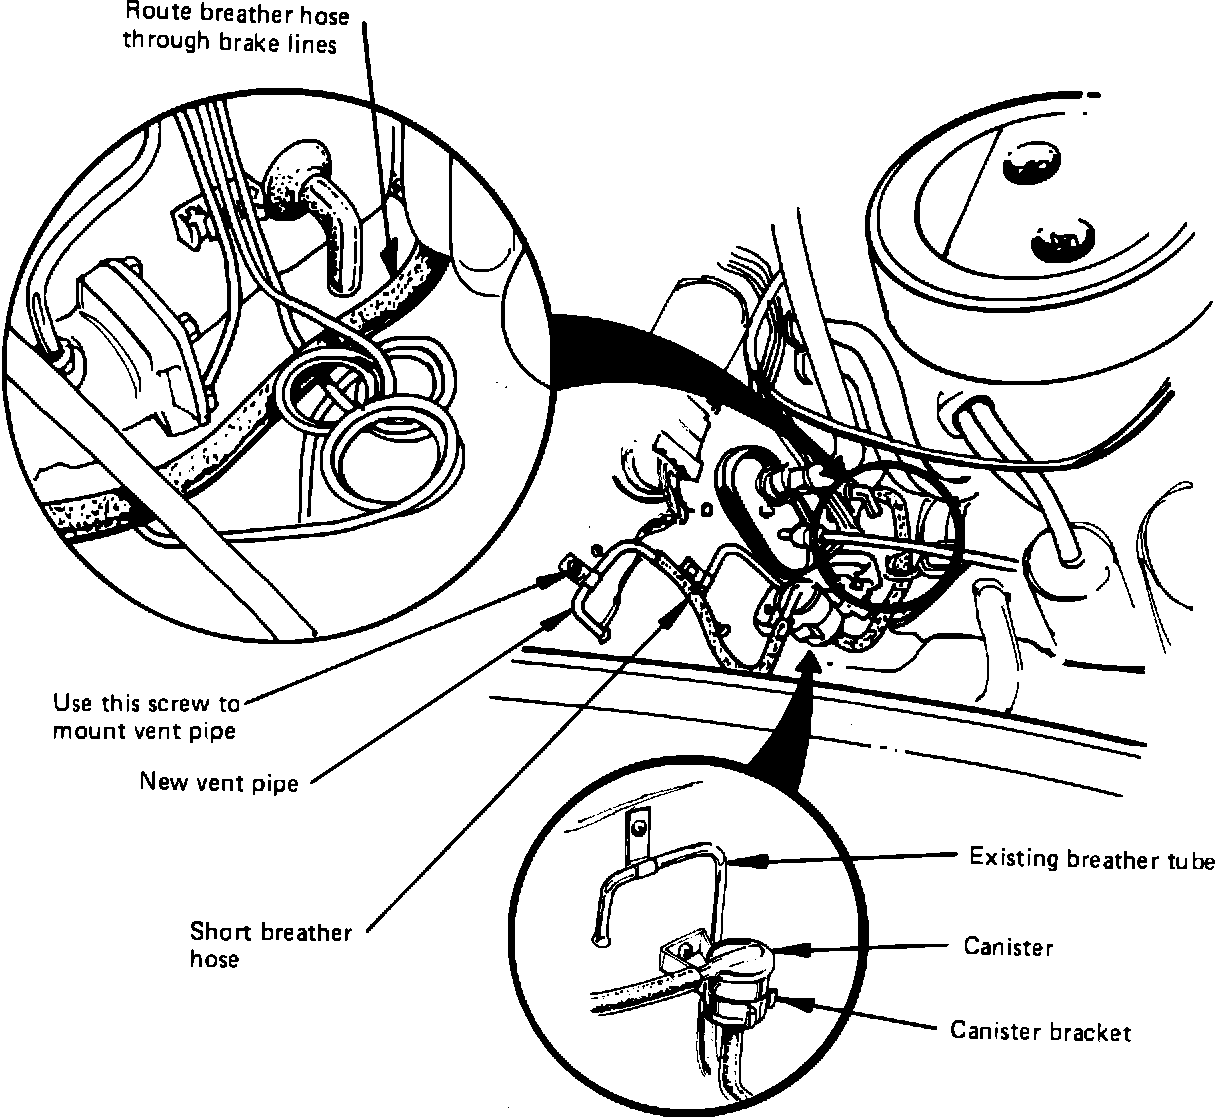
9. Locate the end of the breather hose and route it between the brake lines as shown.
10. Remove the screw below the existing breather tube on the engine wall (see illustration). Mount the separator canister bracket to engine wall using the removed screw.
11. Slide a hose clamp over the breather and attach the hose to the bottom of the canister with the clamp. Install the canister into the bracket.
12. Remove the screw to the right of the hood hinge. Mount the vent pipe to the engine wall using the removed screw.
13. Cut 3 inches off the short hose in the kit. Install the remaining 7 inch piece between the canister and vent tube using the hose clamps in the kit.
14. After installing this kit on a 4WD truck, the following parts should be left over: ^ tie wrap ^ tap screw ^ plastic grommet ^ 3 inches of hose
WARRANTY INFORMATION
CS PNC CT OP CODE FLAT RATE
4B 32131 99 HC99AA 0.3/hr.