Computer Connector
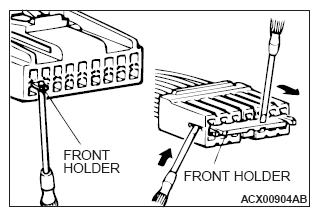
- Insert a screwdriver [1.4 mm (0.06 inch) width] as shown in the figure, disengage the front holder, and remove it.
 Courtesy of MITSUBISHI MOTOR SALES OF AMERICA.
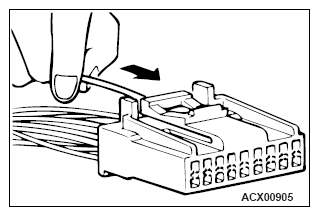
- Push the harness wire of the terminal to be repaired deep into the connector from the harness side and hold it there.
 Courtesy of MITSUBISHI MOTOR SALES OF AMERICA.
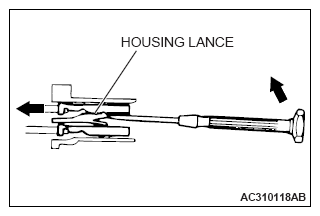
- Insert the tip of the screwdriver [1.4 mm (0.06 inch) width] into the connector as shown in the figure, gently push the housing lance down with the tip, and pull out the terminal.
 Courtesy of MITSUBISHI MOTOR SALES OF AMERICA.
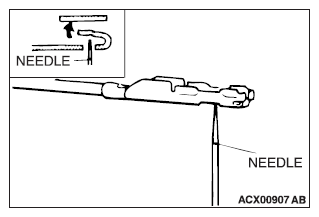
- Insert a needle through the hole provided on the terminal and raise the contact point. Lightly squeeze the outer edge so the flats are parallel with the bottom.
 Courtesy of MITSUBISHI MOTOR SALES OF AMERICA.