Timing Belts & Sprockets: Installation
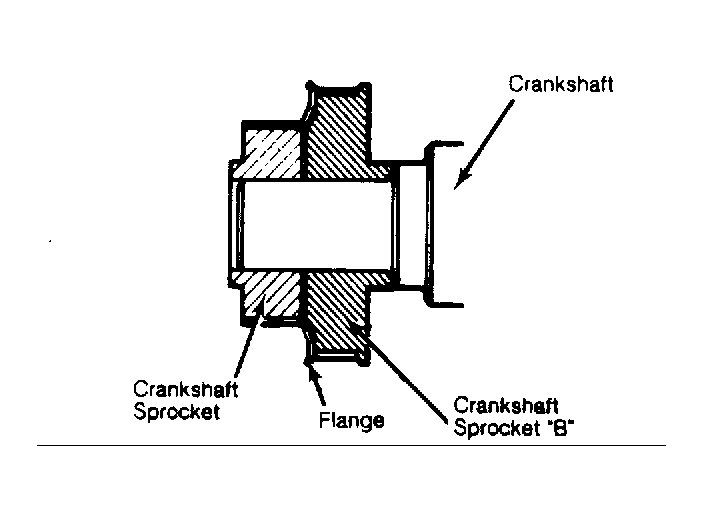
- Install crankshaft sprocket and flange ensuring flange on crankshaft sprocket "B" is installed correctly. See Fig 1. Lightly oil right silent shaft spacer and insert spacer with chamfered end toward seal.
 Courtesy of CHRYSLER LLC
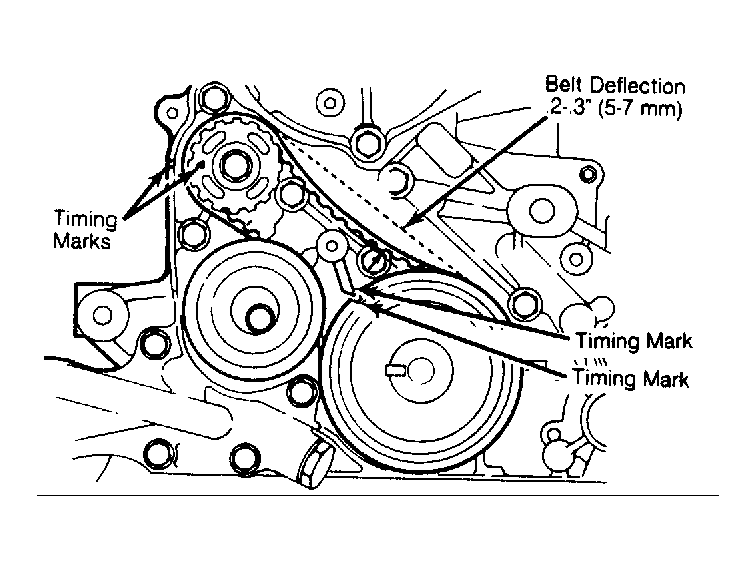
- Install right silent shaft sprocket, if removed, and tighten bolt. Align crankshaft sprocket and silent shaft sprocket timing marks with corresponding marks on front case. See Fig 2.
 Courtesy of CHRYSLER LLC
- Install timing belt "B", ensuring tension side has no slack. Install tensioner "B" so only light pressure is on belt. Ensure flange on tensioner is mounted away from engine and loosely tighten the bolt.
- Rotate tensioner until slack is removed from tension side of belt. Tighten bolt, being careful to prevent turning shaft. Ensure timing marks are in alignment.
- Check belt tension by pressing center of tension side inward, using index finger and measuring belt deflection. Deflection should be.2-.3" (5-7 mm). Readjust if not within specification.
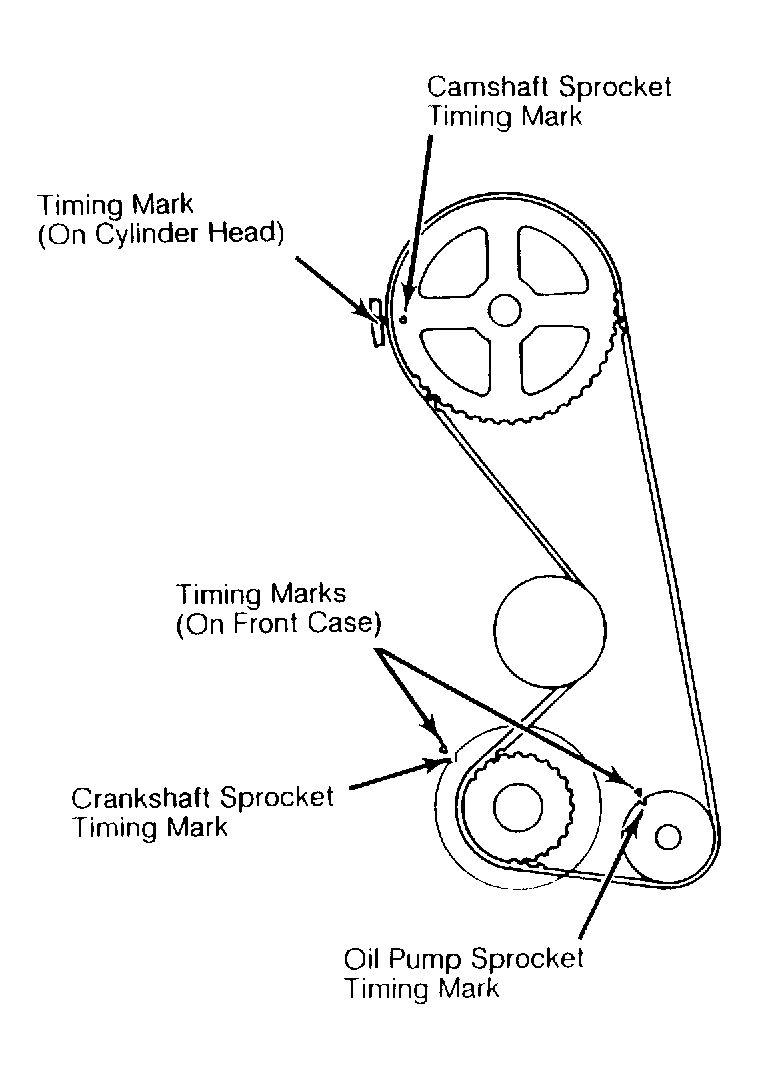
- Align camshaft timing belt sprockets with corresponding timing marks. See Fig 3. To ensure oil pump sprocket is in correct alignment, insert screwdriver shaft in hole on left side of block.
 Courtesy of CHRYSLER LLC
- If screwdriver cannot be inserted at least 2.36" (60 mm), turn oil pump sprocket one revolution and realign marks. Insert screwdriver. Leave screwdriver inserted until timing belt installation is complete.
- With tensioner secured fully toward water pump, install timing belt in order of crankshaft sprocket, oil pump sprocket and camshaft sprocket. Ensure tension side of belt has no slack.
- Loosen tensioner mounting bolt and nut to allow only tensioner spring pressure to tighten belt. Check belt to ensure each tooth is in proper mesh with camshaft sprocket.
- Tighten slot-side bolt before tightening nut. Otherwise, tension bracket will turn and belt will be overtensioned. Ensure all timing marks are in correct alignment. Remove screwdriver and install plug in block.
- Turn crankshaft, clockwise only, one revolution. Loosen mounting nut and bolt to allow tensioner to readjust and tighten slot-side bolt, then tighten nut.
- Hold belt and seal line of undercover, between thumb and forefinger, at center of tension side. Measure clearance between belt and seal line. Clearance should be.55" (14 mm). Reverse removal procedure to complete reassembly.