Installing inner joint gaiter
WARNING: This page is about a different variant/trim than selected.
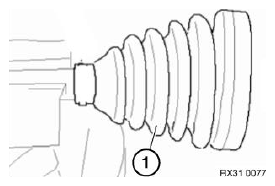
Slide new gaiter (1) together with 34.6 mm dia. stepless ear clip onto output shaft.
Installation:
Slide gaiter of transmission-side joint on cars with automatic transmissions up to stop of wheel-side gaiter and on cars with manual transmissions up to vibration damper.
 Courtesy of BMW OF NORTH AMERICA, INC.
IMPORTANT:
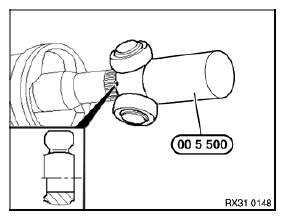
Align tripod star so that chamfer (arrow) points to output shaft.
Drive tripod star with special tool 00 5 500 onto output shaft until groove for snap ring is exposed.
 Courtesy of BMW OF NORTH AMERICA, INC.
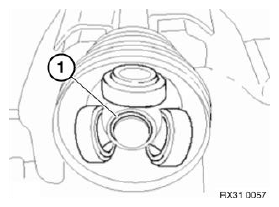
Install new copper-coloured snap ring (1).
 Courtesy of BMW OF NORTH AMERICA, INC.
IMPORTANT:
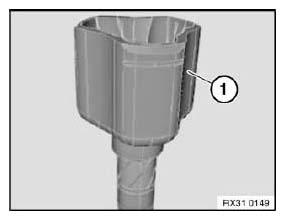
Use only quantity of grease provided.
Packing of grease in the transmission-side joint must not exceed 130 g.
Pack lubricating grease provided into housing (1).
 Courtesy of BMW OF NORTH AMERICA, INC.
IMPORTANT:
During assembly, the sealing faces on the gaiter and joint must be clean, dry and free of grease!
Attach packed housing (1) to tripod star and into gaiter (2).
NOTE:
Make sure gaiter is correctly seated in groove of housing.
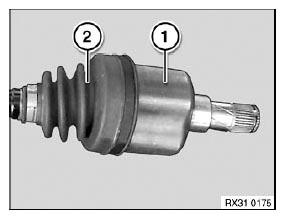 Courtesy of BMW OF NORTH AMERICA, INC.
IMPORTANT:
Centrepoint of clamping pipe must be situated at height of housing centreline!
Max. deviation (A) ± 10 mm.
Close new 89.5 mm dia. stepless clamp with special tool 31 5 200
.
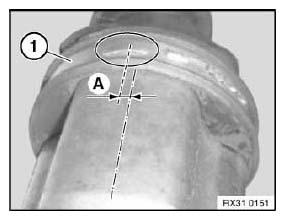 Courtesy of BMW OF NORTH AMERICA, INC.
IMPORTANT:
The stepless clamping band must snap into place completely with both hooks! Both hooks must no longer be visible after engagement.
Closing travel is 13 mm.
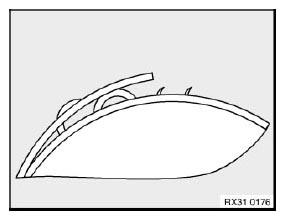 Courtesy of BMW OF NORTH AMERICA, INC.
Adjust gaiter (1) with housing to 100 mm installation length.
IMPORTANT:
Gaiter must be vented after fitting in order to adapt the overpressure generated during fitting to the ambient pressure!
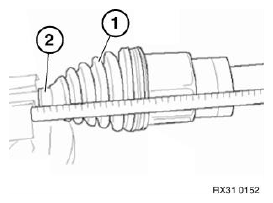 Courtesy of BMW OF NORTH AMERICA, INC.
Vent gaiter (1); carefully slide a suitable tool between gaiter and output shaft for this purpose.
Close new 34.6 mm dia. stepless ear clip (2) with special tool 32 1 260
.