Instrument Panel: Removal
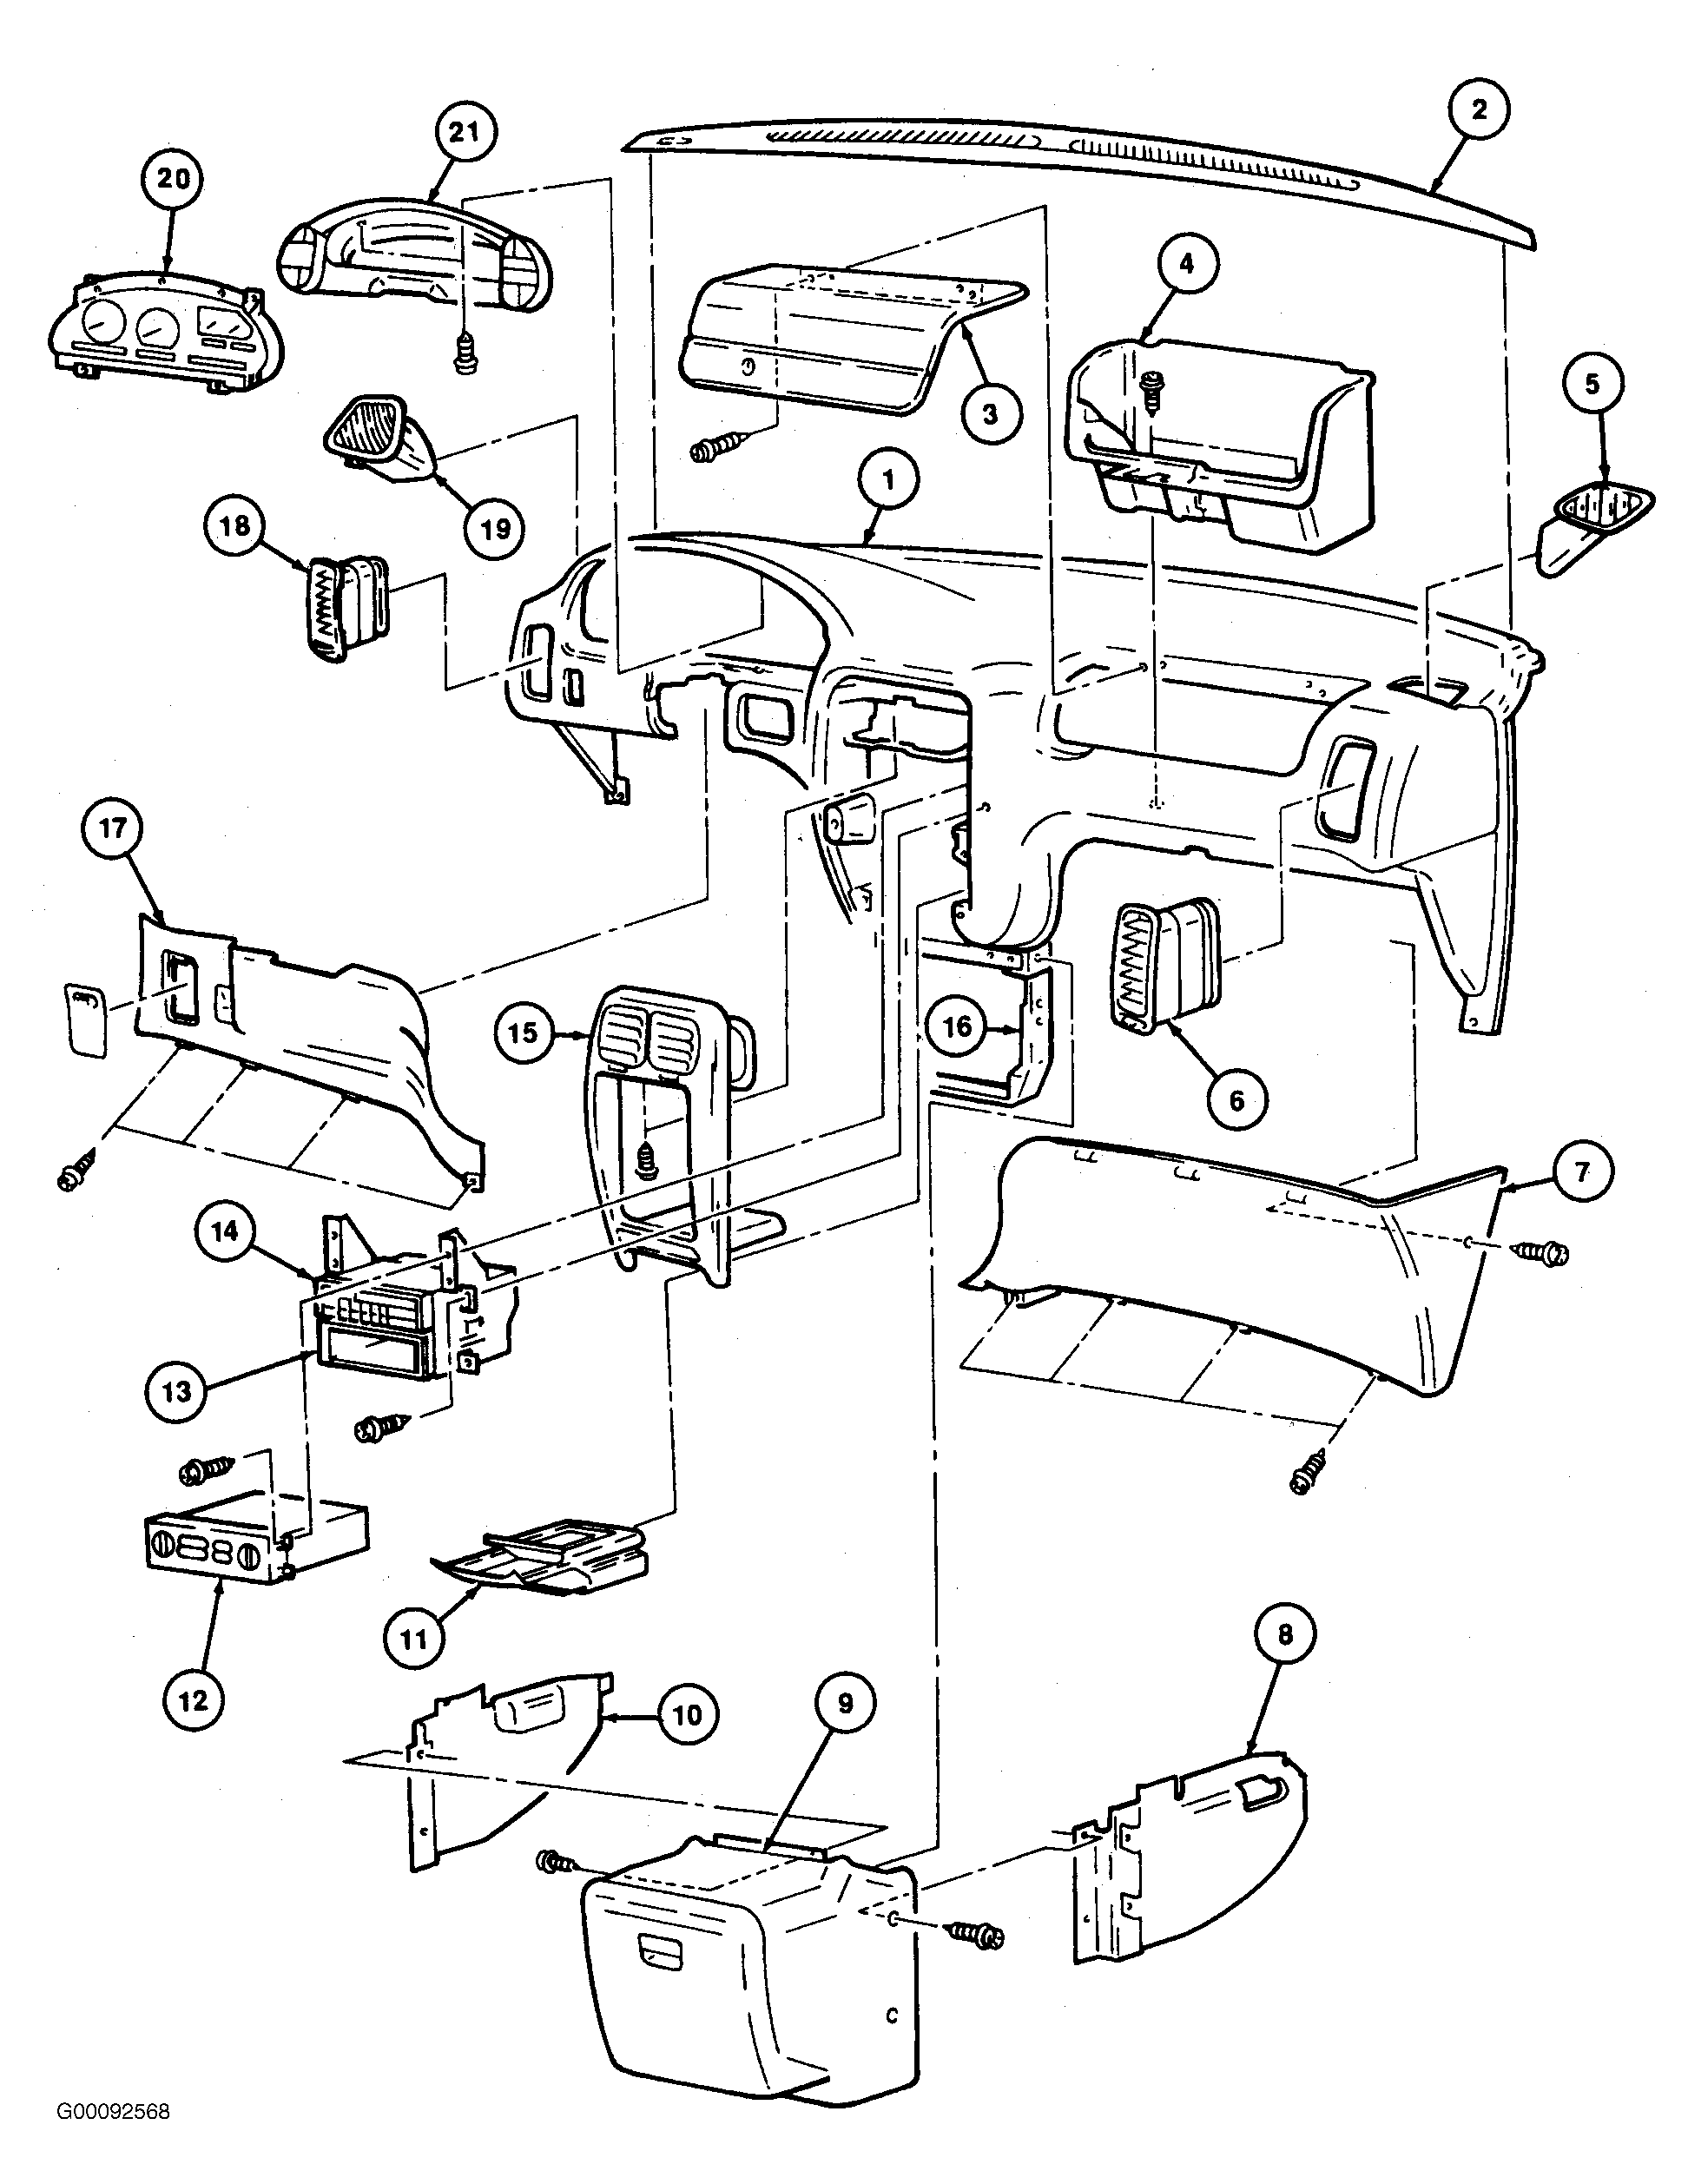
- Disconnect the negative battery cable. Remove the four plastic storage bin screws and the storage bin. Remove the left and right inner kick panels. See INNER KICK PANELS
. Remove the knee reinforcement plates. See KNEE REINFORCEMENT PLATES
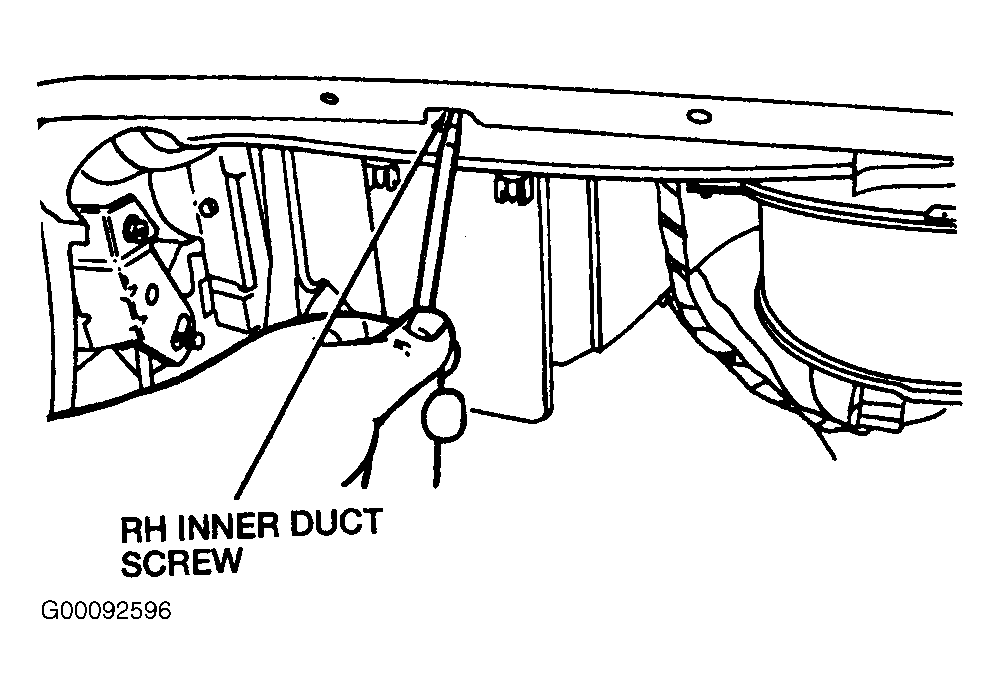
. Remove the right inner duct screw. See Fig 2
.
 Courtesy of FORD MOTOR CO.
 Courtesy of FORD MOTOR CO.
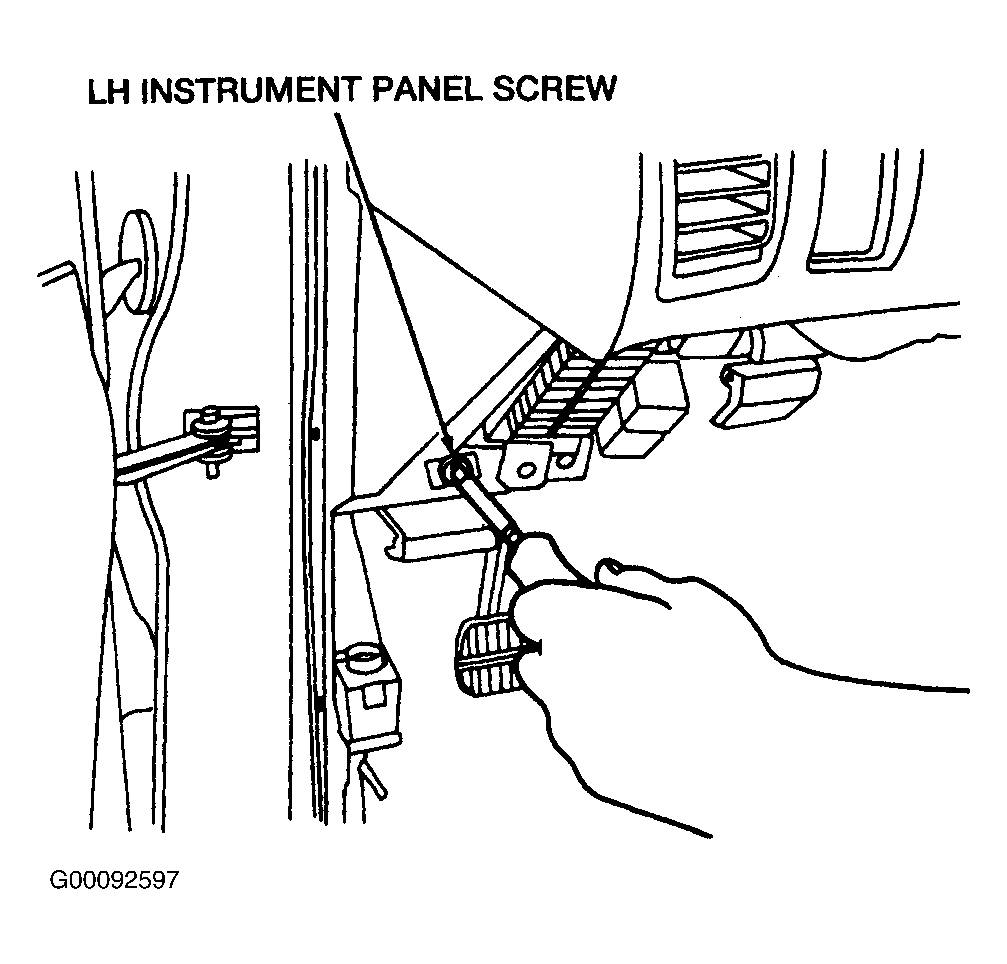
- Remove the left instrument panel screw. See Fig 3
. Remove the right instrument panel screw. Remove the glove compartment box. See GLOVE COMPARTMENT BOX
. Remove the steering column. See STEERING COLUMN - EXCEPT STRIPPED CHASSIS
article.
- Remove the instrument cluster. See ELECTRONIC INSTRUMENT CLUSTER
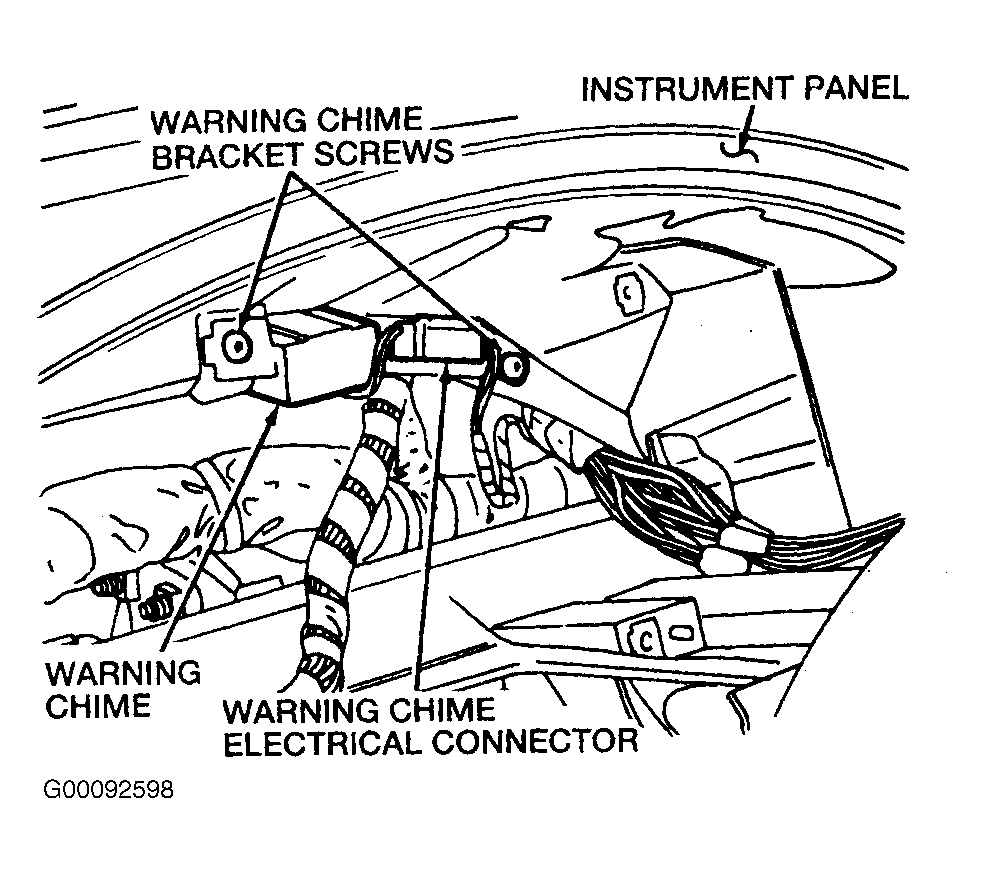
. Disconnect the warning chime electrical connector. See Fig 4
.
 Courtesy of FORD MOTOR CO.
 Courtesy of FORD MOTOR CO.
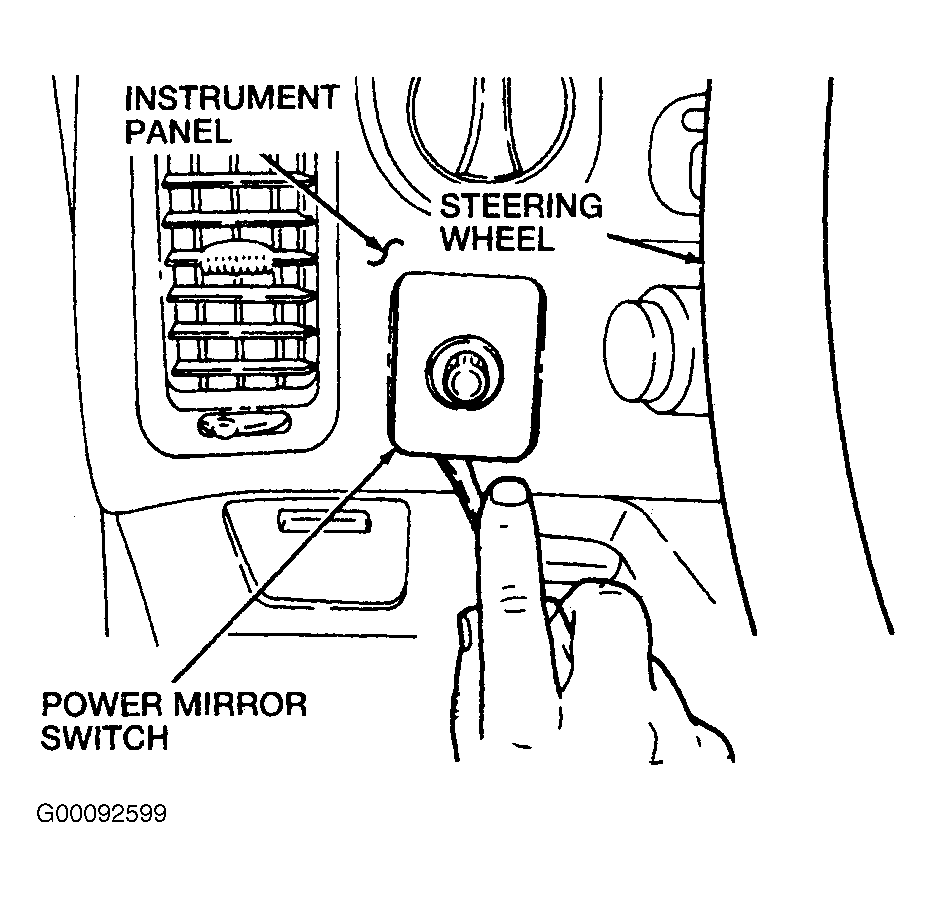
- Remove the two warning chime bracket screws and the warning chime. If equipped, remove the power mirror switch from the instrument panel in order to access its electrical connector. See Fig 5
.
 Courtesy of FORD MOTOR CO.
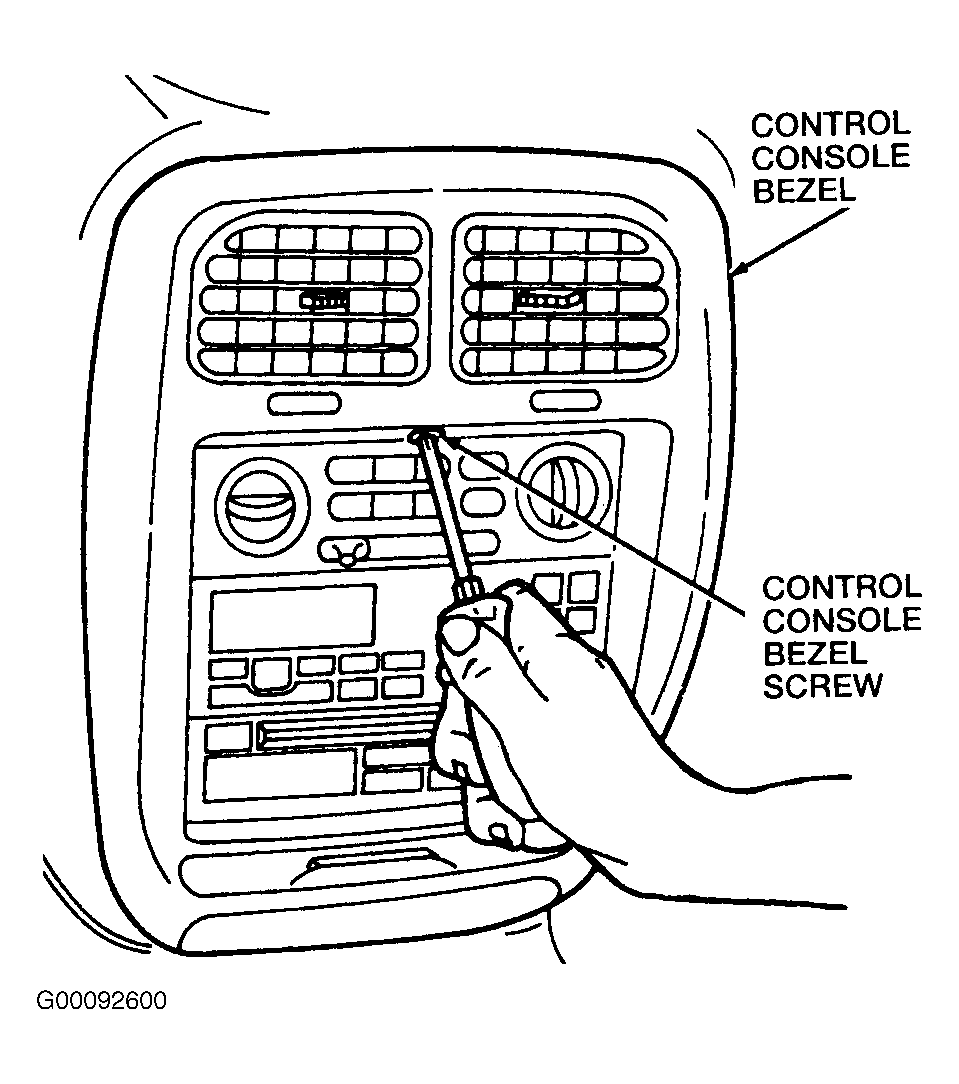
- Disconnect the power mirror switch electrical connector, if equipped. Remove the control console bezel screw. See Fig 6
.
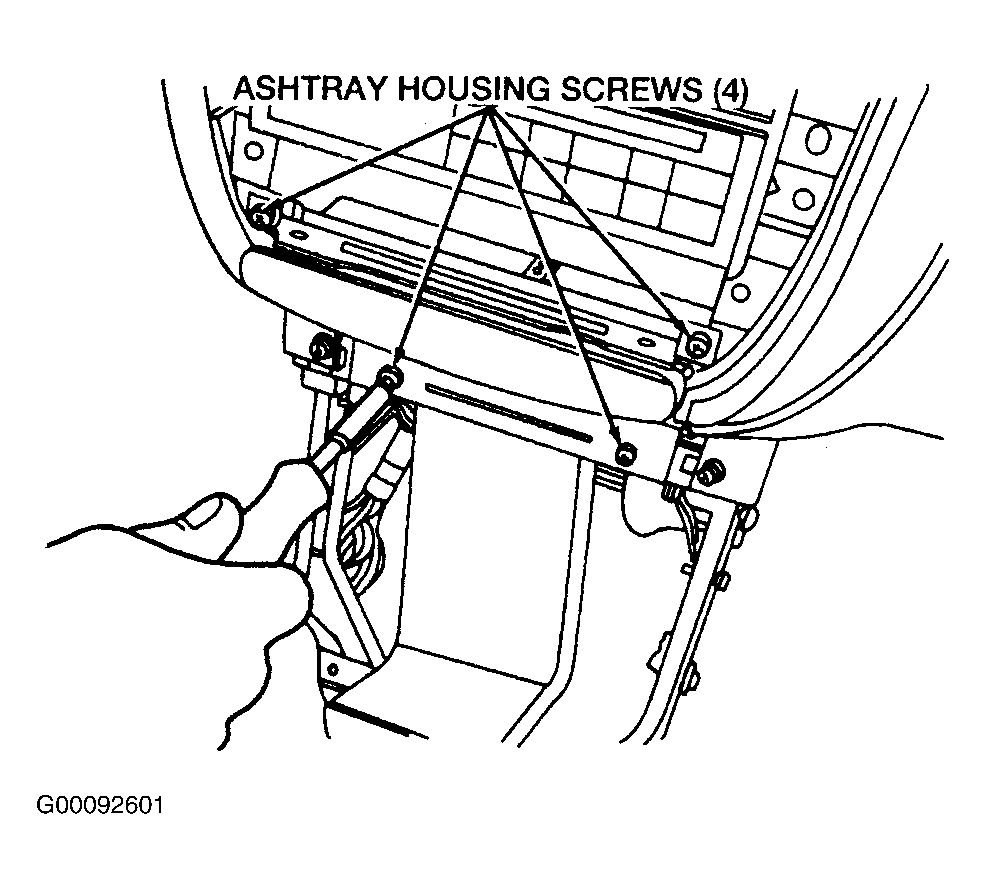
- Remove the control console bezel with the coin holder/tray attached. Remove the four ashtray housing screws. See Fig 7
.
 Courtesy of FORD MOTOR CO.
 Courtesy of FORD MOTOR CO.
- Disconnect the cigar lighter/illumination lamp electrical connector. Remove the ashtray assembly. Remove the climate control panel. Remove the radio and tape chassis.
- Remove the four console bin screws from the radio and tape chassis bracket and remove the console bin. Remove the right and left A-pillar trim. Remove the defroster grille. Remove the photo transistor, if equipped. To remove photo transistor, disconnect the negative battery cable. Gently pry the defroster grille from the dash. Turn and pull the photo transistor from the dash. Disconnect the photo transistor electrical connector from the photocell. Remove the two autolamp module screws, if equipped.
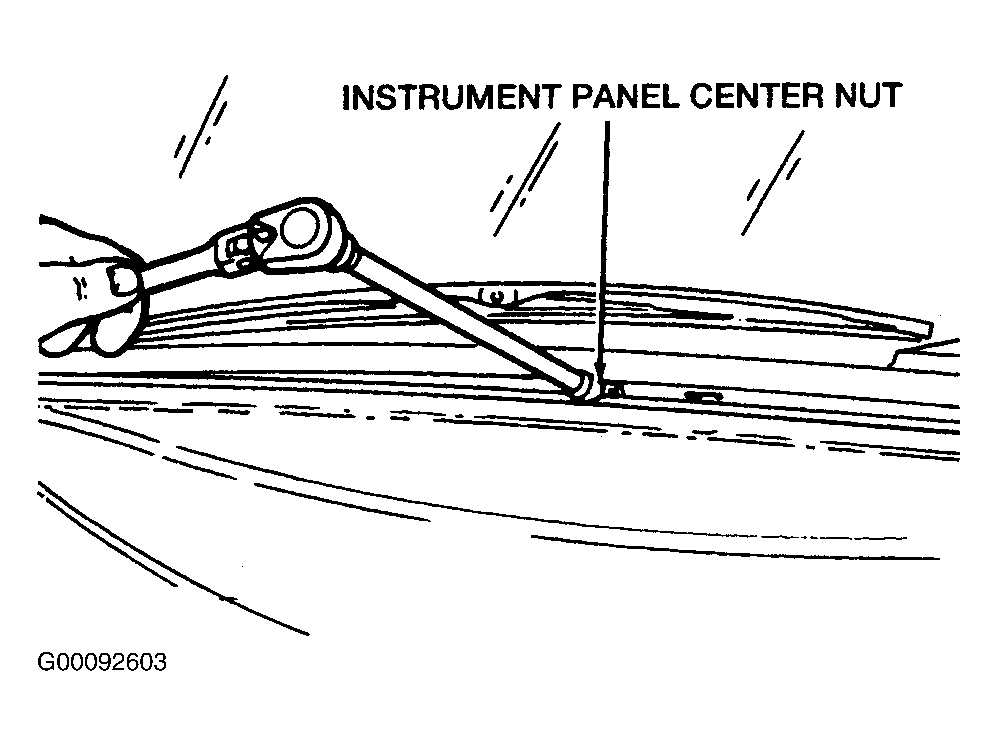
- Disconnect the two autolamp module electrical connectors and remove the autolamp module, if equipped. Remove the instrument panel center nut. See Fig 8
.
 Courtesy of FORD MOTOR CO.
- Remove the two instrument panel upper bolts. Remove the instrument panel. Remove the right and left demister nozzles. Remove the right and left registers.