Installation (1.6L)
- Ensure timing belt and sprockets are clean and not worn or damaged. Ensure timing marks are properly positioned on camshafts and crankshaft. Intake cam should have letter "I" aligned with arrow on belt cover. Exhaust cam should have letter "E" aligned with arrow on belt cover. Crankshaft key should align with arrow. See Fig 1.
- Tighten tension pulley with tension spring fully extended. Install timing belt. Keep tension on opposite side of tensioner as tight as possible. Ensure rotation mark on belt is correct.
- Turn crankshaft 2 full turns. Check alignment of timing marks. If any mark is not aligned, remove timing belt and reset timing. Loosen tension pulley retaining bolt allowing tension spring to tighten belt. Tighten tension pulley to specification and rotate engine 2 full turns. Verify timing mark alignment.
- Measure timing belt tension between camshaft pulleys. Belt deflection should be 0.33-0.45" (8.5-11.5 mm). If incorrect, loosen tension pulley and repeat procedure. If correct tension cannot be achieved, replace tension spring.
- Install lower, center and upper timing belt covers, and tighten bolts to specification. See TORQUE SPECIFICATIONS table at end of article. Install RH engine mount. Lower engine. Tighten retaining nuts to specification. Install crankshaft pulley, damper and baffle. Tighten baffle and damper screws and pulley retaining bolts to specification. Install water pump pulley and tighten retaining bolts to specification.
- Install alternator and power steering belts. Install oil dipstick. Raise vehicle and install splash guard and RF wheel and tire assembly. Lower vehicle, install spark plugs and start engine. Inspect for leaks and check operation.
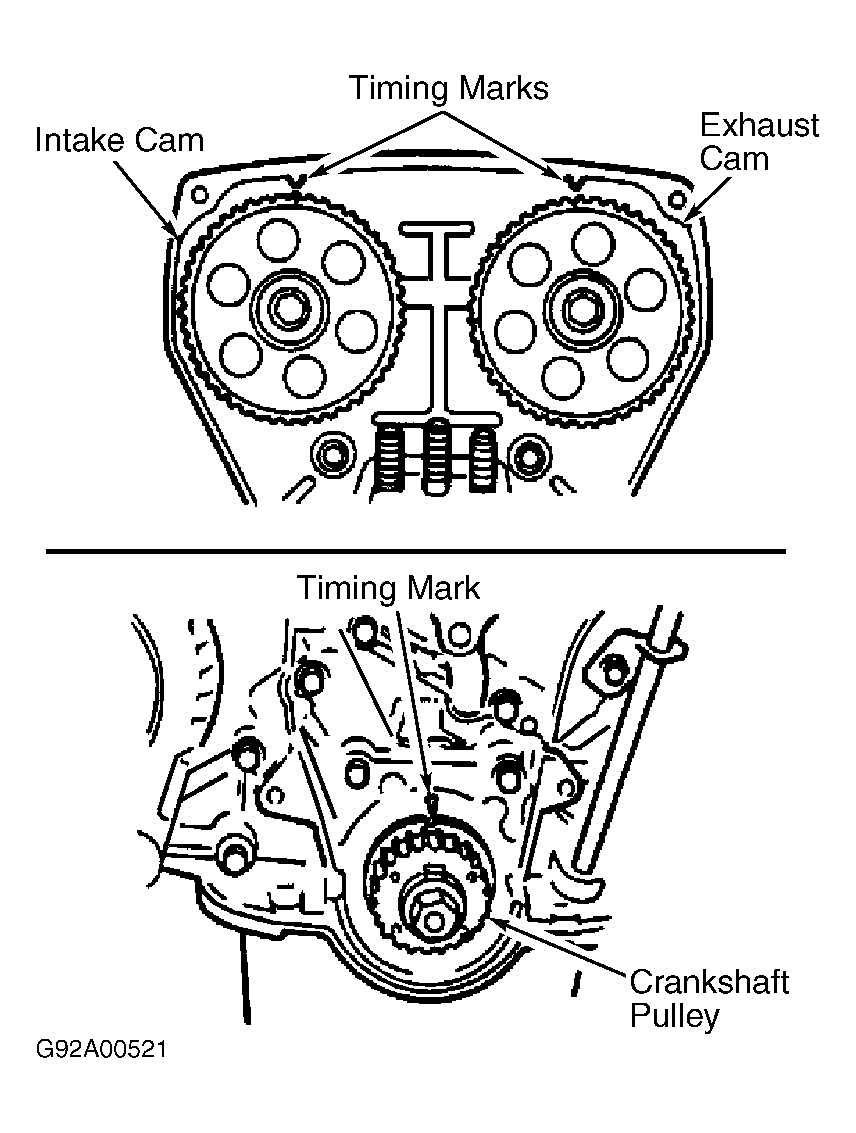 Courtesy of FORD MOTOR CO.