- Install rear fender (1), trunk lid, taillamps and rubber seal.
- Fit rear fender (1), trunk lid, taillamps and check gaps using
 feeler gauge and adjust.
- Fasten rear fender (1) on body with clamping pliers and remove trunk lid, taillamps and rubber seal.
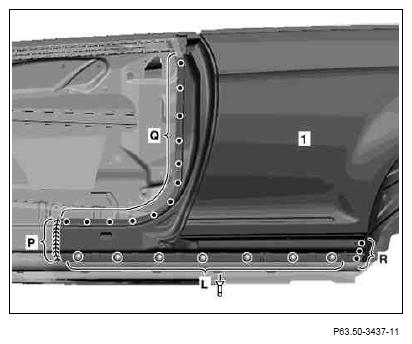
- Drill rivet holes with BTR Usibor drill, dia. 6.7 mm (area L).
 Transfer each second spot weld from removed part to new part to drill rivet holes.
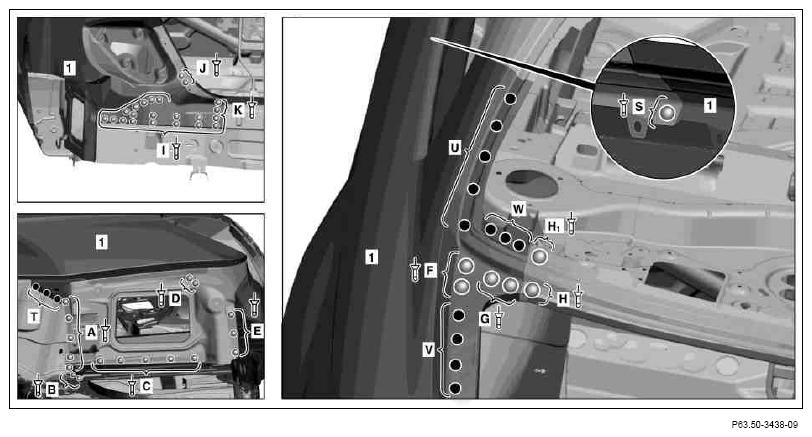
- Drill rivet holes with 6.5 mm dia. bit (areas A, B, C, F, H, H1
and K).
- Countersink rivet hole (area H1
).
- Drill 6.5 mm dia. rivet holes from inside (areas D, E, G, I and J).
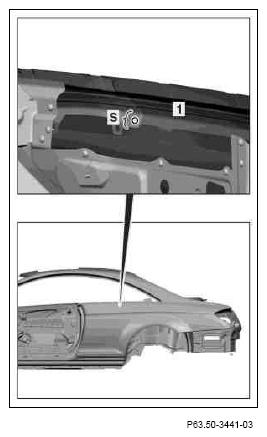
- Drill rivet hole with 6.5 mm dia. bit (area S).
- Remove clamping pliers and rear fender (1).
- Deburr rivet holes on rear fender (1) on both sides.
- Remove drill shavings using wet/dry vacuum cleaner
- Coat insides of riveted joints with zinc dust paint (area S).
 Courtesy of MERCEDES-BENZ USA
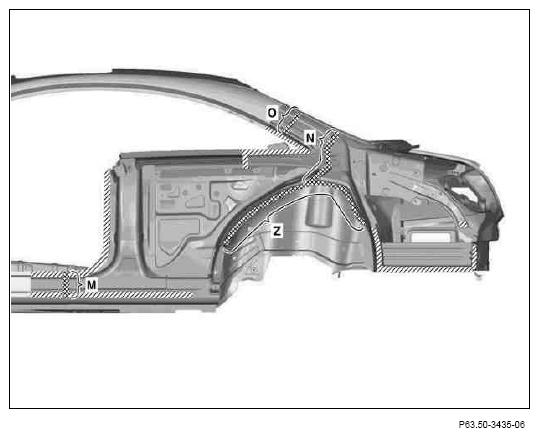
- Install rubber window spacers from glazing repair kit at uniform intervals (area Z).
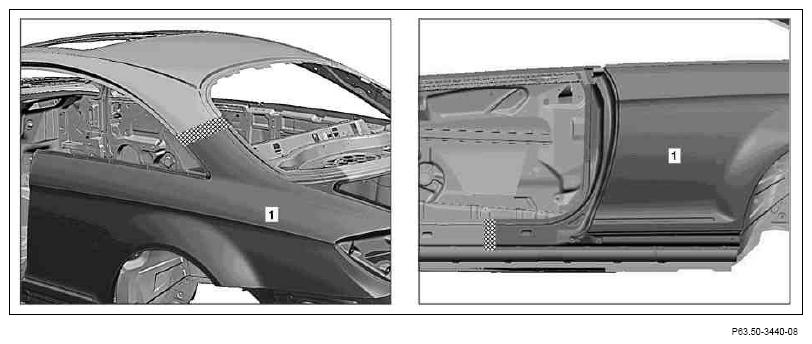
- Apply MB body sealant in cross-hatched areas (areas M, N, O and Z).
Damaged foam parts must be removed and replaced.
 Thoroughly clean all bonding surfaces and do not coat with zinc dust paint, otherwise adhesion of the 2-component adhesive may decrease.
 Courtesy of MERCEDES-BENZ USA
Observe pretreatment of bonding surfaces. Observe manufacturer's specifications of the 2-component adhesive for drying and processing time.
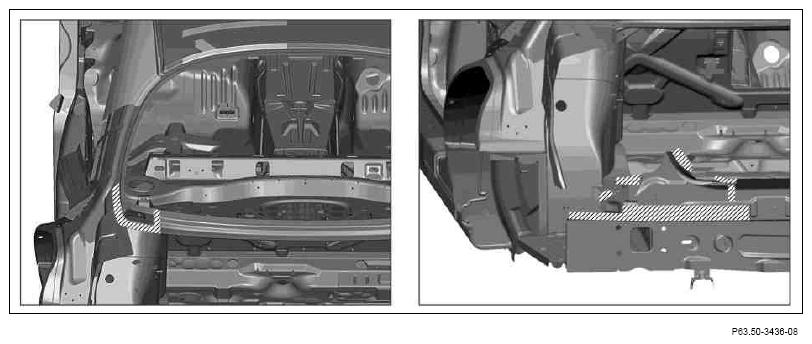
- Apply 2-component adhesive to mating surfaces on cross-hatched areas.
 Courtesy of MERCEDES-BENZ USA
- Apply 2-component adhesive to mating surfaces in cross-hatched areas.
- Install rear fender and fasten using clamping pliers and manual temporary fasteners.
Position resistance spot welds at precise position of resistance spot welds made at factory to ensure minimum required strength for weld joints.
- Rear fender (1)
 (areas Q and R).
- Rear fender (1)
 (area P).
Perform weld seams in intervals and allow to cool down in between to prevent heat distortion.
- Rivet rear fender (1) using Polygrip flat/round head rivet, dia. 6.4 X 14 (area L).
 Courtesy of MERCEDES-BENZ USA
 Courtesy of MERCEDES-BENZ USA
- Rivet rear fender (1) using Polygrip flat/round head rivet, dia. 6.4X14 (areas A, B, C, D, E, F, G, H, I, J, K, and S).
- Rivet rear fender (1) using Polygrip 6.4 x 14 countersunk rivet (area H1
).
- Rear fender (1)
(areas T, U, V and W).
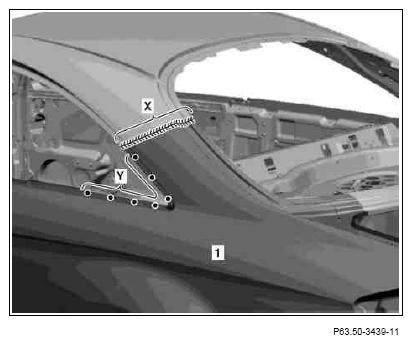
- Rear fender (1)
(area Y).
- Rear fender (1)
(area X).
Perform weld seams in intervals and allow to cool down in between to prevent heat distortion.
 Courtesy of MERCEDES-BENZ USA
 Courtesy of MERCEDES-BENZ USA
- Finish surface on rear fender (1), fill and smooth.
- Remove grinding and drill shavings using wet/dry vacuum cleaner.