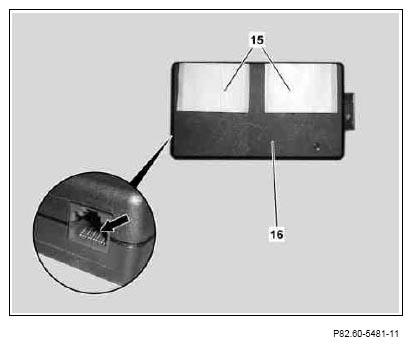
- Glue two of the Velcro strips (15) included in the installation kit onto iPod interface (16) as per picture.
 Ensure that the small jack (see arrow in enlarged detail) is located in the lower left.
- Affix the two other Velcro strips to the Velcro strips on iPod interface (16).
 Courtesy of MERCEDES-BENZ USA
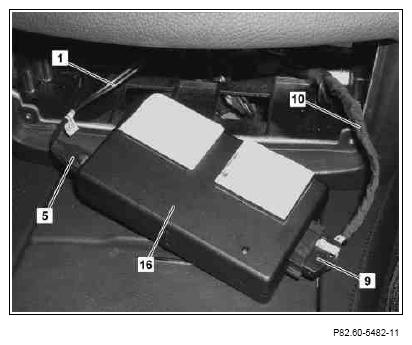
- Connect interface coupling (5) of iPod wiring harness (1) and interface coupling (9) of interface wiring harness (10) to iPod interface (16).
The connections are coded mechanically and can therefore not be mixed up.
 Courtesy of MERCEDES-BENZ USA
 Courtesy of MERCEDES-BENZ USA
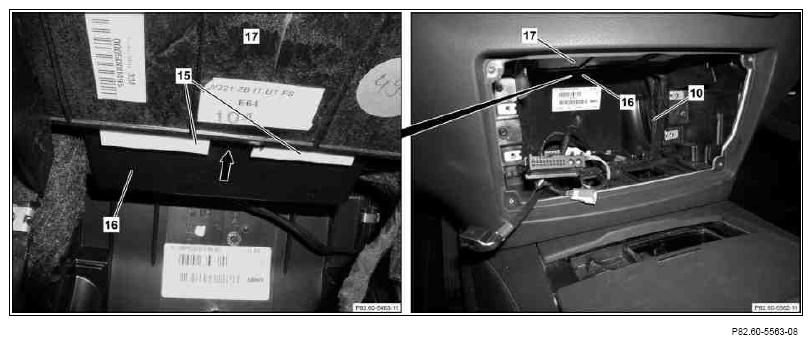
- Insert iPod interface (16) as per picture into COMAND installation opening with affixed Velcro strips (15) above cover (17) (see arrow) and glue onto cover (17).
Ensure that the wiring harnesses connected to iPod interface (16) are not kinked or pinched during installation.
- Route interface wiring harness (10) behind COMAND installation frame in COMAND installation opening as per picture and fasten in place.
- Route iPod wiring harness at top behind iPod interface (16) in COMAND installation opening and fasten in place.
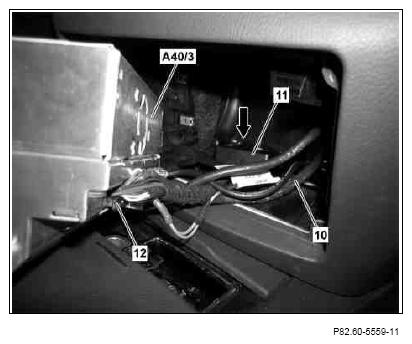
- Connect COMAND adapter coupling (12) of interface wiring harness (10) to COMAND control unit (A40/3).
 Risk of breakage!
Do not kink fiber optic cable, route over sharp edges or bend in radii smaller than 25 mm. Tensile forces on inserts must not exceed 65 N. Do not squeeze fiber optic cable and do not compress with clamps or tie straps.
Risk of breakage!
Do not kink fiber optic cable, route over sharp edges or bend in radii smaller than 25 mm. Tensile forces on inserts must not exceed 65 N. Do not squeeze fiber optic cable and do not compress with clamps or tie straps.
Ensure that the connected wiring harnesses are not kinked or pinched during installation of COMAND control unit (A40/3).
- Place COMAND adapter connector (11) of interface wiring harness (10) in direction of arrow at bottom behind COMAND installation frame into COMAND installation opening.
 Courtesy of MERCEDES-BENZ USA