- 2.1 For vehicles with reinforcement (35), remove bolts (34) and remove reinforcement (35).
 On vehicles with AIRmatic, reinforcement (35) must be placed to one side together with the air reservoir but without
detaching air line (36) such that it is possible to assemble the SDAR components. Ensure that air line (36) is not damaged.
On vehicles with AIRmatic, reinforcement (35) must be placed to one side together with the air reservoir but without
detaching air line (36) such that it is possible to assemble the SDAR components. Ensure that air line (36) is not damaged.
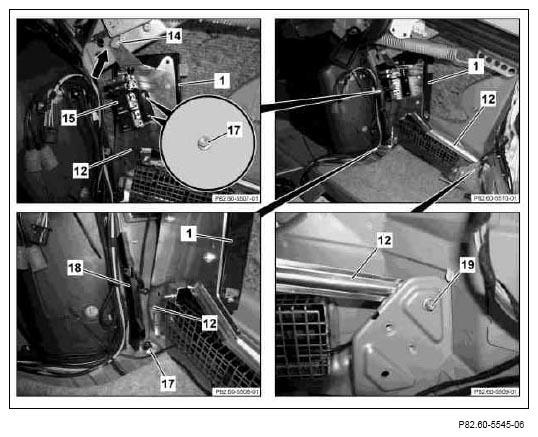
- 3.1 On vehicles with fuse and relay holder (15), remove plastic nuts (16) and remove fuse and relay holder (15) from wheelhouse.
Do not disconnect electrical connectors. The plastic nuts (16) are no longer required.
- 4 Remove nut (14) on ground connection stud and remove cable lug from ground connection stud.
- 5 Position bracket (12) with SDAR control unit (1) as per picture on weld stud and ground connection stud.
The cable lug (see arrow) and nut (14) will be fastened at a later stage when installing the SDAR wiring harness onto the ground connection stud.
- 6 Fasten bracket (12) with plastic nut (17) to weld stud.
- 7 Fasten bracket (12) using bolt (19) to body tab.
- 8 Mount plastic edge guard (18) as per picture onto wheel arch lip.
 Courtesy of MERCEDES-BENZ OF NORTH AMERICA.
- 9.1 On vehicles with fuse and relay holder (15), position the fuse and relay holder (15) as per picture on the stud of bracket (12) and fasten in place using nuts (17).
Re-route electrical lines of fuse and relay holder (15) and fasten in place, ensuring they do not chafe.