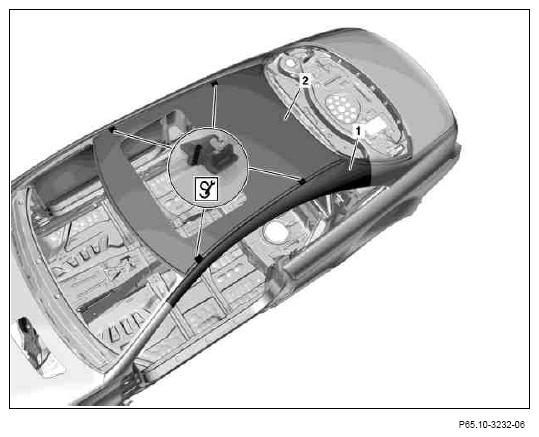
- Install side roof paneling (1) and center roof paneling (2), fit using
 spacer blocks and fasten side roof paneling (1) using clamping pliers.
 When removing, observe specified dimensions and position of
spacer blocks.
When removing, observe specified dimensions and position of
spacer blocks.
-
Remove spacer blocks and center roof paneling (2).
 Courtesy of MERCEDES-BENZ USA
 Courtesy of MERCEDES-BENZ USA
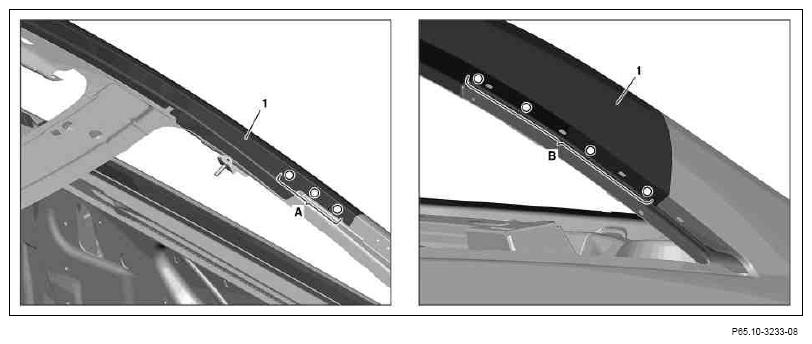
- Drill dia. 5 mm rivet holes and countersink (areas A and B).
- Remove clamping pliers, manual temporary fasteners and side roof paneling (1).
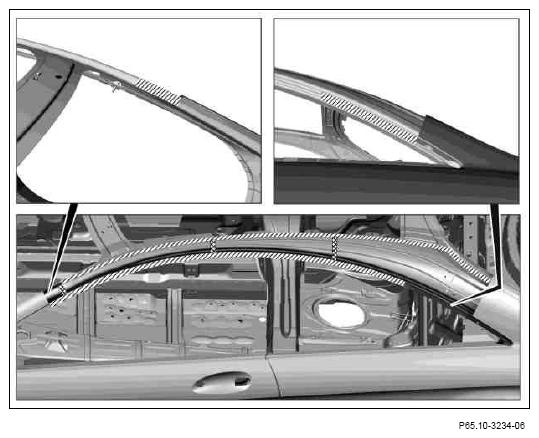
- Apply MB body sealant to foam parts in cross-hatched areas
Damaged foam parts must be removed and replaced.
- Apply 2-component adhesive material in cross-hatched areas.
 Thoroughly clean all bonding surfaces and do not coat with zinc dust paint, otherwise adhesion of the 2-component adhesive may decrease.
Observe pretreatment of bonding surfaces. Observe manufacturer's specifications of 2-component adhesive for drying and processing time.
 Courtesy of MERCEDES-BENZ USA
 Courtesy of MERCEDES-BENZ USA
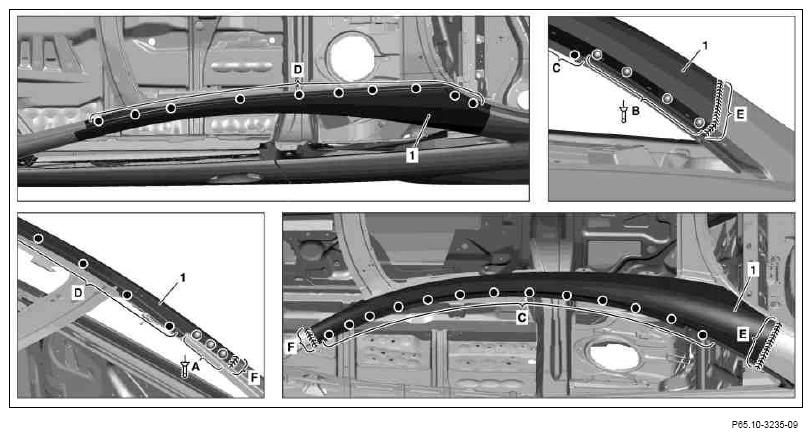
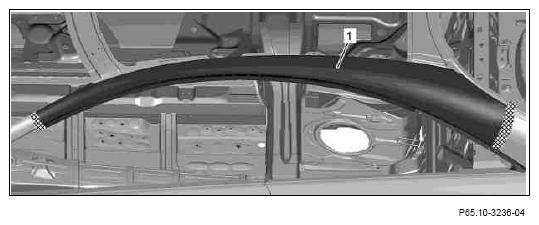
- Install side roof paneling (1), fit and fasten using clamping pliers and manual temporary fasteners.
- Rivet side roof paneling (1) using blind rivet, steel/steel 4.8 x 8 (areas A and B).
- Side roof paneling (1)
 (areas C and D).
- Side roof paneling (1)
 (areas E and F).
Perform weld seams in intervals and allow to cool down in between to prevent heat distortion.
- Grind side roof paneling (1) down flat in cross-hatched areas, restore surface, fill and smooth.
- Remove grinding and drill shavings using wet/dry vacuum cleaner.
 Courtesy of MERCEDES-BENZ USA