Separate A-pillar outer section - AR63.20-P-1102-01SX
 Courtesy of MERCEDES-BENZ USA
 Courtesy of MERCEDES-BENZ USA
 COMMERCIALLY AVAILABLE TOOLS
| Number |
Designation |
| WH58.30-Z-1002-01A |
Ball cutter, dia. 12 mm |
| WH58.30-Z-1006-01A |
Vario Drill WS 91 spot weld removing tool |
| WH58.30-Z-1007-01A |
BTR Usibor drill bit, dia. 6.7 mm |
| WH58.30-Z-1010-01A |
BTR Usibor center punch Ø 8 x80 mm |
| WH58.30-Z-1001-03A |
Round wire brush, braided, dia. 70 mm |
| WH58.30-Z-1021-04A |
Cutting disk, dia. 65 mm, 80 m/s (max. 23, 500 RPM) |
| WH58.30-Z-1024-04A |
Abrasive disk, dia. 115 mm, 80 m/s (max. 13, 250 RPM) |
| WH58.30-Z-1004-20A |
Hot-air gun |
WORKSHOP EQUIPMENT
| WE58.40-Z-1001-03A |
Drill (electric/pneumatic) |
| WE58.40-Z-1002-03A |
Straight grinder (electric/pneumatic) |
| WE58.40-Z-1003-03A |
Angle grinder (electric/pneumatic) |
| WE58.40-Z-1004-03A |
Body saw (electric/pneumatic) |
| WE58.40-Z-1005-03A |
Wet/dry vacuum cleaner |
REPAIR MATERIALS
| Number |
Designation |
Order number |
| BR00.45-Z-1001-07A |
Zinc dust paint suitable for spot welding |
A 000 986 34 42 |
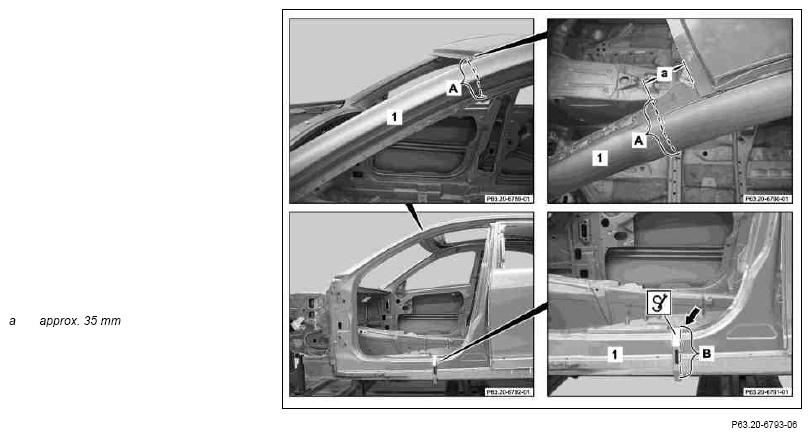
- Scribe separation line on A-pillar outer paneling (1) (area A).
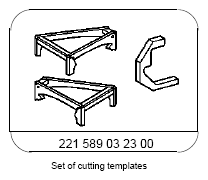
- Scribe separation lines on A-pillar outer paneling (1) using
 cutting template (area B).
 When replacing complete A-pillar
position cutting template on Y-marking. Expose Y-marking if necessary (arrow).
When replacing complete A-pillar
position cutting template on Y-marking. Expose Y-marking if necessary (arrow).
When replacing A-pillar outer paneling (1) and A-pillar reinforcement (2), establish separation line in accordance with the damage profile using the
cutting template (area B).
Dimensions:
 Courtesy of MERCEDES-BENZ USA
- Separate separation points on A-pillar outer paneling (1) using body saw (areas A and B) (areas A and B).
Do not damage the underlying side longitudinal member and A-pillar reinforcement (2).
- Expose spot welds and weld seams on A-pillar outer paneling (1) (areas C, C 1
D and E).
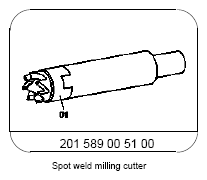
- Cut out spot welds on A-pillar outer paneling (1) using
spot weld milling cutter or
 Vario Drill spot weld removing tool (areas C and C 1
).
Vario Drill spot weld removing tool (areas C and C 1
).
Cut through two sheet metal layers (area C).
- Separate weld seams on A-pillar outer paneling (1) using cutting disk (areas D and E).
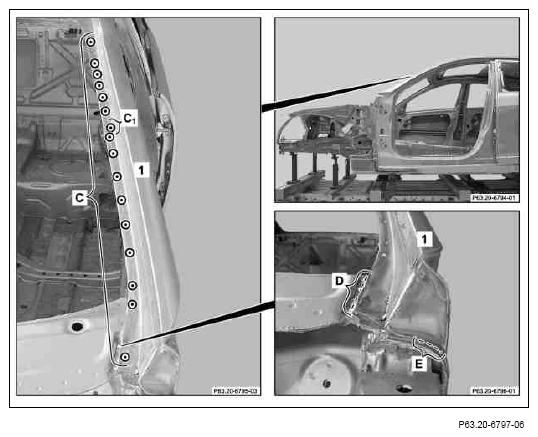 Courtesy of MERCEDES-BENZ USA
- Expose spot welds on A-pillar outer paneling (1) (areas F, G, H, H1
and I).
- Cut out spot welds on A-pillar outer paneling (1) using
spot weld milling cutter or
Vario Drill spot weld removing tool (areas F, G, H, H1
and I).
Cut through two sheet metal layers (areas H1
and F).
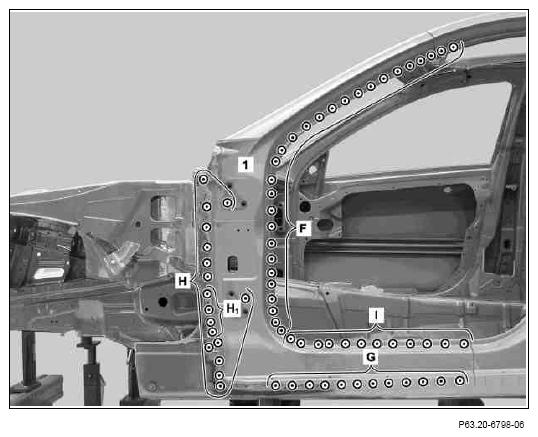 Courtesy of MERCEDES-BENZ USA
- Heat A-pillar outer paneling (1) in cross-hatched areas using
hot air gun.
Cross-hatched areas are bonded.
- Remove damaged A-pillar outer paneling (1).
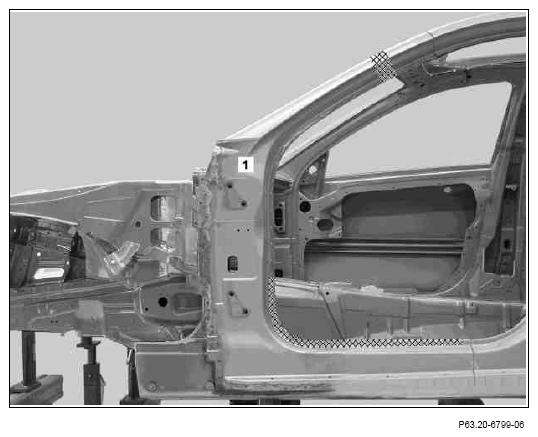 Courtesy of MERCEDES-BENZ USA
- Expose spot welds on A-pillar reinforcement (2) (areas J, K and L).
- Center punch holes with
BTR Usibor center punch, dia. 8 x 80 mm (area J).
- Drill holes with
BTR Usibor drill bit, dia. 6.7 mm (area J).
- Cut out spot welds on A-pillar reinforcement (2) using
spot weld milling cutter or
Vario Drill spot weld removing tool (areas K and L).
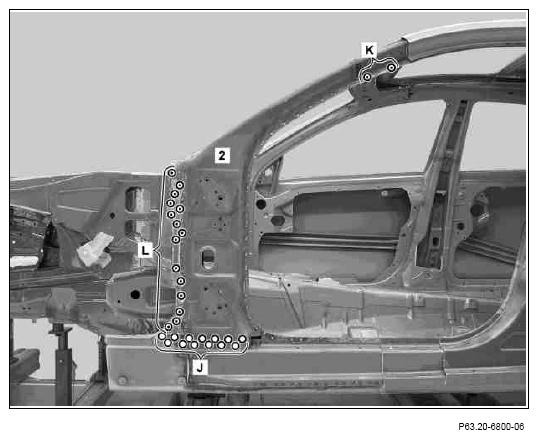 Courtesy of MERCEDES-BENZ USA
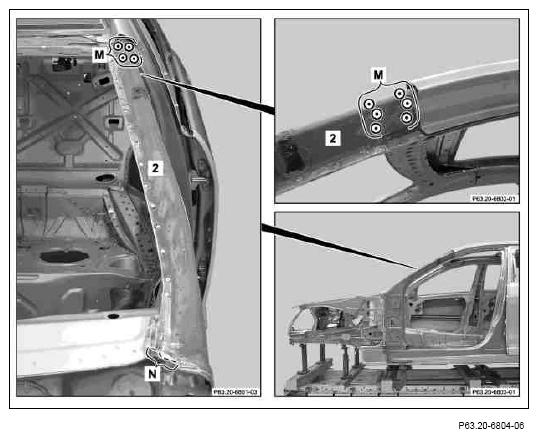
- Expose spot welds and weld on A-pillar reinforcement (2) (areas M and N).
- Cut out spot welds on A-pillar reinforcement (2) using
spot weld milling cutter or
Vario Drill spot weld removing tool (area M).
- Cut weld on A-pillar reinforcement (2) using cutting disk (area N).
 Courtesy of MERCEDES-BENZ USA
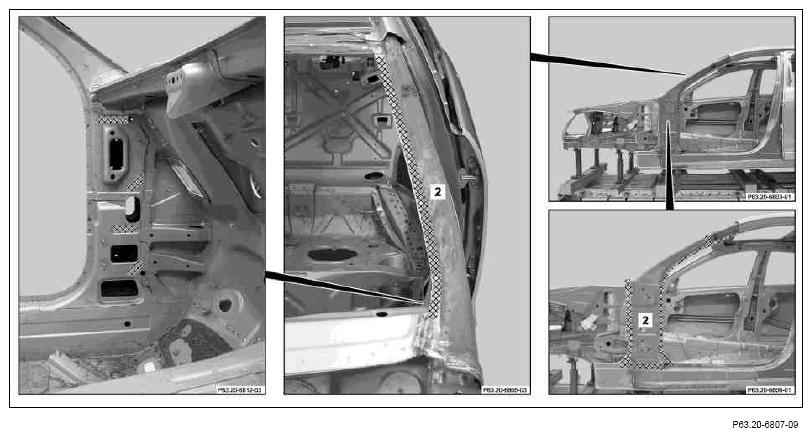
- Heat A-pillar reinforcement (2) in cross-hatched areas using
hot air gun.
Cross-hatched areas are bonded.
 Courtesy of MERCEDES-BENZ USA
- Remove damaged A-pillar reinforcement (2).
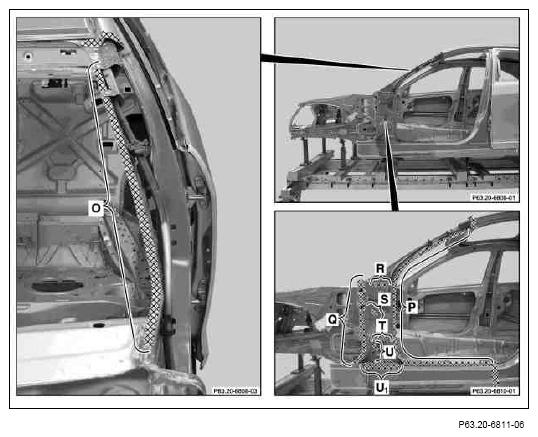
- Grind mating surfaces in cross-hatched areas down to bare metal using
round wire brush.
Grind cross-hatched area down to bare metal from inside (area U 1
).
Grind spot weld flange down to bare metal on both sides (areas O and P).
Observe pretreatment of bonding surfaces (areas O, P, Q, R, S, T, U and U1
).
 To prevent adhesion problems, do not coat bonding surfaces with zinc dust paint. (areas O, P, Q, R, S, T, U and U 1
).
To prevent adhesion problems, do not coat bonding surfaces with zinc dust paint. (areas O, P, Q, R, S, T, U and U 1
).
- Remove grinding and drill shavings using wet/dry vacuum cleaner.
 Courtesy of MERCEDES-BENZ USA