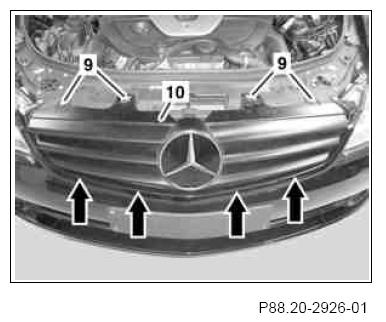
- 1.1 Unscrew bolts (9), unclip radiator paneling (10) (arrows) and remove radiator paneling (10).
 Only on model 216.
 Courtesy of MERCEDES-BENZ USA
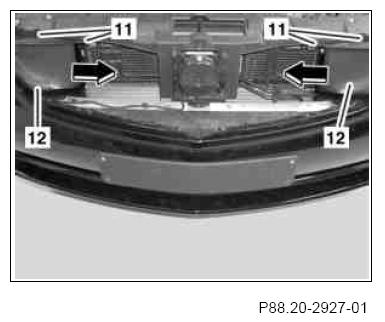
- 2.1 Remove expansion clips (11) and unclip cover (12) next to left lamp unit and right lamp unit (arrows).
Only on model 216.
 Courtesy of MERCEDES-BENZ USA
 Courtesy of MERCEDES-BENZ USA
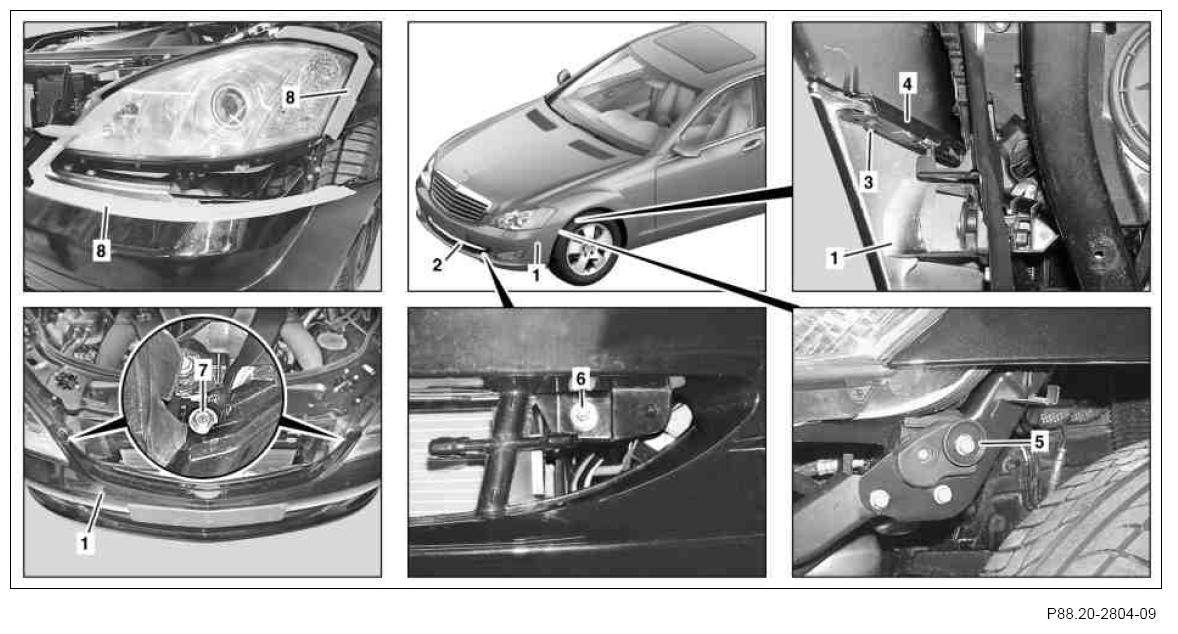
Work sequence is shown for removal of left front lamp unit on model 221 as an example.
- 3 Unscrew bolt (3) on clamping strip (4) and remove clamping strip (4).
- 4.1 Unclip air inlet grate (2).
Only on model 221.
- 5 Unscrew nut (6).
- 6 Unscrew bolts (7) at top on front bumper (1).
- 7 Attach adhesive tape (8), as illustrated, to front bumper (1) and front fender.
The adhesive tape (8) serves to protect the front bumper (1) and front fender.
- 8.1 Lift front fender in area of left front lamp unit with
 assembly wedge until retaining clip on front bumper (1) is exposed.
 Do not damage front fender.
Only on model 216.
- 9 Pull front bumper (1) forward far enough to remove left front lamp unit.
Carefully pull front bumper (1) forward, otherwise, the front bumper (1) or front fender can be damaged.
 Ensure that front bumper (1) is seated properly in mount (5).
- 10 Fasten in reverse order