- Determine the center lines of the antenna base (2) as shown and transcribe to the covering foil.
 The center line refers to the center of the transfer surface (5).
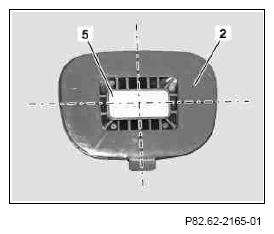 Courtesy of MERCEDES-BENZ USA
- Transfer axis line on covering foil to the edge of the antenna base (2) (arrows).
Using a white or red felt-tip pen make a dot at the edge of the antenna base (2).
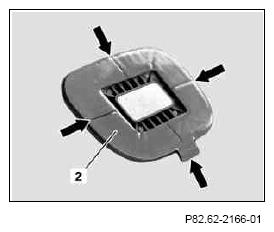 Courtesy of MERCEDES-BENZ USA
- Determine the center lines of the connection between the telephone antenna (3) as shown and mark on the edge (arrow).
The center line refers to the center of the transfer surface (5).
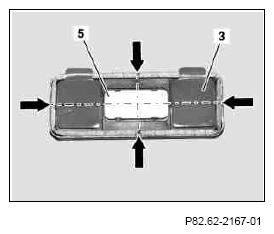 Courtesy of MERCEDES-BENZ USA
Make all markings carefully on the adhesive strips. Do not damage or scratch the window.
- Clean the outside of the two corner points (arrows) of the center segment in the rear window and carefully bond the wire (6) between these corner points from outside using transparent adhesive strips (Tesa film).
- Also stick transparent adhesive strips over the wire (7).
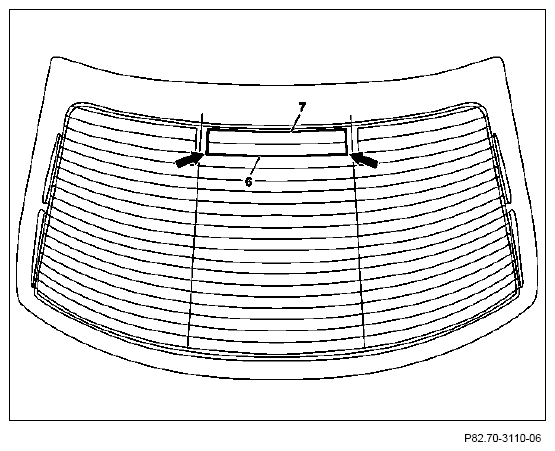 Courtesy of MERCEDES-BENZ USA
- Measure the center lines (M) of the middle antenna segment and mark on the adhesive strips of the wire (6 and 7).
- Tape off a window (F) in the extension of the center line (M) upwards using transparent adhesive strips and draw the center line (M) onto the adhesive strips.
- Mark the height axis (H) as shown on the adhesive strips.
The free window (F) must be aligned towards the center axis (M) and the height axis (H).
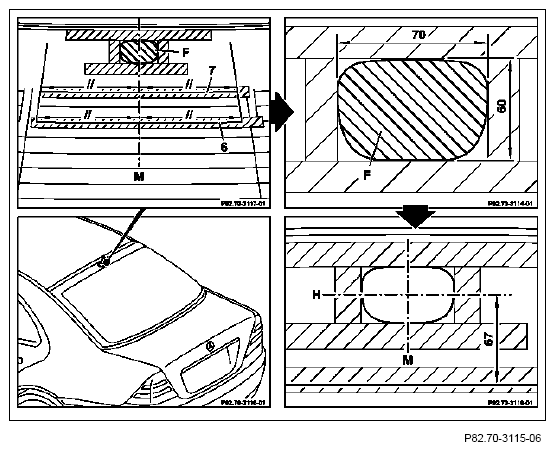 Courtesy of MERCEDES-BENZ USA
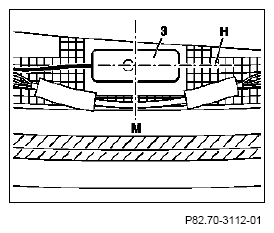
- Mark the center axis (M) on the inside of the rear window for the telephone antenna connection as shown.
The outer markings on the adhesive strips are visible from the inside and have to be transferred upwards using a straightedge. Markings may only be made to the coated edge of the rear window.
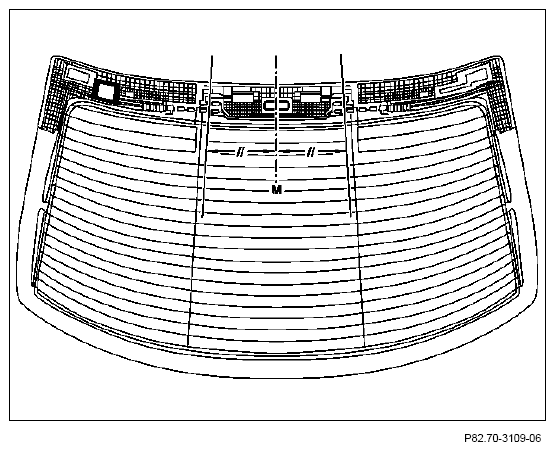 Courtesy of MERCEDES-BENZ USA
- Mark the height axis (H) as shown on the coated inner side of the rear window.
Clean the bonding surface for the antenna on the rear window.
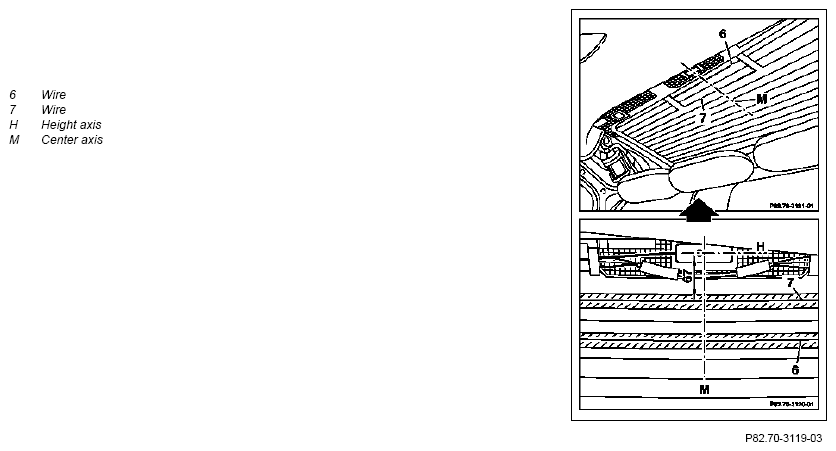 Courtesy of MERCEDES-BENZ USA
- Align the antenna base (2) for bonding to the center axis (M) and height axis (H) on the rear window.
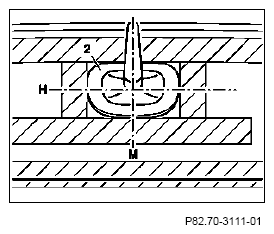 Courtesy of MERCEDES-BENZ USA
- Align the telephone antenna connection (3) from inside to the center axis (M) and height axis (H) on the rear window.
When positioning the antenna components do so with particular care. The two antenna components must be bonded with a deviation of max. 1 mm to each other.
 Courtesy of MERCEDES-BENZ USA