Charge Air Cooler Inlet Hose Installation Note
- Clean the seal surface and furrow area of the charge air cooler air inlet pipe and turbocharger air outlet pipe.
 Courtesy of MAZDA
- Degrease the seal surface of the pipe, and verify if there is foreign matter penetration or scratches.
- If there is foreign matter penetration or scratches, replace the pipe.
- Apply engine oil to the seal surface of the pipe.
NOTE:
- Make sure that the installation direction of the charge air cooler hose is correct and verify the marking shown in the figures.
 Courtesy of MAZDA
- Align the pipe rib and connector groove positions, and install.
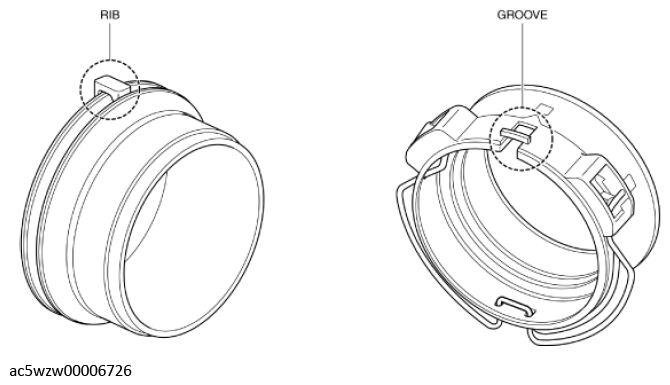 Courtesy of MAZDA
- Insert the pipe connector completely into the connector.
 Courtesy of MAZDA
- Pull the pipe outward and verify that a click sound is heard.
 Courtesy of MAZDA
- Install the front under cover No. 2. (See FRONT UNDER COVER No. 2 REMOVAL/INSTALLATION
.)
- Install the front under cover No. 1. (See FRONT UNDER COVER No. 1 REMOVAL/INSTALLATION
.)