Liftgate Garnish Removal/Installation
- Attach a piece of wire between the liftgate striker and liftgate latch to hold the liftgate in the half-opened position as shown below.
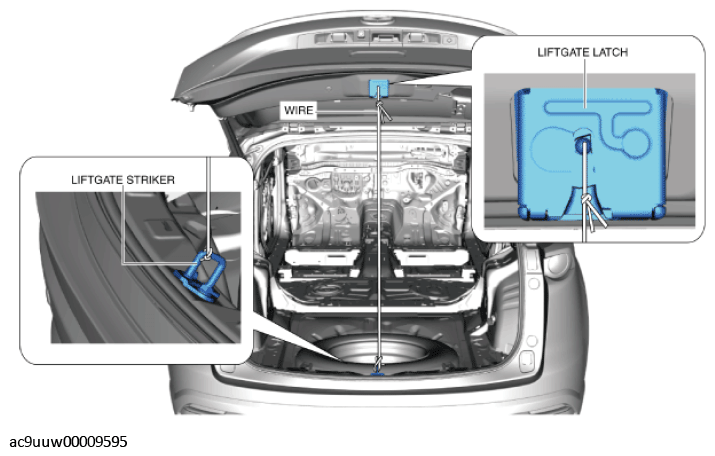 Courtesy of MAZDA MOTORS CORP.
WARNING:
- Always wear gloves when using a utility knife. Using a utility knife with bare hands can cause injury.
- Peeling off the double-sided adhesive tape shown in the figure using a utility knife.
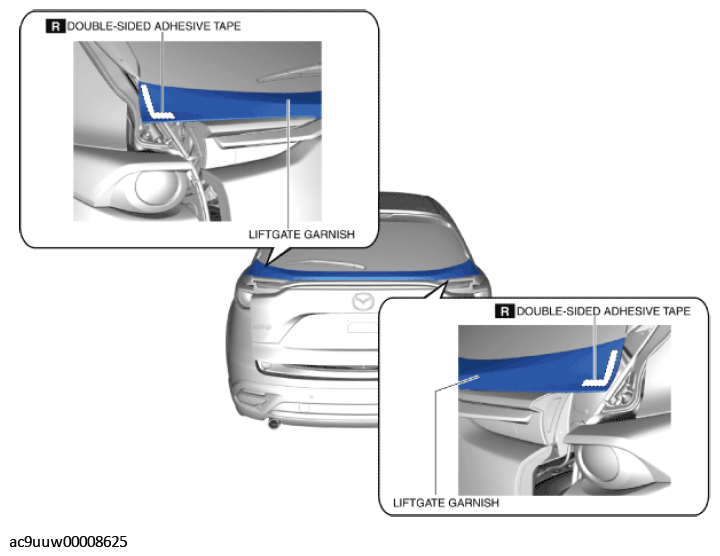 Courtesy of MAZDA MOTORS CORP.
- Insert a tape-wrapped flathead screwdriver into the position shown in the figure, rotate it in the direction of the arrows and detach liftgate garnish clips.
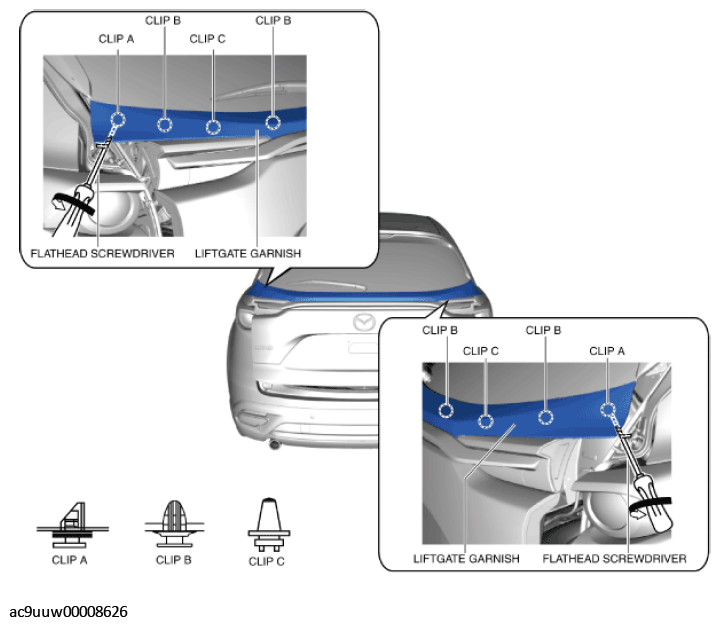 Courtesy of MAZDA MOTORS CORP.
- Affix rag using tape to the position shown in the figure.
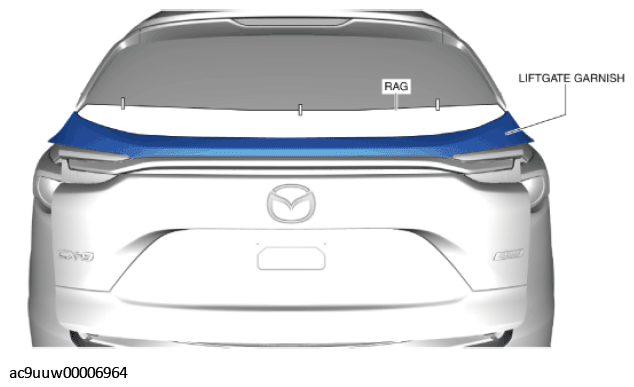 Courtesy of MAZDA MOTORS CORP.
- Insert a tape-wrapped flathead screwdriver into the position shown in the figure, rotate it in the direction of the arrow and detach liftgate garnish clips.
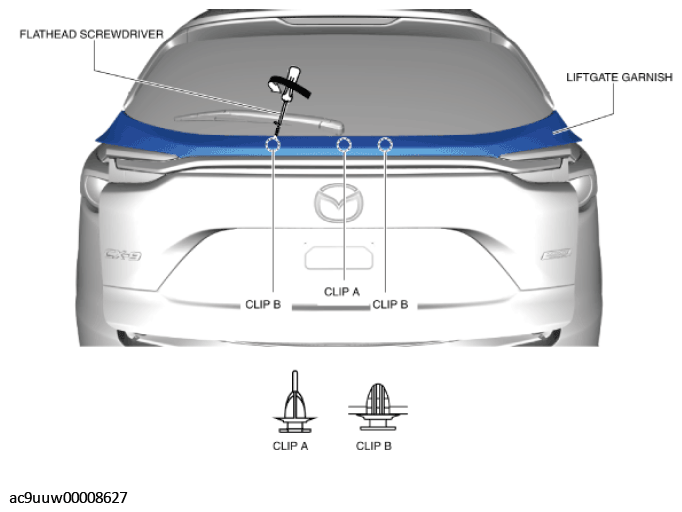 Courtesy of MAZDA MOTORS CORP.
- Remove the liftgate garnish.
- Install in the reverse order removal.