Power Liftgate (PLG) Rear Switch Removal/Installation
- Disconnect the negative battery terminal. (See NEGATIVE BATTERY TERMINAL DISCONNECTION/CONNECTION
.)
- Insert remover tool into the position shown in the figure, and detach the cover tab from the liftgate.
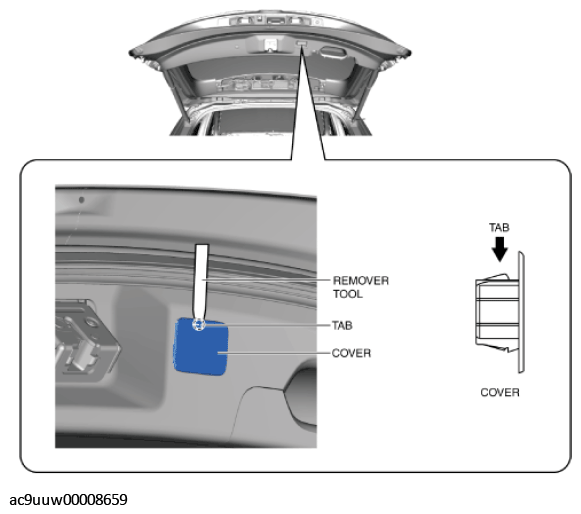 Courtesy of MAZDA MOTORS CORP.
- Disconnect the connector.
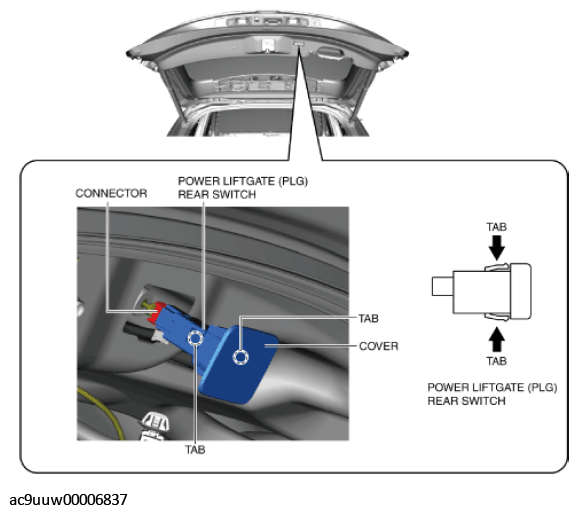 Courtesy of MAZDA MOTORS CORP.
- Press the power liftgate (PLG) rear switch tabs in the direction of the arrow shown in the figure and detach the power liftgate (PLG) rear switch from the cover.
- Remove the power liftgate (PLG) rear switch.
- Install in the reverse order of removal.