Rear Sash Molding Removal
- Remove the following parts:
- Rear beltline molding (See REAR BELTLINE MOLDING REMOVAL/INSTALLATION .)
- Rear door garnish (front) (See REAR DOOR GARNISH REMOVAL .)
- Rear door garnish (rear) (See REAR DOOR GARNISH REMOVAL .)
CAUTION:
- Always wear gloves when using a utility knife. Using a utility knife with bare hands can cause injury.
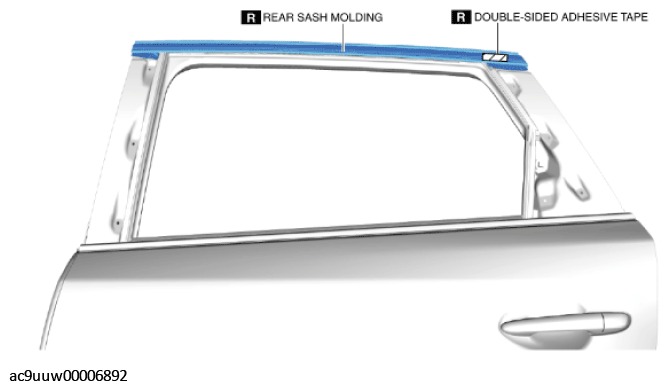
- Peeling off the double-sided adhesive tape shown in the figure using a utility knife.
 Courtesy of MAZDA MOTORS CORP.
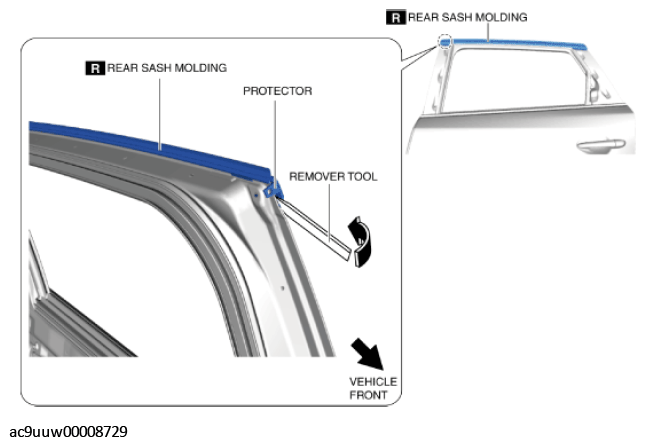
- Insert a remover tool into the position shown in the figure, move it in the direction of the arrow and remove protector from the rear sash molding.
 Courtesy of MAZDA MOTORS CORP.
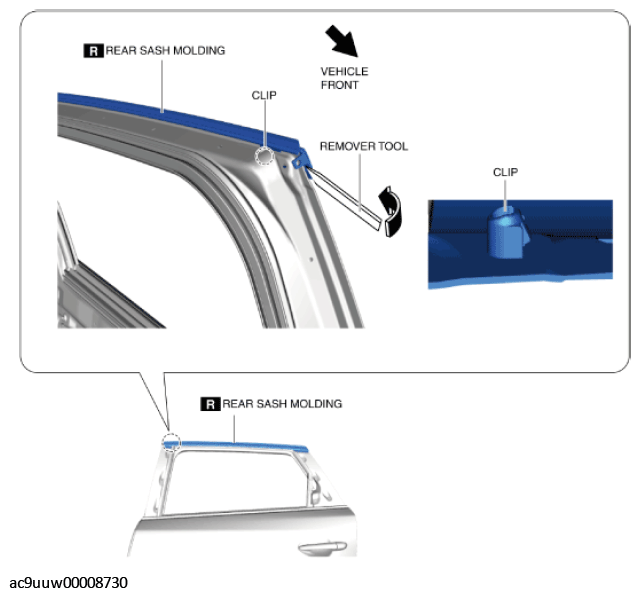
- Move the remover tool in the direction of the arrow shown in the figure and detach the rear sash molding clip from the rear door.
 Courtesy of MAZDA MOTORS CORP.
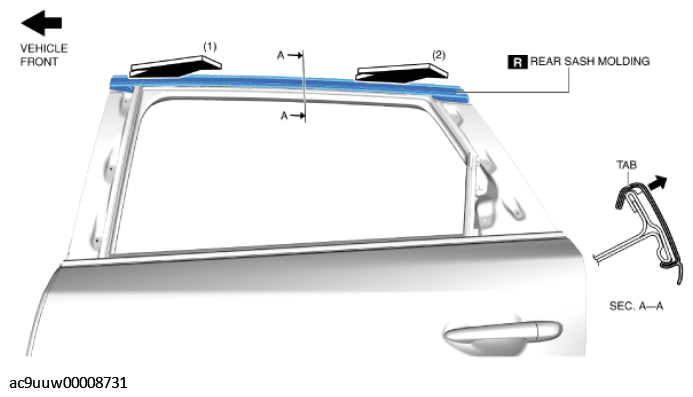
- Pull the rear sash molding in the direction of the arrows in the order shown in the figure and detach the rear sash molding tab from the rear door.
 Courtesy of MAZDA MOTORS CORP.
- Remove the rear sash molding.