Rear Sash Molding Installation
- Remove any grease or dirt from the adhesion surface of the rear door.
- Peel off the backing of the double-sided adhesive tape.
- After aligning the rear sash molding clip to the rear sash molding installation hole, hook the rear sash molding tab to the rear door.
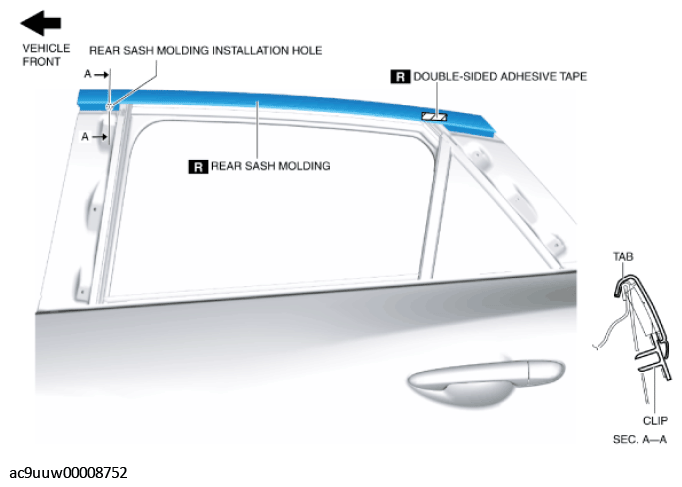 Courtesy of MAZDA MOTORS CORP.
- Press in the rear sash molding in the direction of the arrow shown in the figure and attach the rear sash molding clip to the rear door.
 Courtesy of MAZDA MOTORS CORP.
CAUTION:
- Do not press the rear sash molding in any place other than the rubber areas.
- Press in the rear sash molding in the direction of the arrow shown in the figure and attach the rear sash molding tab to the rear door.
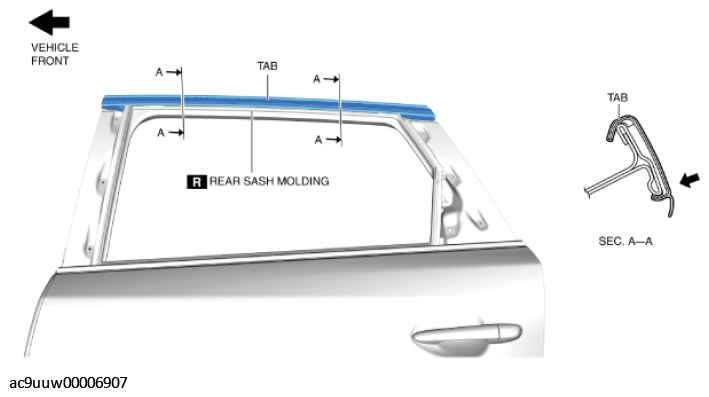 Courtesy of MAZDA MOTORS CORP.
NOTE:
- After installing the rear sash molding, verify that tabs are connected properly to the rear door.
- Press the rear sash molding to adhere the double-sided adhesive tape to the rear sash molding installation area.
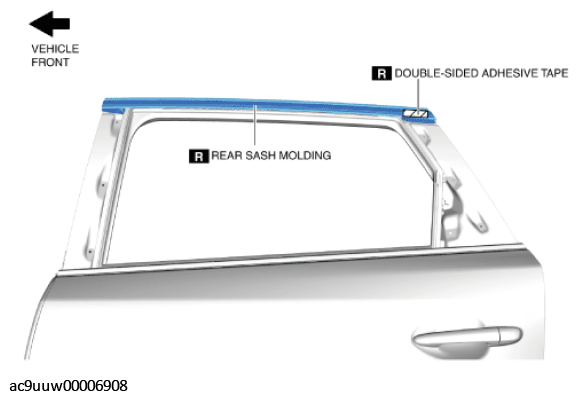 Courtesy of MAZDA MOTORS CORP.
- Install the following parts:
- Rear door garnish (rear) (See REAR DOOR GARNISH INSTALLATION .)
- Rear door garnish (front) (See REAR DOOR GARNISH INSTALLATION .)
- Rear beltline molding (See REAR BELTLINE MOLDING REMOVAL/INSTALLATION .)