Shift Panel Removal/Installation: ATX
- Disconnect the negative battery terminal. (See NEGATIVE BATTERY TERMINAL DISCONNECTION/CONNECTION
.)
- Remove the following parts:
- Console side panel (See CONSOLE SIDE PANEL REMOVAL/INSTALLATION .)
- Switch panel (See SWITCH PANEL REMOVAL/INSTALLATION .)
- Selector lever knob (See SELECTOR LEVER COMPONENT REMOVAL/INSTALLATION
.)
- Disconnect the connector.
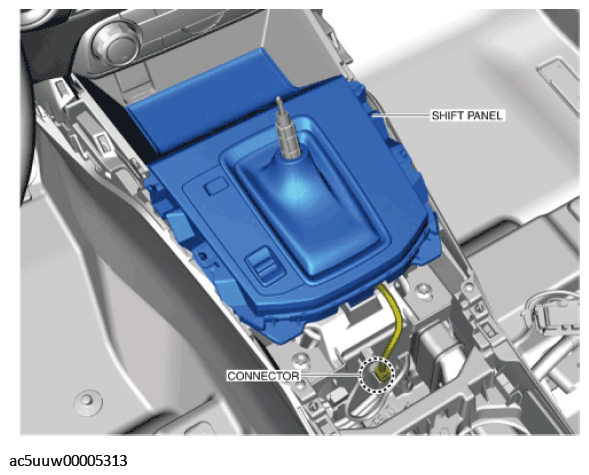 Courtesy of MAZDA MOTORS CORP.
- Using a remover tool, move the shift panel in the order of arrows (1), (2), (3), and (4) shown in the figure, and detach the clips and hooks.
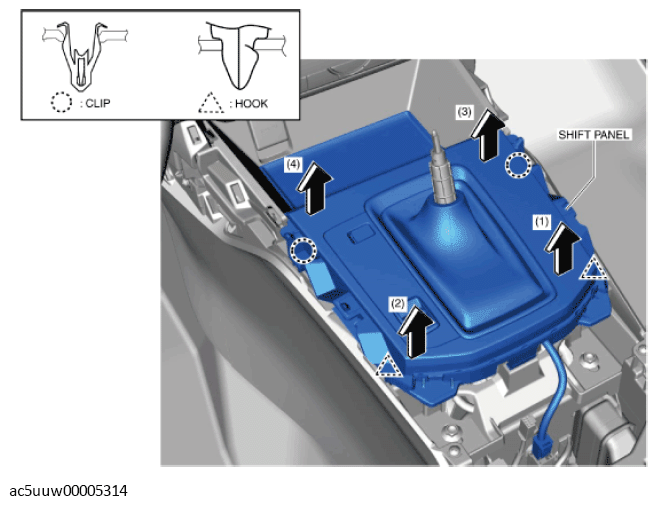 Courtesy of MAZDA MOTORS CORP.
- Move the shift panel in the direction of the arrow shown in the figure and remove it while detaching the guides.
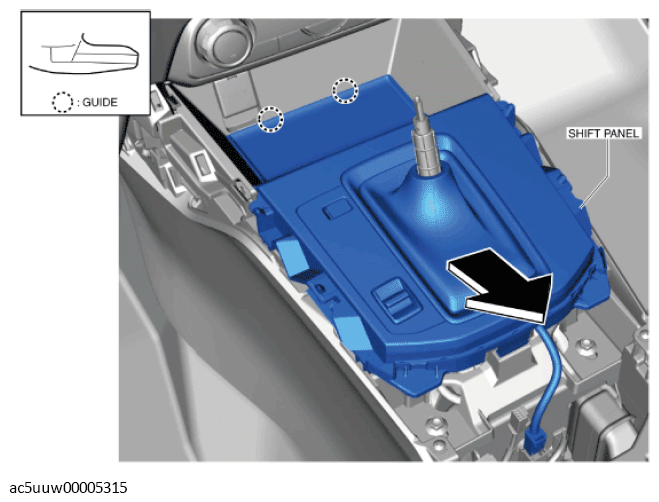 Courtesy of MAZDA MOTORS CORP.
NOTE:
- When replacing the shift panel, press the tabs in the order of arrows (1) and (2) shown in the figure and remove the console mat.
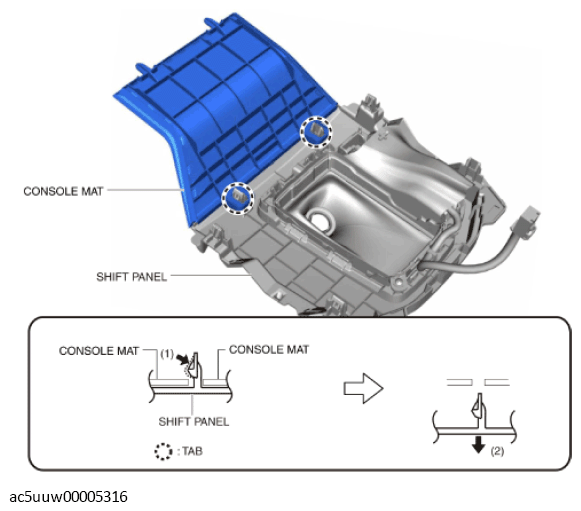 Courtesy of MAZDA MOTORS CORP.
- Install in the reverse order of removal.