Front Door Trim Removal/Installation
- Disconnect the negative battery terminal. (See NEGATIVE BATTERY TERMINAL DISCONNECTION/CONNECTION
.)
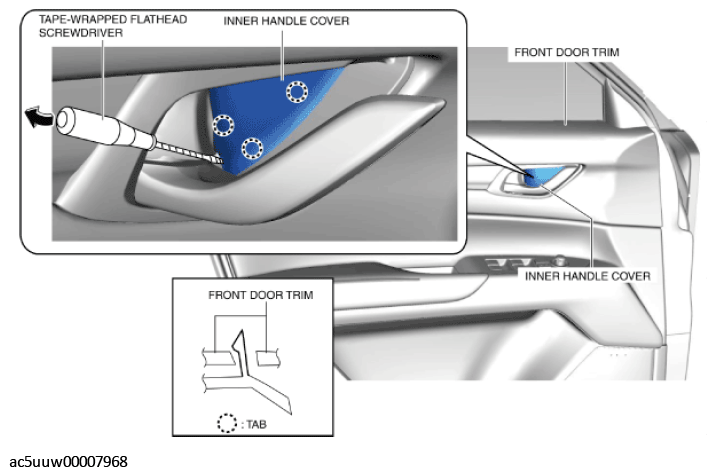
- Insert a tape-wrapped flathead screwdriver into the position shown in the figure, move it in the direction of the arrow and remove the inner handle cover while detaching the tabs.
 Courtesy of MAZDA MOTORS CORP.
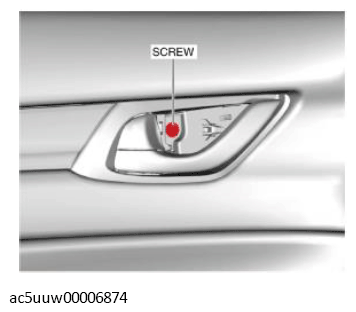
- Remove the screw.
 Courtesy of MAZDA MOTORS CORP.
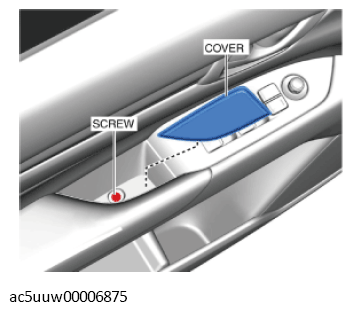
- Remove the cover, then remove the screw.
 Courtesy of MAZDA MOTORS CORP.
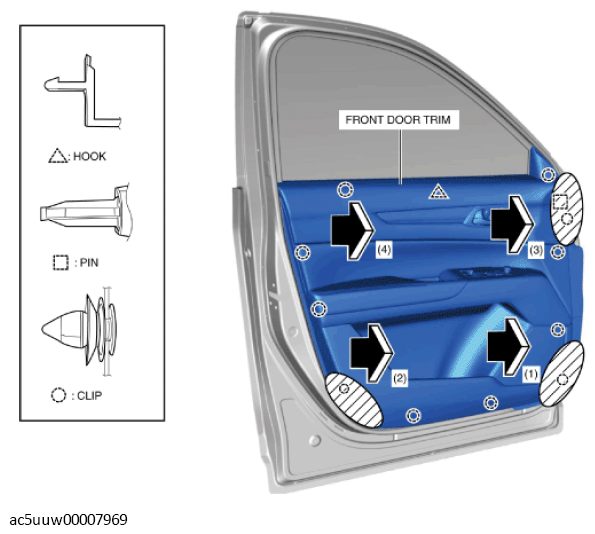
- Hold each shaded area and pull the front door trim in the order of arrows (1), (2), (3), and (4), and detach the clips, hook, and pin.
 Courtesy of MAZDA MOTORS CORP.
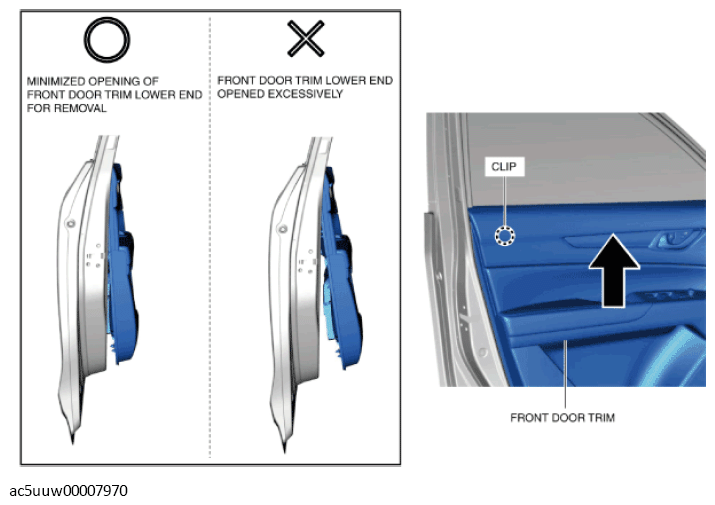
- Lift up the front door trim in the direction of the arrow shown in the figure being careful not to open the lower end of the front door trim excessively, and remove the front door trim from the clip.
 Courtesy of MAZDA MOTORS CORP.
- Disconnect the power outer mirror switch connector.
- Disconnect the power window main switch connector (driver-side) or power window subswitch connector and door lock switch connector (passenger-side).
- Remove the front door trim.
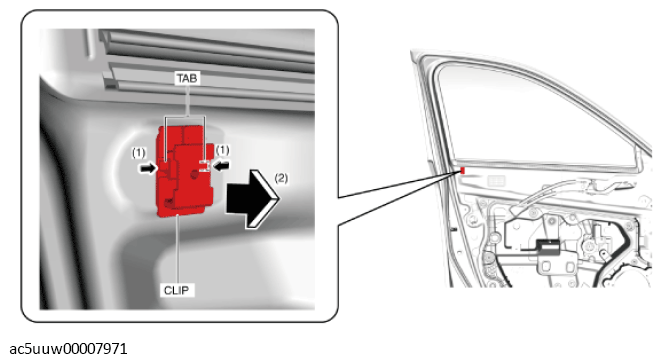
- While pressing the tabs of the clip in the directions of arrows (1) shown in the figure, pull the clip in the direction of arrow (2) to remove the clip from the front door.
 Courtesy of MAZDA MOTORS CORP.
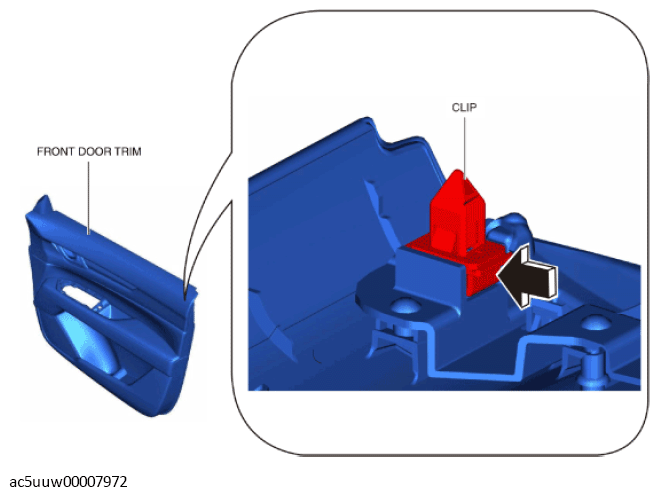
- Install the clip removed in Step 10 to the front door trim.
 Courtesy of MAZDA MOTORS CORP.
- Install in the reverse order of removal.