Rear Door Trim Removal/Installation
- Disconnect the negative battery cable. (See NEGATIVE BATTERY CABLE DISCONNECTION/CONNECTION
.)
- Remove the power window subswitch. (rear) (See POWER WINDOW SUBSWITCH REMOVAL/INSTALLATION
.)
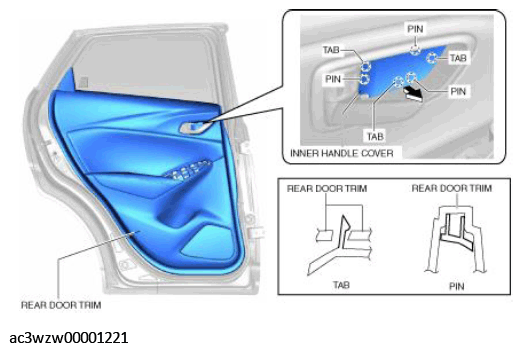
- Remove the inner handle cover while detach tabs, pins.
 Courtesy of MAZDA MOTORS CORP.
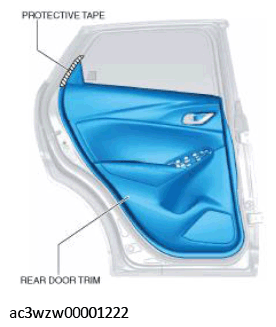
- Affix protective tape to the shaded position shown in the figure.
 Courtesy of MAZDA MOTORS CORP.
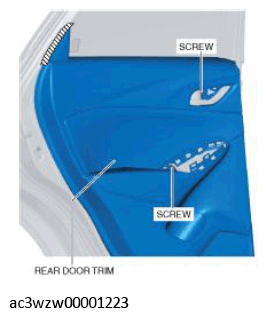
- Remove the screws.
 Courtesy of MAZDA MOTORS CORP.
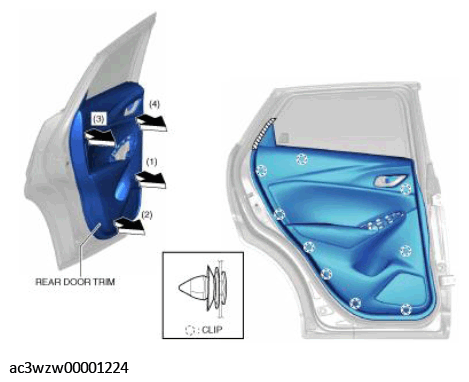
- Pull the rear door trim in the order of the arrows shown in the figure and remove the clips.
 Courtesy of MAZDA MOTORS CORP.
- Insert the remover tool into the position shown in the figure, move it in the direction of arrow (1), and detach the clip.
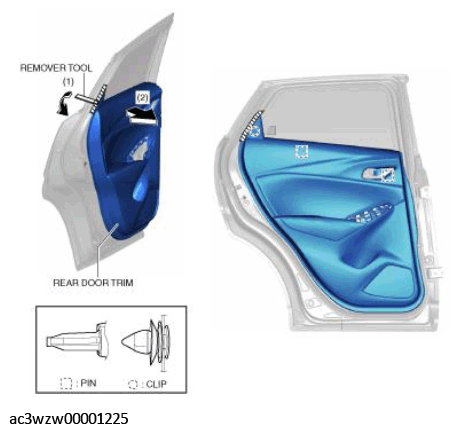 Courtesy of MAZDA MOTORS CORP.
- Pull the pins out of the rear door in the direction of arrow (2) shown in the figure and remove the rear door trim.
- Install in the reverse order of removal.