A-Pillar Trim Removal/Installation
- Partially peel back the seaming welt.
- Grasp the shaded areas shown in the figure, and pull the A-pillar trim in the direction of the arrow while detaching clips A, clip B.
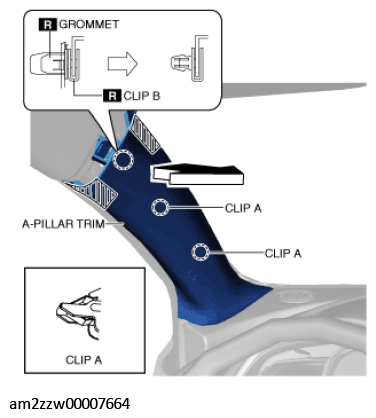 Courtesy of MAZDA MOTORS CORP.
- Cut the lead wire connecting clip B and grommet using a nipper.
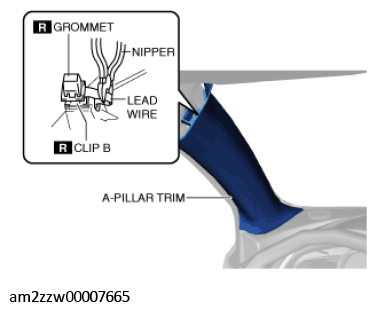 Courtesy of MAZDA MOTORS CORP.
- Pull the A-pillar trim in the direction of the arrow shown in the figure while detaching the guides.
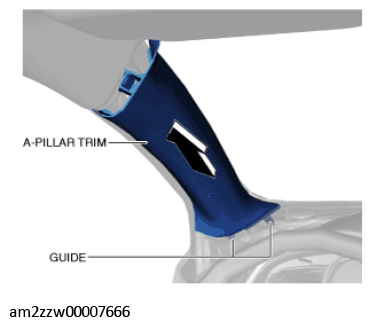 Courtesy of MAZDA MOTORS CORP.
- Move the hook in the direction of arrow shown in the figure using a tape-wrapped flathead screwdriver and detach it from the front pillar inner panel.
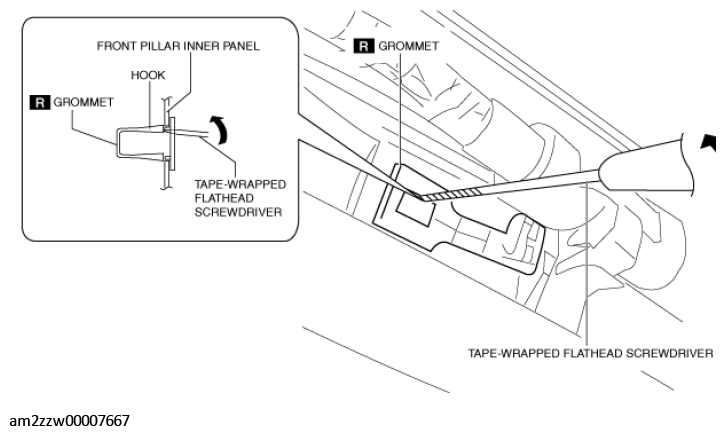 Courtesy of MAZDA MOTORS CORP.
- Move the hook in the direction of arrow (1) shown in the figure using a tape-wrapped flathead screwdriver and detach it from the front pillar inner panel.
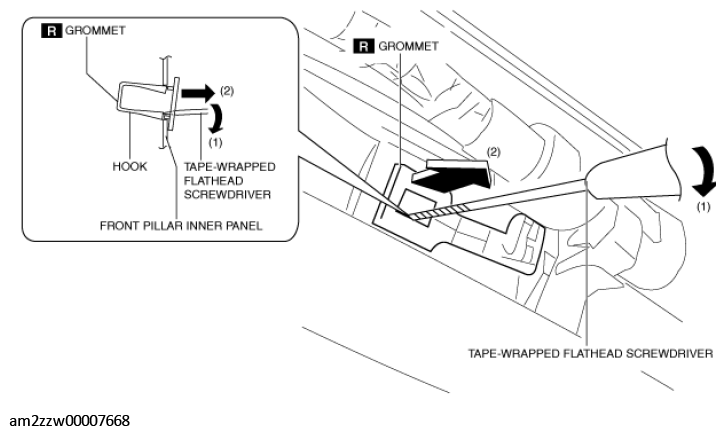 Courtesy of MAZDA MOTORS CORP.
- Remove the grommet in the direction of the arrow (2) shown in the figure.
- When installing the A-pillar, install new clips B and grommet to the A-pillar trim in advance.
- Install in the reverse order of removal.