Front Fender Molding Removal/Installation
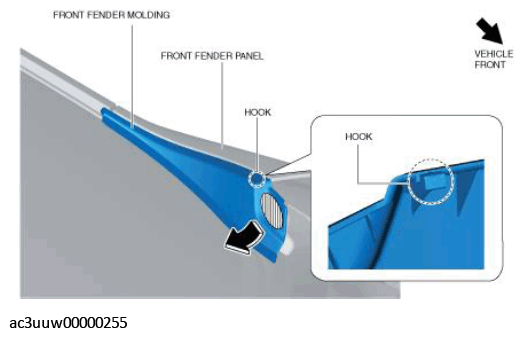
- Press the shaded area shown in the figure in the direction of the arrow and detach hook from the front fender panel.
 Courtesy of MAZDA MOTORS CORP.
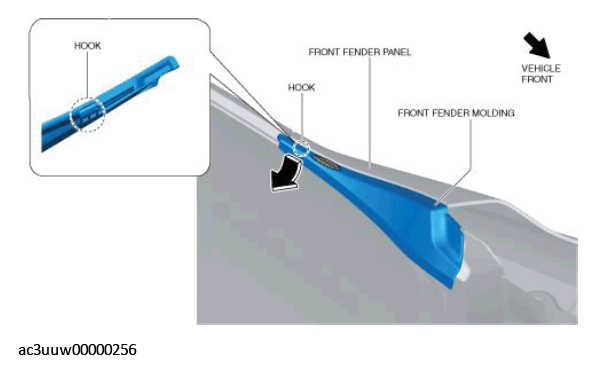
- Press the shaded area shown in the figure in the direction of the arrow and detach hook from the front fender panel.
 Courtesy of MAZDA MOTORS CORP.
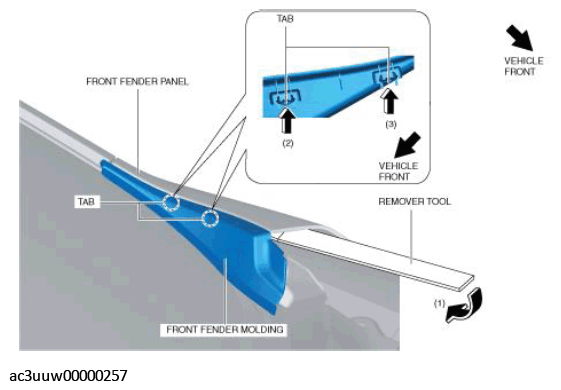
- Move the remover tool in the direction of arrow (1) and detach the front fender molding tabs from the front fender panel in the order of arrows (2) and (3) shown in the figure.
 Courtesy of MAZDA MOTORS CORP.
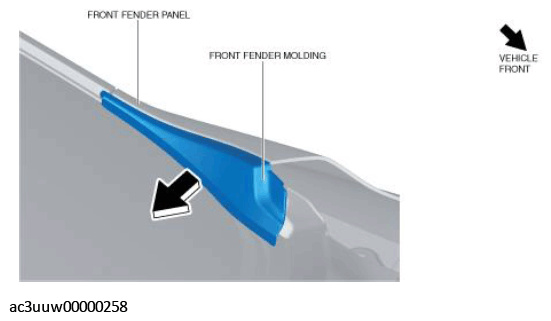
- Move the front fender molding in the direction of the arrow shown in the figure and remove it from the front fender panel.
 Courtesy of MAZDA MOTORS CORP.
- Install in the reverse order of removal.