Front Over Fender Removal/Installation
- Affix the protective tape to the position shown in the figure to prevent scratches and damage.
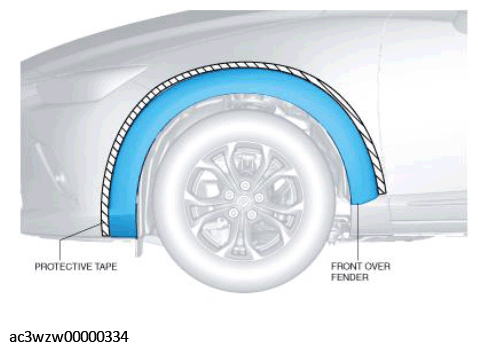 Courtesy of MAZDA
- Remove the fasteners.
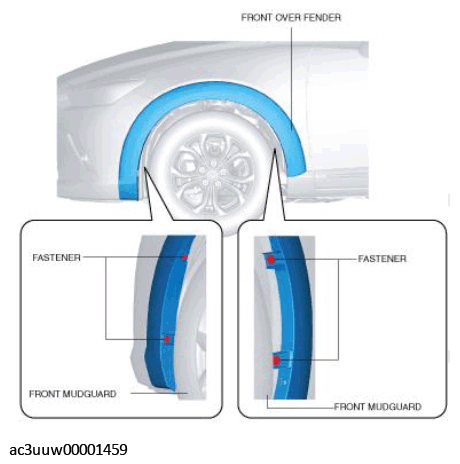 Courtesy of MAZDA
- Remove the fasteners.
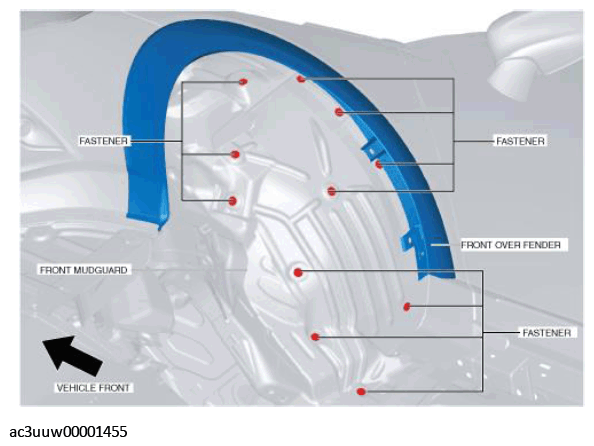 Courtesy of MAZDA
- Move the remover tool in the direction of the arrow shown in the figure and detach the front over fender clips.
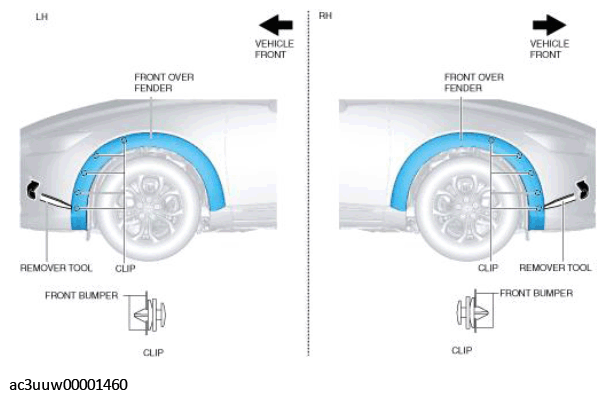 Courtesy of MAZDA
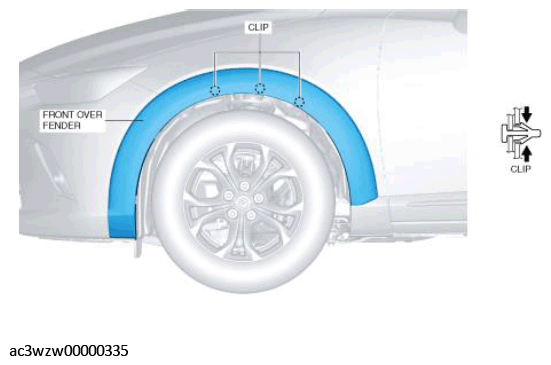
- Detach the front over fender clips from the front fender panel by pressing the tabs of the front over fender clips in the direction of the arrows shown in the figure.
 Courtesy of MAZDA
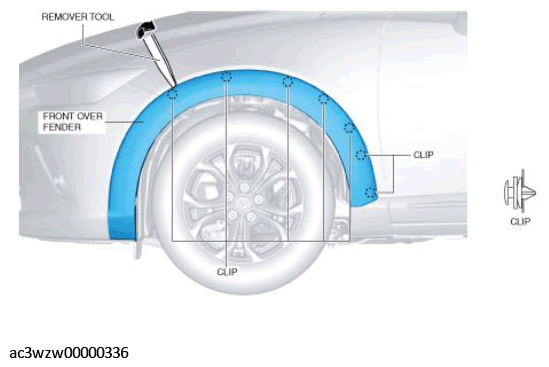
- Move the remover tool in the direction of the arrow shown in the figure and detach the front over fender clips from the front fender panel starting from the vehicle front.
 Courtesy of MAZDA
CAUTION:
- If the front over fender and side step molding are pulled off toward the outside of the vehicle, the clip installation area may be damaged. When removing the front over fender and side step molding, slide the front over fender and side step molding straight towards the front of the vehicle with the clips still attached to the vehicle body.
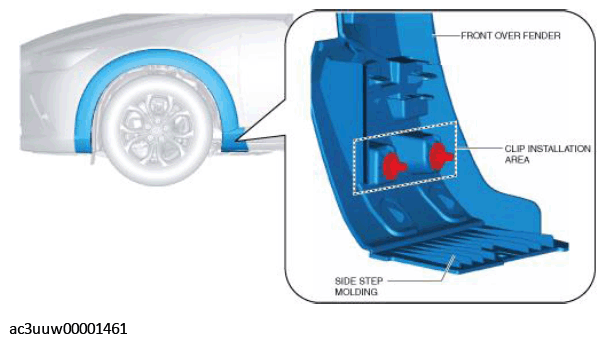 Courtesy of MAZDA
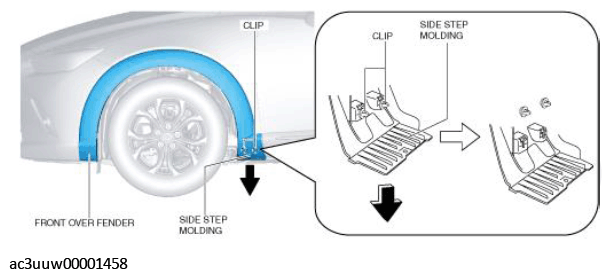
- Remove the front over fender and side step molding as a single unit by sliding them in the direction of the arrow shown in the figure.
 Courtesy of MAZDA
- Remove the clips remaining on the vehicle body and install them to the side step molding.
- Remove the side step molding from the front over fender. (See SIDE STEP MOLDING REMOVAL
.) (See SIDE STEP MOLDING INSTALLATION
.)
- Install in the reverse order of removal.
WARNING:
- When installing the front over fender, verify that clips are not damaged, if they are damaged, replace them with new ones. Otherwise, the front over fender may fall off while the vehicle is being driven, leading to a serious accident.