Electrical Supply Unit (ESU) Removal/Installation
- Disconnect the negative battery cable. (See NEGATIVE BATTERY CABLE DISCONNECTION/CONNECTION
.)
- Front scuff plate (LH). (See FRONT SCUFF PLATE REMOVAL/INSTALLATION
.)
- Front side trim (LH). (See FRONT SIDE TRIM REMOVAL/INSTALLATION
.)
- Disconnect the connectors.
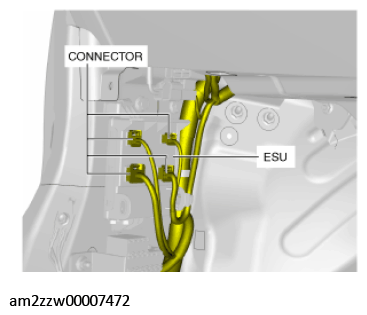 Courtesy of MAZDA MOTORS CORP.
- While pressing the tabs of the electrical supply unit (ESU) in the direction of arrow (1) shown in the figure simultaneously, pull them in the direction of arrow (2) to detach the tabs from the body.
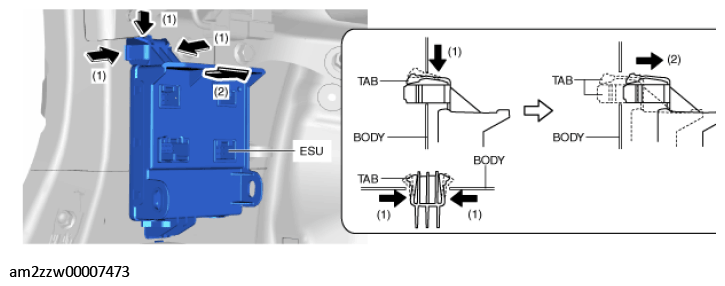 Courtesy of MAZDA MOTORS CORP.
- Pull the electrical supply unit (ESU) in the direction of the arrow shown8 in the figure and detach the hook from the body.
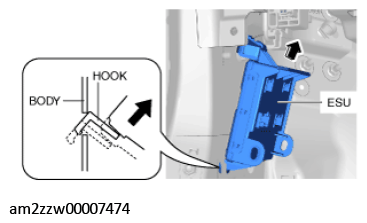 Courtesy of MAZDA MOTORS CORP.
- Remove the vehicle wiring harness clip.
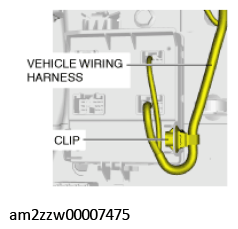 Courtesy of MAZDA MOTORS CORP.
- Remove the electrical supply unit (ESU).
- Install in the reverse order of removal.