Front Bumper Removal
- Disconnect the negative battery cable. (See NEGATIVE BATTERY CABLE DISCONNECTION/CONNECTION
.)
- Remove the fasteners.
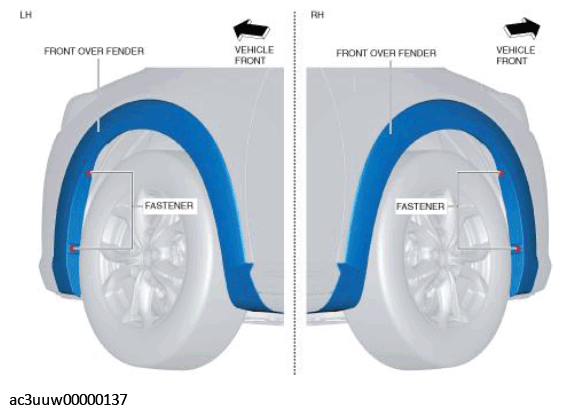 Courtesy of MAZDA
CAUTION:
- After removing clips, insert a rag between the front fender panel and the front over fender to prevent the front fender panel and clips from being damaged.
- Affix the protective tape to the position shown in the figure to prevent scratches and damage.
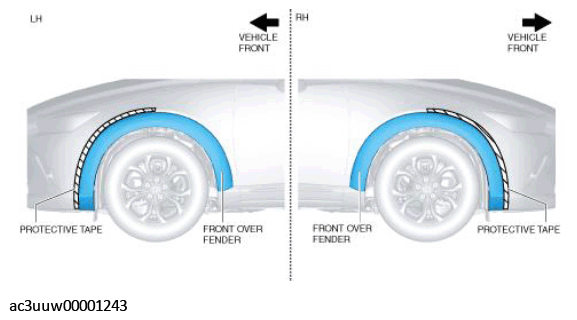 Courtesy of MAZDA
- Move the remover tool in the direction of the arrow shown in the figure and detach the front over fender clips from the front bumper.
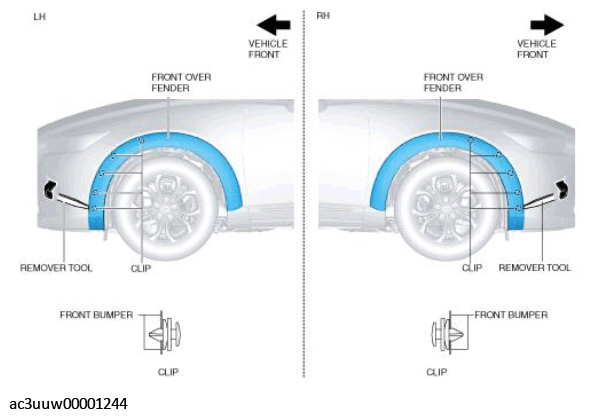 Courtesy of MAZDA
- Affix the protective tape to the position shown in the figure to prevent scratches and damage.
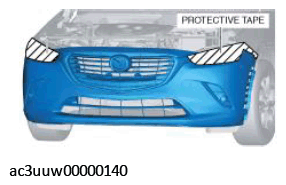 Courtesy of MAZDA
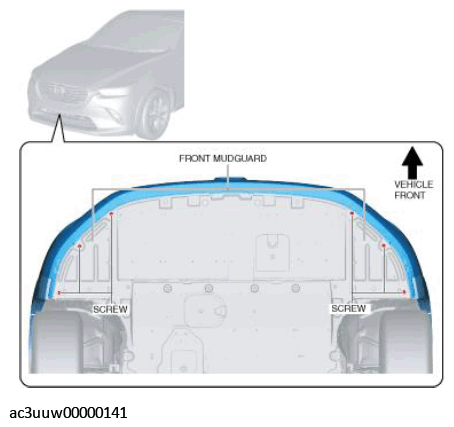
- Remove the screws.
 Courtesy of MAZDA
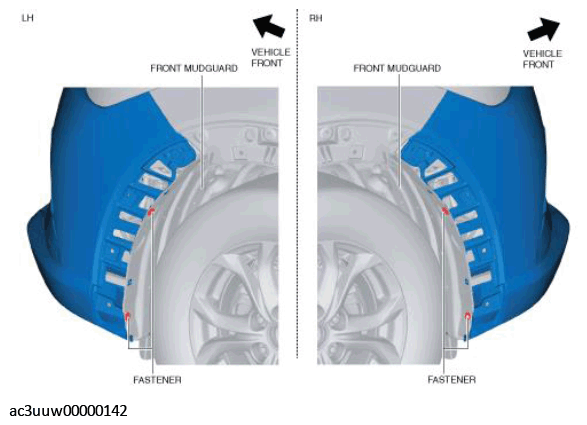
- Remove the fasteners.
 Courtesy of MAZDA
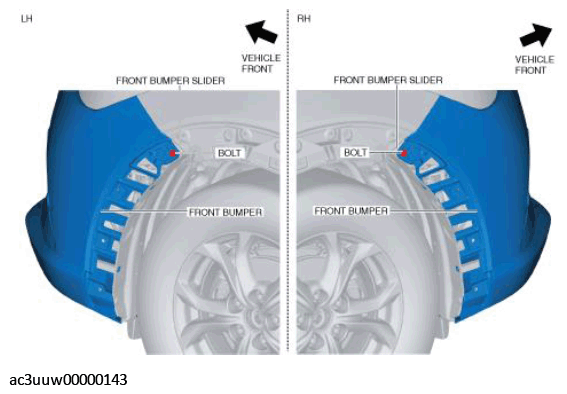
- Slightly bend back the front over fender and remove the bolts.
 Courtesy of MAZDA
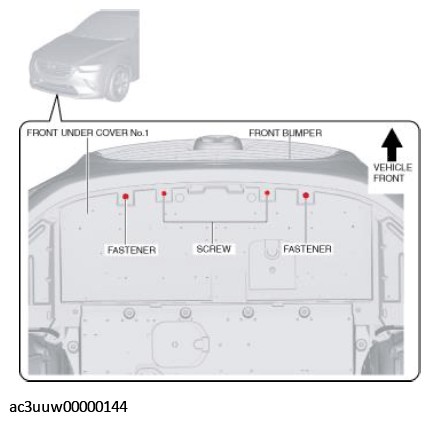
- Remove the screws and fasteners.
 Courtesy of MAZDA
- Remove the screws and fasteners which can be verified at the position where front under cover No. 1 was pulled back.
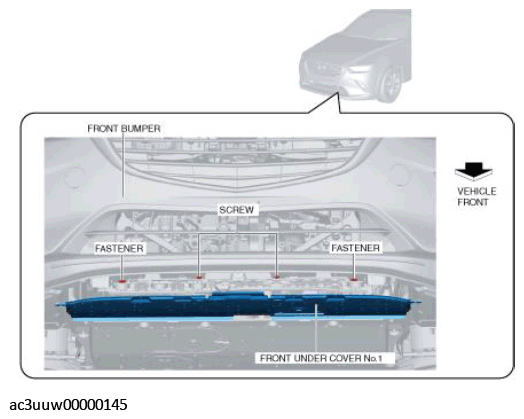 Courtesy of MAZDA
- Remove the bolts.
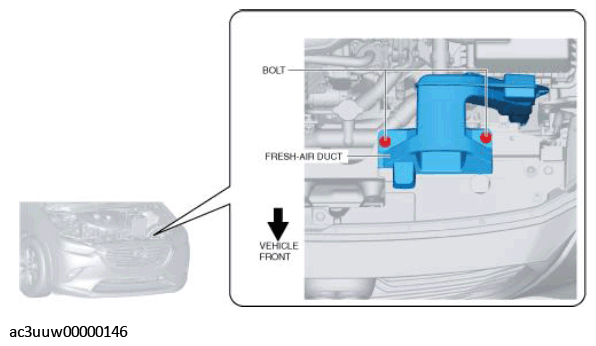 Courtesy of MAZDA
- Remove the fastener which can be verified at the position where the fresh-air duct was pulled back.
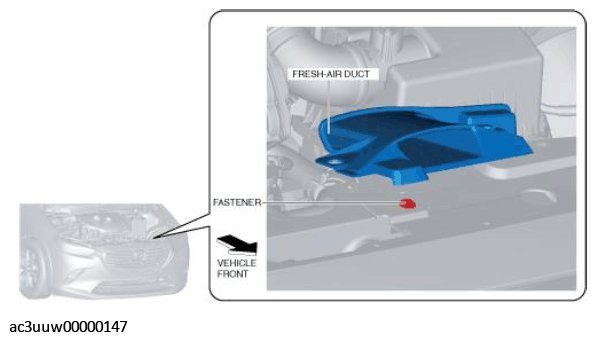 Courtesy of MAZDA
- Remove the screws and fasteners.
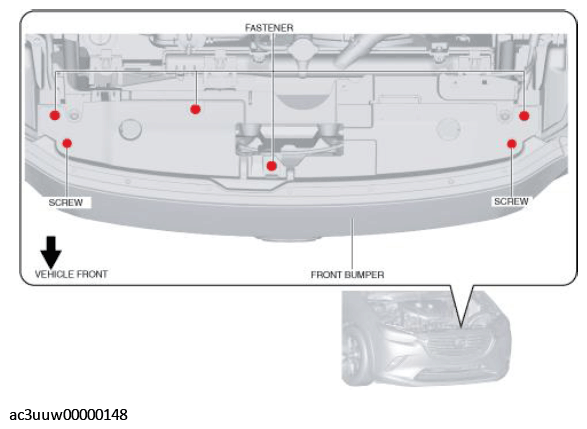 Courtesy of MAZDA
CAUTION:
- The front bumper and front bumper slider are engaged firmly. If they are disengaged forcibly the bumper could fall and be damaged. Perform the servicing carefully when disengaging the front bumper from the front bumper slider.
- When disengaging the front bumper from the front bumper slider, the front bumper could fall and be damaged. Support the front bumper so that it does not fall.
- Detach the front bumper from the front bumper sliders while removing the hooks in the order of the arrows shown in the figure.
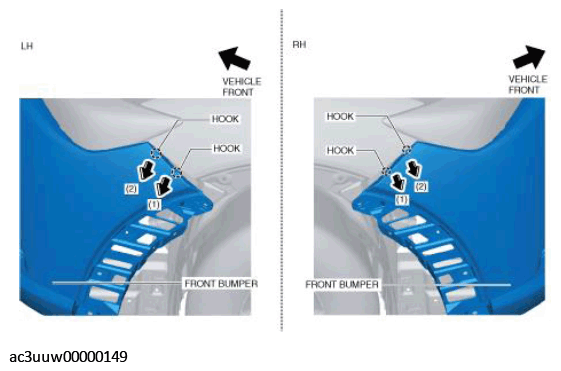 Courtesy of MAZDA
- Hold the shaded areas shown in the figure and pull the front bumper in the direction of the arrow to pull out the guide (LH) from the shroud panel.
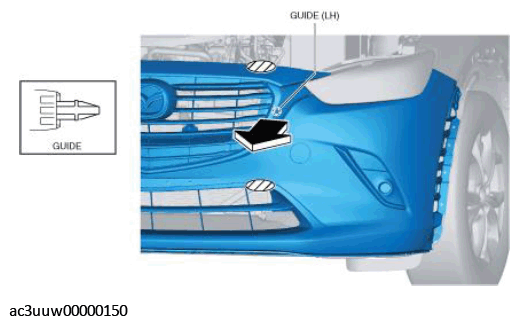 Courtesy of MAZDA
- Hold the shaded areas shown in the figure and pull the front bumper in the direction of the arrow to pull out the guide (RH) from the shroud panel.
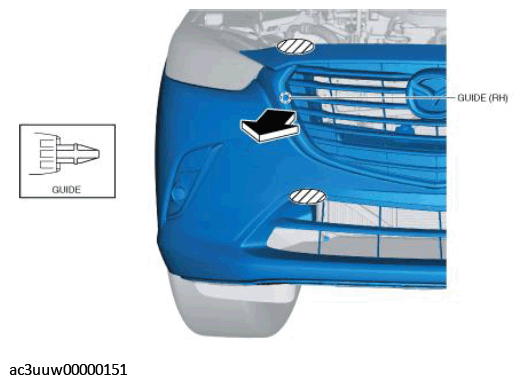 Courtesy of MAZDA
- Disconnect the connectors.
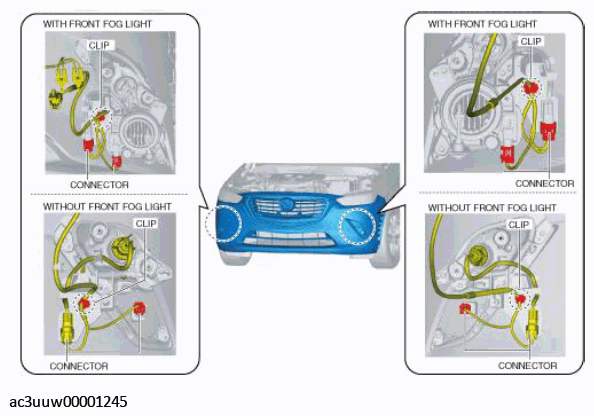 Courtesy of MAZDA
- Remove the clips.
CAUTION:
- After removing the front bumper, secure the front over fender and front mudguard with tape to prevent the front over fender from being damaged and to prevent injury.
- Remove the front bumper.