Front Scuff Plate Removal/Installation
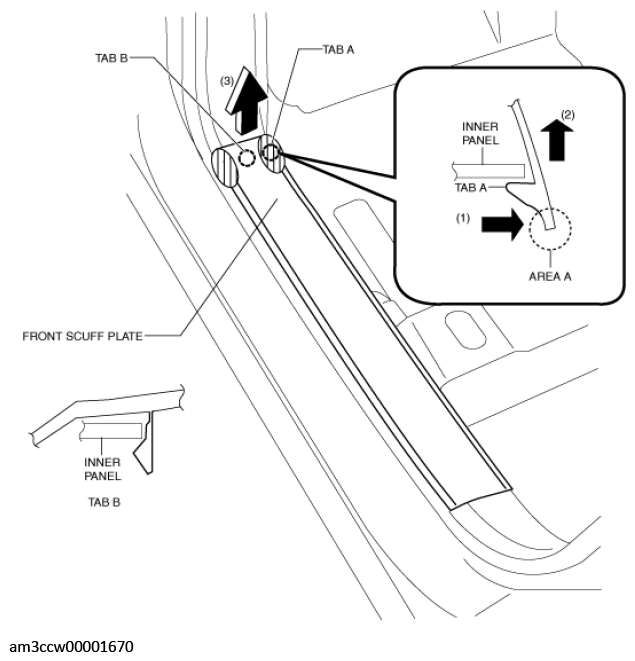
- Hold area A shown in the figure, open the front scuff plate in the direction of arrow (1), move it in the direction of arrow (2), and detach tab A of the front scuff plate from the inner panel.
 Courtesy of MAZDA MOTORS CORP.
- Hold the shaded area shown in the figure, move the front scuff plate in the direction of arrow (3), and detach tab B of the front scuff plate from the inner panel.
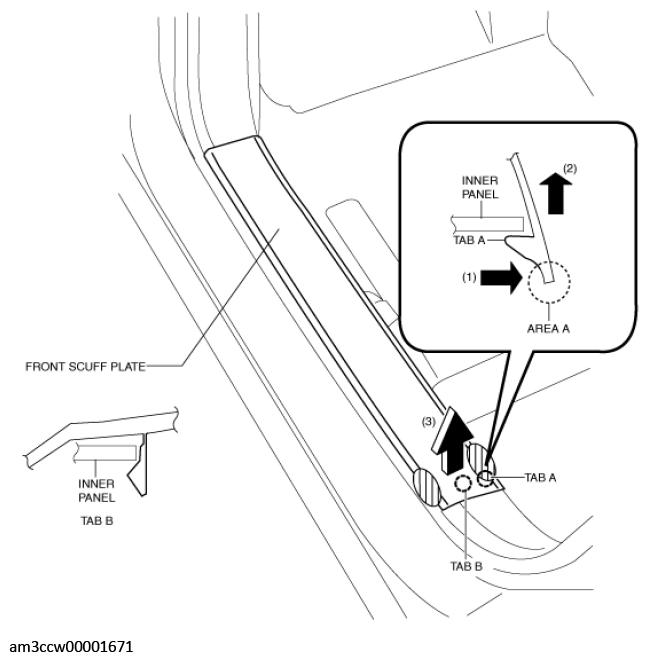
- Hold area A shown in the figure, open the front scuff plate in the direction of arrow (1), move it in the direction of arrow (2), and detach tab A of the front scuff plate from the inner panel.
 Courtesy of MAZDA MOTORS CORP.
- Hold the shaded area shown in the figure, move the front scuff plate in the direction of arrow (3), and detach tab B of the front scuff plate from the inner panel.
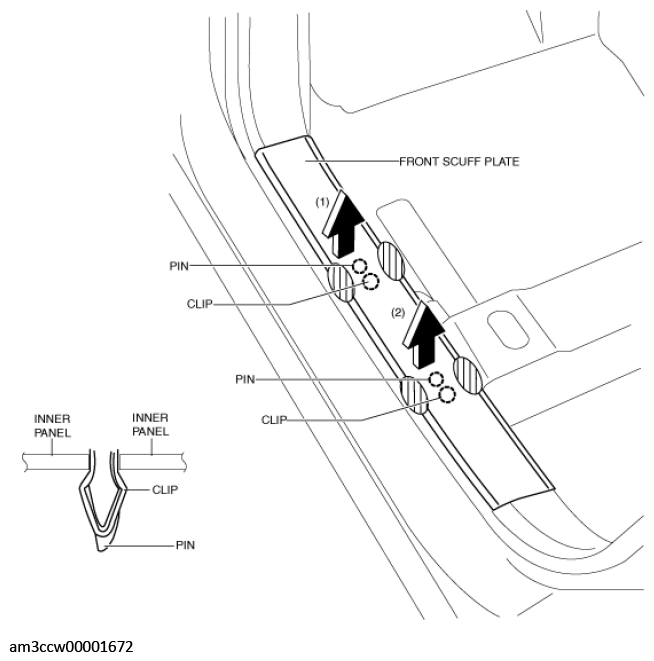
- Hold the shaded area shown in the figure, move the front scuff plate in the direction of arrow (1), and detach the clips from the inner panel.
 Courtesy of MAZDA MOTORS CORP.
- Hold the shaded area shown in the figure, move the front scuff plate in the direction of arrow (2), and detach the clips from the inner panel.
- Pull out the pins and remove the front scuff plate.
- Install in the reverse order of removal.