Cluster Switch Removal/Installation
- Disconnect the negative battery cable. (See NEGATIVE BATTERY CABLE DISCONNECTION/CONNECTION
.)
- Remove the driver-side front scuff plate. (See FRONT SCUFF PLATE REMOVAL/INSTALLATION .)
- Remove the driver-side front side trim. (See FRONT SIDE TRIM REMOVAL/INSTALLATION .)
- Partially peel back the seaming welt.
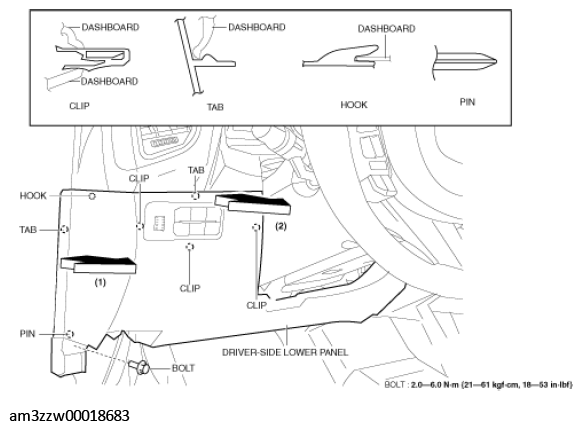
- Remove the bolts.
 Courtesy of MAZDA MOTORS CORP.
- Move the driver-side lower panel in the order of the arrows (1) and (2) shown in the figure, detach the clips, tabs, hook, and pin, and partially peel back the driver-side lower panel to the position where the cluster switch hook is visible.
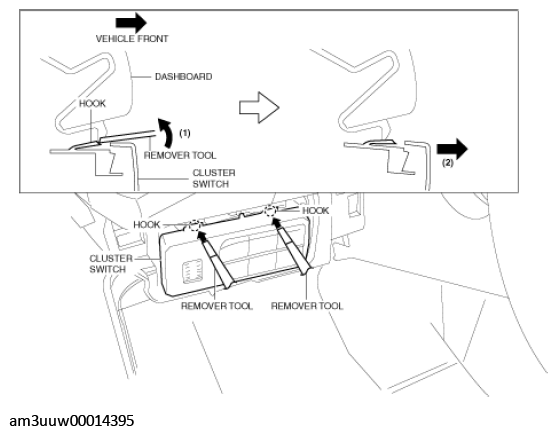
- Insert the remover tool into the positions shown in the figure, move it in the direction of the arrow (1), move the cluster switch in the direction of the arrow (2) while pressing the hooks, and then detach the cluster switch hooks from the dashboard.
 Courtesy of MAZDA MOTORS CORP.
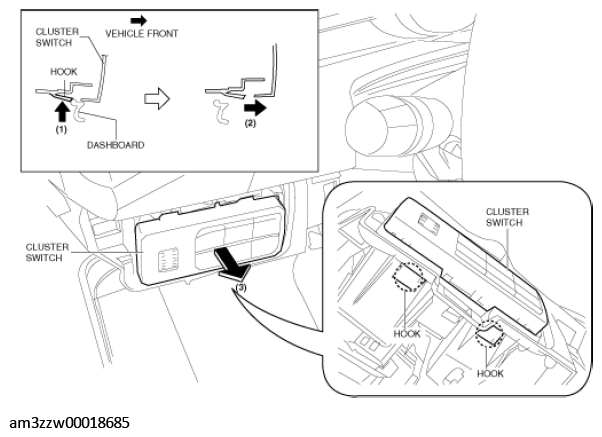
- Hold the cluster switch so that the hooks on its top part do not engage, and while pressing the hooks in the direction of arrow (1) shown in the figure, move the cluster switch in the direction of arrow (2) and detach the cluster switch hooks from the dashboard.
 Courtesy of MAZDA MOTORS CORP.
- Remove the cluster switch in the direction of the arrow (3) shown in the figure.
- Disconnect the cluster switch connector.
CAUTION:
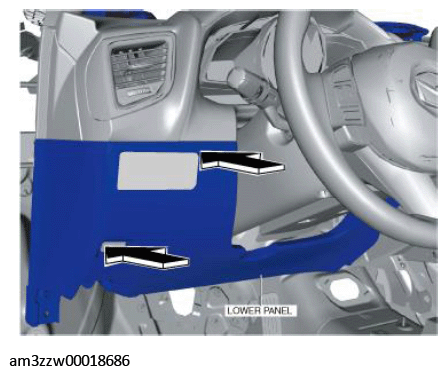
- If the cluster switch is not to be installed for the time being such as during the cluster switch inspection, temporarily install the driver-side lower panel in the direction of the arrows shown in the figure to prevent damage to the driver-side lower panel.
 Courtesy of MAZDA MOTORS CORP.
- Install in the reverse order of removal.