Front Bumper Removal
- Affix the protective tape to the position (vehicle body side) shown in the figure to prevent scratches and damage.
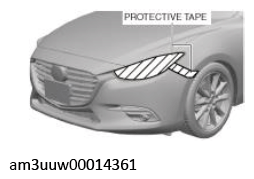 Courtesy of MAZDA MOTORS CORP.
- Disconnect the negative battery cable. (See NEGATIVE BATTERY CABLE DISCONNECTION/CONNECTION [SKYACTIV-G 2.0, SKYACTIV-G 2.5]
.)
- Remove the screws.
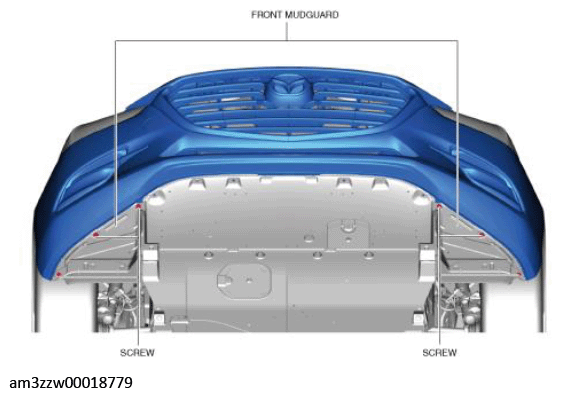 Courtesy of MAZDA MOTORS CORP.
- Remove the fasteners.
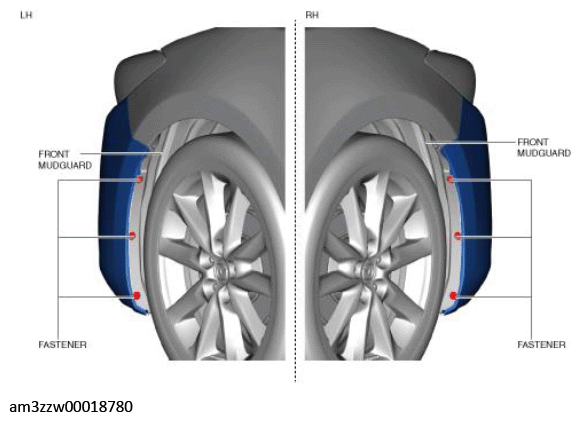 Courtesy of MAZDA MOTORS CORP.
- Remove the screw which can be verified at the position where the front mudguard was bent back.
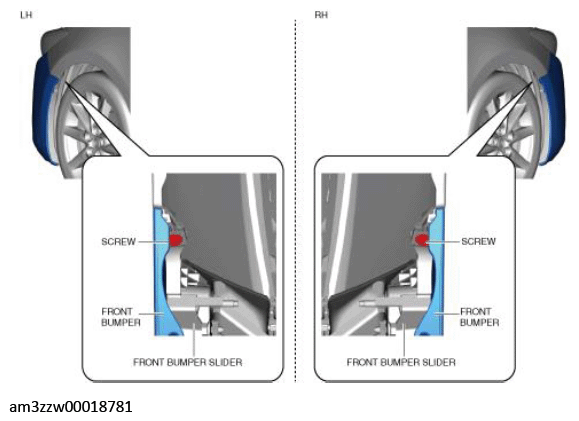 Courtesy of MAZDA MOTORS CORP.
- Remove the screws and fasteners.
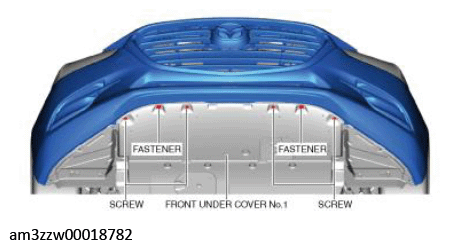 Courtesy of MAZDA MOTORS CORP.
- Remove the screws and fasteners which can be verified at the position where front under cover No. 1 was pulled back.
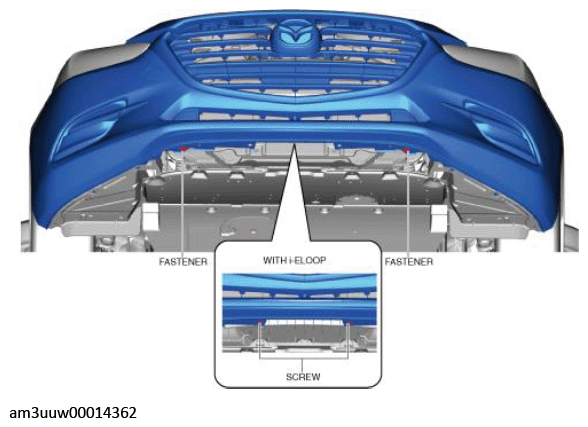 Courtesy of MAZDA MOTORS CORP.
- Remove the bolts.
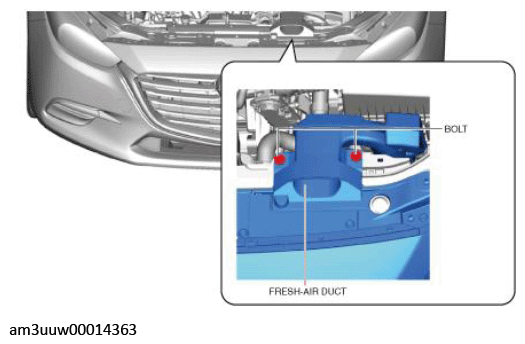 Courtesy of MAZDA MOTORS CORP.
- Remove the fastener which can be verified at the position where the fresh-air duct was pulled back.
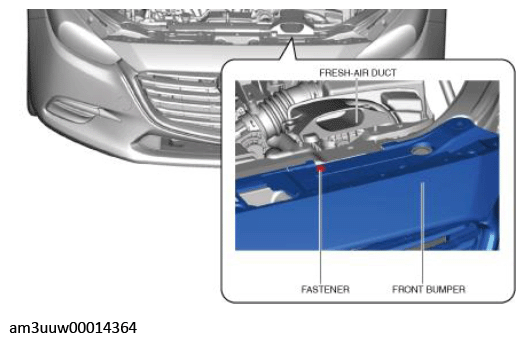 Courtesy of MAZDA MOTORS CORP.
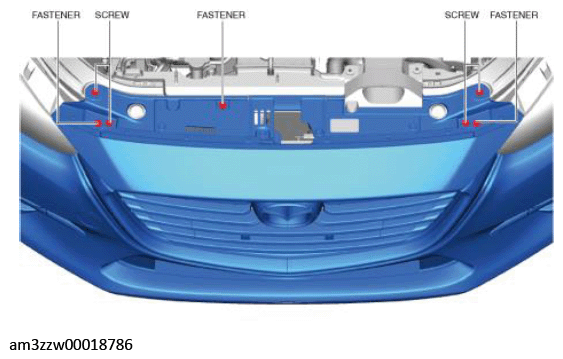
- Remove the screws.
 Courtesy of MAZDA MOTORS CORP.
- Remove the fasteners.
- Remove the set plate. (See SET PLATE REMOVAL/INSTALLATION .)
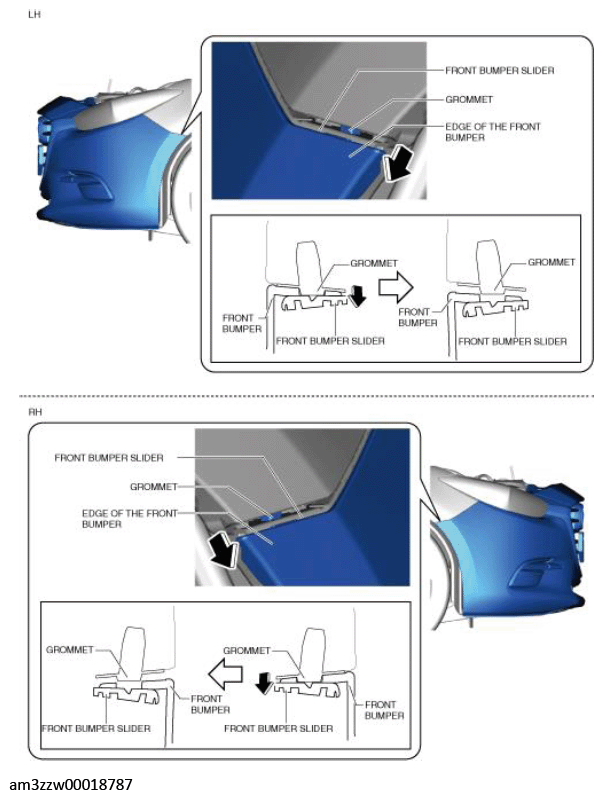
- Grasp the front bumper end, move it in the direction of the arrow shown in the figure, and remove the front bumper from the grommet.
 Courtesy of MAZDA MOTORS CORP.
CAUTION:
- Carefully remove the front bumper from the front bumper slider. If the front bumper is removed from the front bumper slider with excessive force, the front bumper hooks may be damaged because the front bumper and the front bumper slider are engaged firmly.
- Detach the front bumper hooks from the front bumper slider using two people, one person supports the front bumper. If the front bumper hooks are detached from the front bumper without supporting the front bumper, it may fall off and be damaged.
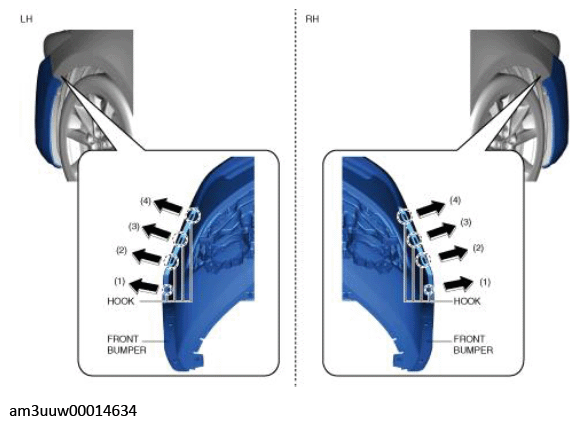
- Pull the rear end of the front bumper in the order of the arrows shown in the figure, and detach the front bumper hooks from the front bumper slider.
 Courtesy of MAZDA MOTORS CORP.
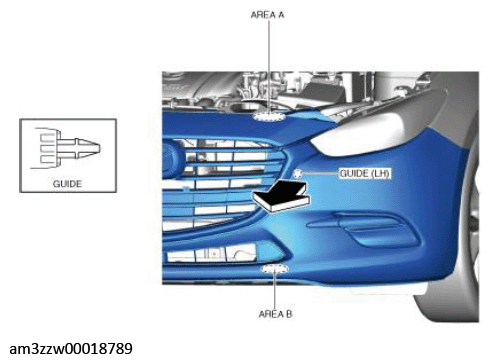
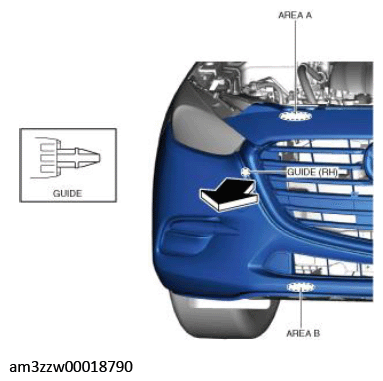
- Hold areas A and B shown in the figure, pull the front bumper in the direction of the arrow, and remove the guide (LH).
 Courtesy of MAZDA MOTORS CORP.
- Hold areas A and B shown in the figure, pull the front bumper in the direction of the arrow, and remove the guide (RH).
 Courtesy of MAZDA MOTORS CORP.
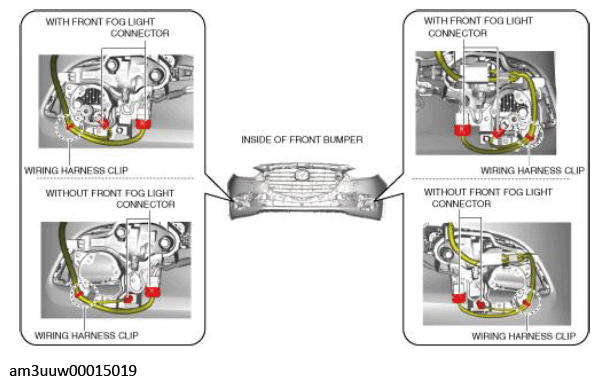
- Disconnect the connectors and wiring harness clips shown in the figure.
 Courtesy of MAZDA MOTORS CORP.
- Remove the front bumper.