Charge Air Cooler Installation Note
- Remove foreign matter on the O-ring seal surface of charge air cooler and in the pipe furrow O-ring (sand or dust).
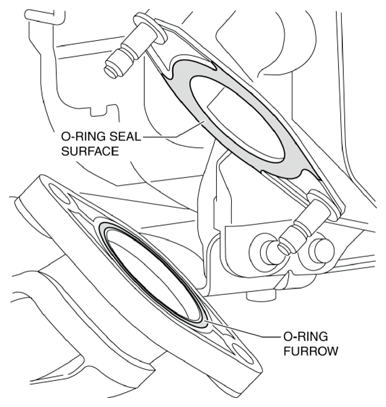 Courtesy of MAZDA MOTORS CORP.
- Apply engine oil to the entire surface of the O-ring.
- Align the O-ring projection with the pipe furrow and install the O-ring.
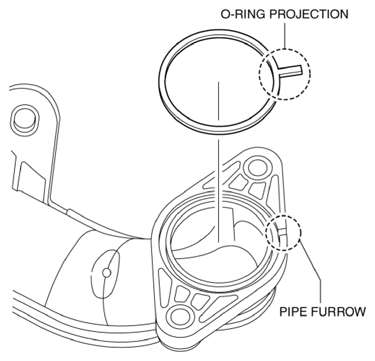 Courtesy of MAZDA MOTORS CORP.
- Temporarily install the bolts and nuts shown in the figure.
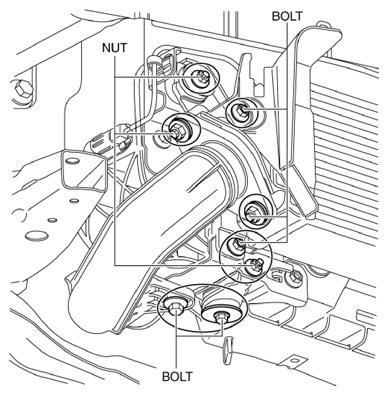 Courtesy of MAZDA MOTORS CORP.
- Tighten the charge air cooler in the order shown in the figure.
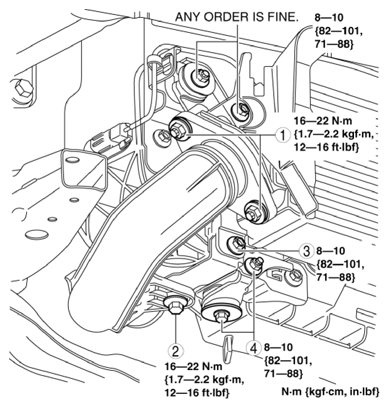 Courtesy of MAZDA MOTORS CORP.