Rear Door Trim Removal/Installation
- Disconnect the negative battery cable. (See NEGATIVE BATTERY CABLE DISCONNECTION/CONNECTION [SKYACTIV-G 2.5]
.)
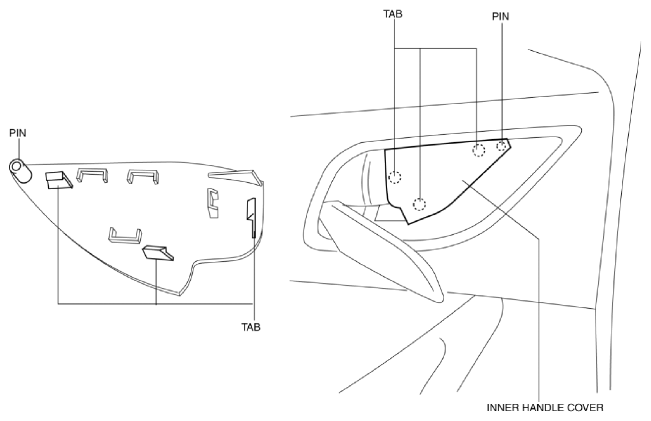
- Remove the inner handle cover while detach tabs, pin.
 Courtesy of MAZDA MOTORS CORP.
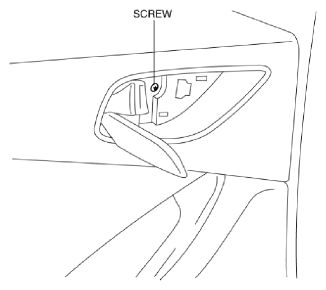
- Remove the screw.
 Courtesy of MAZDA MOTORS CORP.
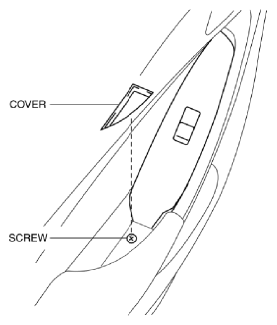
- Remove the cover, then remove the screw.
 Courtesy of MAZDA MOTORS CORP.
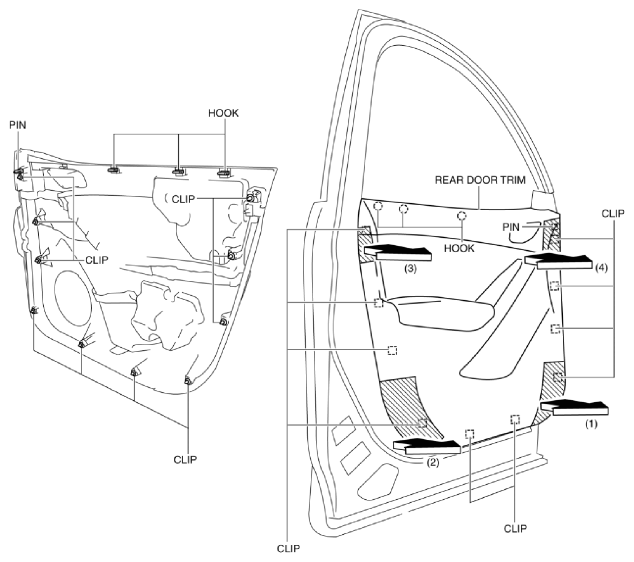
- Grasp the shaded areas shown in the figure, and pull the rear door trim in the direction of the arrow in the order of (1), (2), (3), (4) while detaching clips, hooks and pin.
CAUTION:
- If the rear door trim is removed in the same way as past vehicles by pulling it upward, it could damage clips and pin. When removing the rear door trim, always pull it in the direction of the arrows shown in the figure.
 Courtesy of MAZDA MOTORS CORP.
- Remove tab A in the direction of the arrow (1) shown in the figure.
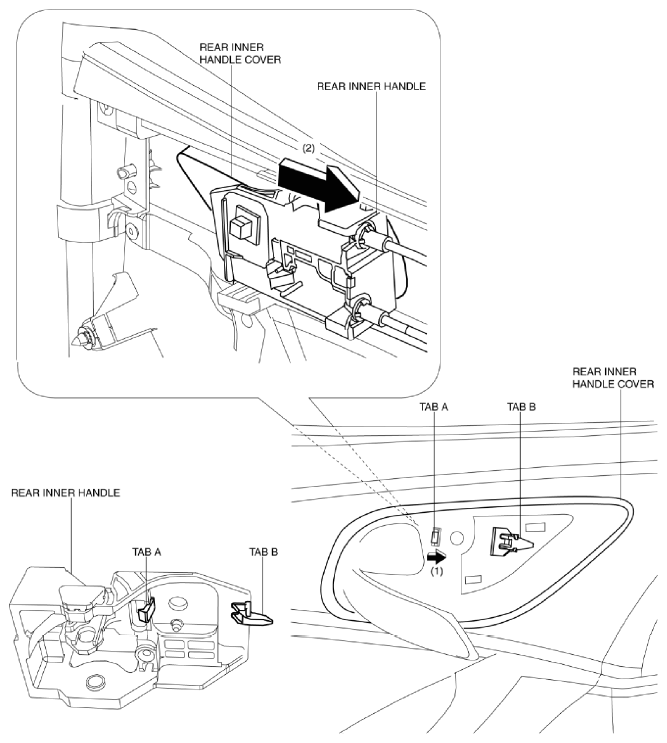 Courtesy of MAZDA MOTORS CORP.
- Remove the rear inner handle in the direction of the arrow (2) shown in the figure while detaching tab B.
- Disconnect the power window subswitch connector.
- Install in the reverse order of removal.