Antenna Feeder No. 1 Inspection
ANTENNA FEEDER NO.1 INSPECTION
1. Disconnect the negative battery cable.
2. Remove the following parts:
a. Side wall Side Wall Removal/Installation
b. Center console box Center Console Box Removal/Installation
c. Console panel Console Panel Removal/Installation
d. Center console Center Console Removal/Installation
e. Shift lever knob (MTX) Service and Repair
f. Selector lever knob (ATX) Automatic Transaxle Shift Mechanism Removal/Installation
g. Shift panel Shift Panel Removal/Installation
h. Front console Front Console Removal/Installation
i. Climate control unit Service and Repair
j. Upper column cover Service and Repair
k. Instrument cluster Removal and Replacement
l. Switch panel Service and Repair
m. Audio unit Audio Unit Removal/Installation
n. A-pillar trim (RH) A-Pillar Trim Removal/Installation
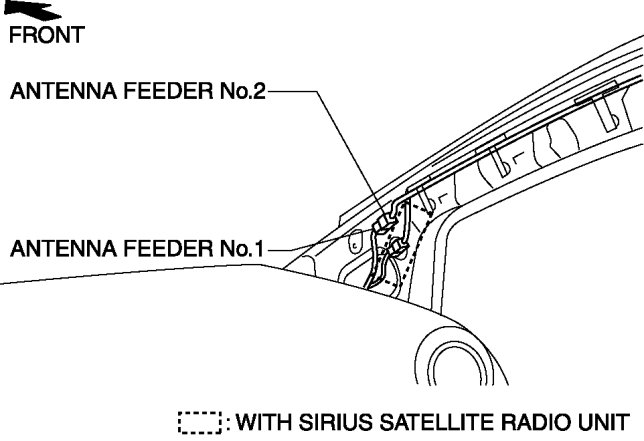
3. Disconnect the antenna feeder No.2.
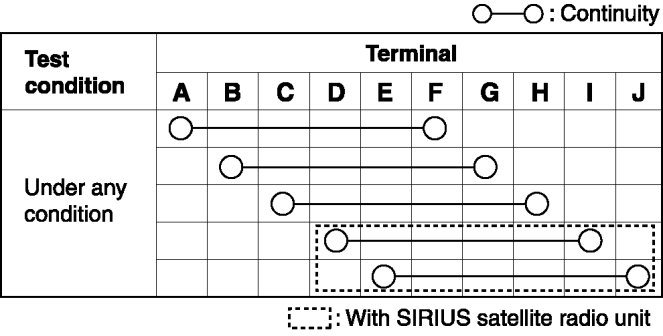
4. Verify that the continuity between antenna feeder No.1 terminals is as indicated in the table.
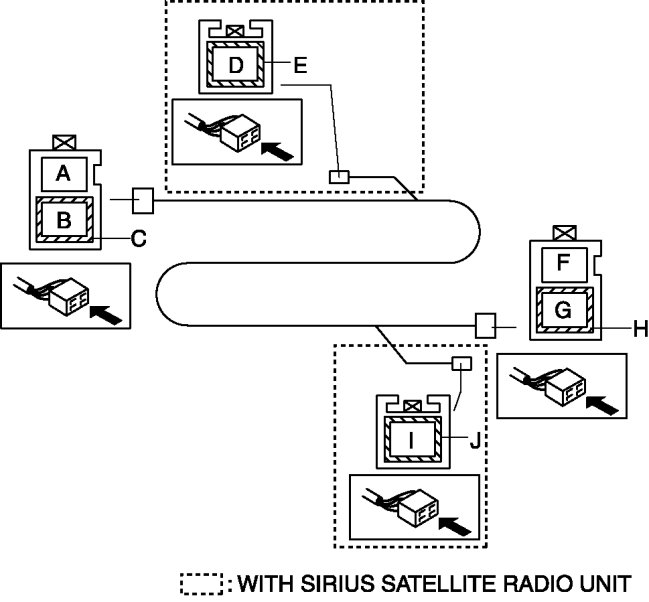
- If not as indicated in the table, replace antenna feeder No.1.