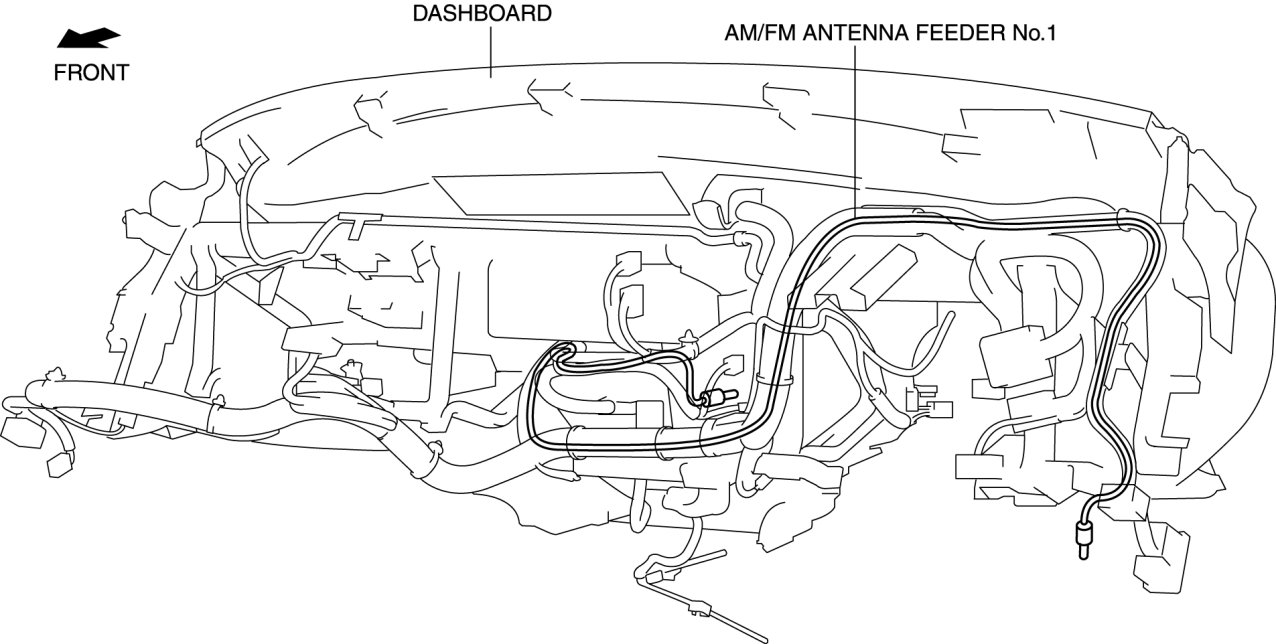
AM/FM Antenna Feeder No.1 Installation
AM/FM ANTENNA FEEDER NO.1 INSTALLATION
CAUTION:
- If the antenna feeder is installed with tension on the cable and wiring harness it could result in loosening of the connection areas and poor contact. When installing and connecting the antenna feeder, always make sure there is slack on the cable and wiring harness.
NOTE:
- The antenna feeder is integrated with the vehicle wiring harness.
- When installing a new antenna feeder, secure it to the vehicle wiring harness along the installation route of the old antenna feeder.
1. Disconnect the negative battery cable.
2. Remove the following parts:
a. Shift lever knob (MT) Transmission Removal/Installation
b. Shift knob (AT) Selector Lever Removal/Installation
c. Console Removal and Replacement
d. Glove compartment Service and Repair
e. Inner scuff plate Inner Scuff Plate Removal/Installation
f. Front side trim Front Side Trim Removal/Installation
g. Side panel Side Panel Removal/Installation
h. Lower panel Lower Panel Removal/Installation
i. Knee bolster Knee Bolster Removal/Installation
j. Column cover Service and Repair
k. Steering shaft installation nut Service and Repair
l. A-pillar trim A-Pillar Trim Removal/Installation
m. Dashboard Dashboard Removal/Installation
3. Align and secure the new AM/FM antenna feeder No.1 to the vehicle wiring harness.