D-Pillar Trim Removal/Installation
D-PILLAR TRIM REMOVAL/INSTALLATION
1. Remove the following parts:
a. Rear scuff plate inner Rear Scuff Plate Removal/Installation
b. Rear seat Rear Seat Removal/Installation
c. Sub trunk box Service and Repair
d. Trunk end trim Trunk End Trim Removal/Installation
e. Trunk side trim
2. Partially peel back the seaming welt.
3. Remove the fastener.
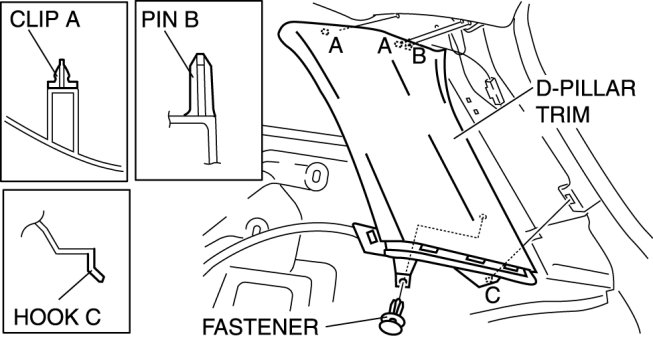
4. Pull the D-pillar trim outward and detach clips A and pin B.
5. Pull the D-pillar trim upward and detach hook C.
6. Remove the D-pillar trim.
7. Install in the reverse order of removal.