Front Side Trim Removal/Installation
FRONT SIDE TRIM REMOVAL/INSTALLATION
Driver-side
1. Remove the driver-side front scuff plate. (See Front Scuff Plate Removal/Installation)
2. Partially peel back the seaming welt.
3. Remove the fastener.
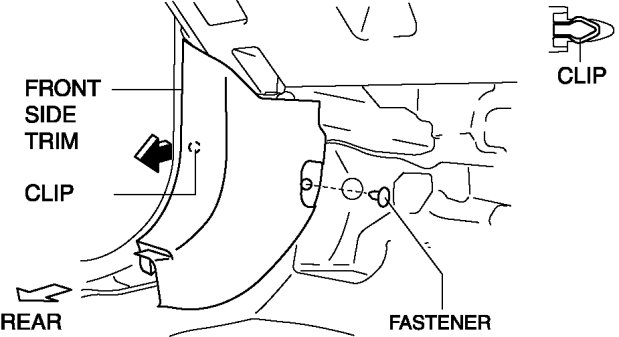
4. Pull the front side trim in the direction of the arrow shown in the figure and remove it while detaching the clips.
5. Install in the reverse order of removal.
Passenger-side
1. Remove the passenger-side front scuff plate. (See Front Scuff Plate Removal/Installation)
2. Partially peel back the seaming welt.
3. Remove the cap nut.
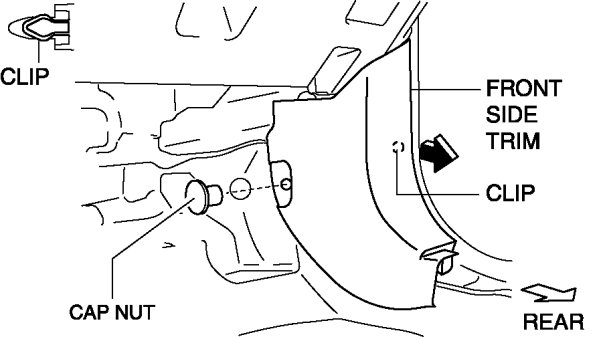
4. Pull the front side trim in the direction of the arrow shown in the figure and remove it while detaching the clips.
5. Install in the reverse order of removal.