Front Antenna Feeder Removal/Installation
FRONT ANTENNA FEEDER REMOVAL/INSTALLATION
1. Disconnect the negative battery cable.
2. Remove the following parts:
a. Front door Front Door Removal/Installation
b. Sail garnish Service and Repair
c. Front scuff plate inner Front Scuff Plate Removal/Installation
d. Front side trim Front Side Trim Removal/Installation
e. Side panel (passenger's side) Side Panel Removal/Installation
f. Side wall Side Wall Removal/Installation
g. Front console Front Console Removal/Installation
h. Glove compartment Service and Repair
i. Lower panel Lower Panel Removal/Installation
j. Center panel module (vehicles with audio unit) Center Panel Module Removal/Installation
k. Center panel (vehicles without audio unit) Center Panel Removal/Installation
l. Climate control unit Climate Control Unit Removal/Installation [Full-Auto Air Conditioner] Climate Control Unit Removal [Manual Air Conditioner] Climate Control Unit Installation [Manual Air Conditioner]
m. Car-navigation unit (Vehicles with car-navigation system) Service and Repair
n. Selector lever component Service and Repair
o. Meter hood Meter Hood Removal/Installation
p. Lower column cover Service and Repair
q. Driver-side air bag module Driver-Side Air Bag Module Removal/Installation
r. Steering shaft Service and Repair
s. Instrument cluster Removal and Replacement
t. A-pillar trim A-Pillar Trim Removal/Installation
u. Rear heater duct (1) Service and Repair
v. Windshield wiper arm and blade Windshield Wiper Arm And Blade Removal/Installation
w. Cowl grille Cowl Grille Removal/Installation
x. Center cowl grille Center Cowl Grille Removal/Installation
y. Dashboard Dashboard Removal/Installation
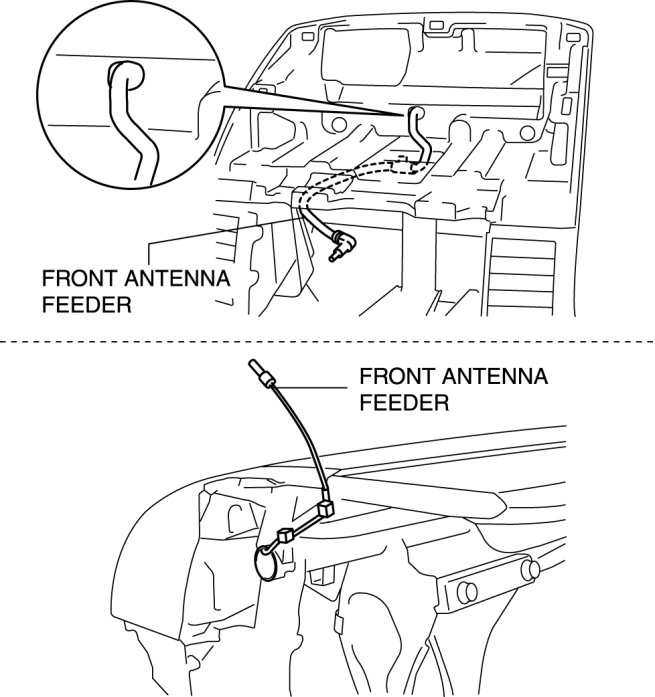
3. Remove the front antenna feeder from the dashboard.
4. Install in the reverse order of removal.