Solenoid Valve Removal/Installation (Primary Control Valve Body) [FS5A-EL]
SOLENOID VALVE REMOVAL/INSTALLATION (PRIMARY CONTROL VALVE BODY) [FS5A-EL]
1. Remove the battery duct and battery cover. Removal and Replacement
2. Disconnect the negative battery cable.
3. Remove the under cover.
4. Drain the ATF.
5. Remove the oil pan.
6. Remove the primary control valve body. Primary Control Valve Body Removal [FS5A-EL]
7. Remove the solenoid valve(s).
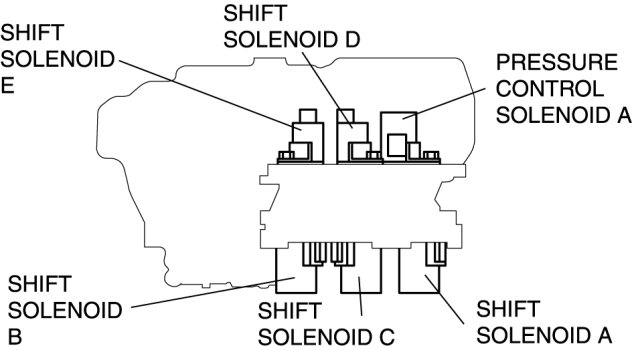
8. Apply ATF to a new O-ring and install it on the solenoid valve.
9. Install the solenoid valve in the primary control valve body.
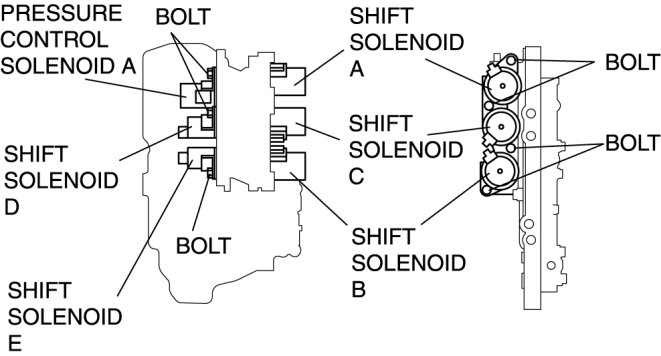
Tightening torque
- 7.8-10.8 Nm
{80-110 kgf-cm, 70-95.4 in-lbf}
10. Install the primary control valve body. Primary Control Valve Body Removal [FS5A-EL]
11. Install the oil pan. Primary Control Valve Body Removal [FS5A-EL]
12. Install the under cover.
13. Connect the negative battery cable.
14. Install the battery duct and battery cover. Removal and Replacement
15. Add ATF. Automatic Transaxle Fluid (ATF) Replacement [FS5A-EL]
16. Perform the mechanical system test. FS5A-EL Transmission
17. Perform the road test. FS5A-EL Transmission