B-Pillar Trim Panel - 2 Door, Regular Cab
B-PILLAR TRIM PANEL - 2 DOOR, REGULAR CABRemoval and Installation
Both B-pillar trim panels
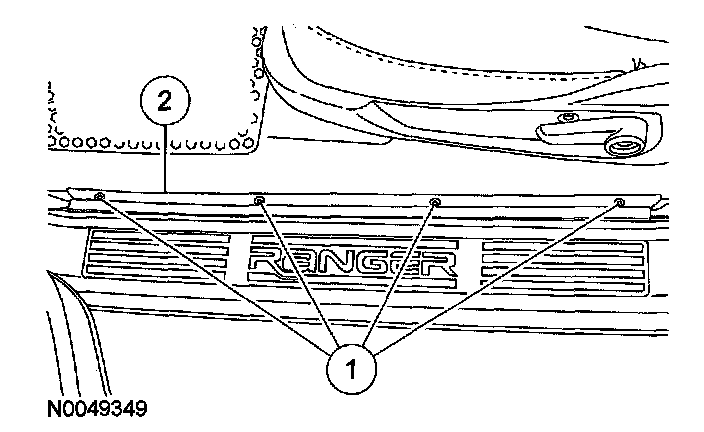
1. Remove the door scuff plate trim panel.
1. Remove the screws.
2. Remove the scuff plate.
RH B-pillar trim panel
2. Remove the handle carrier cover.
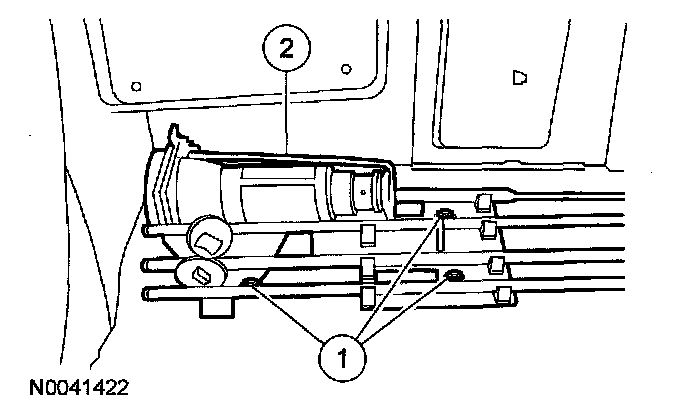
3. Remove the jack handle carrier.
1. Remove the screws.
2. Remove the jack handle carrier.
LH B-pillar trim panel
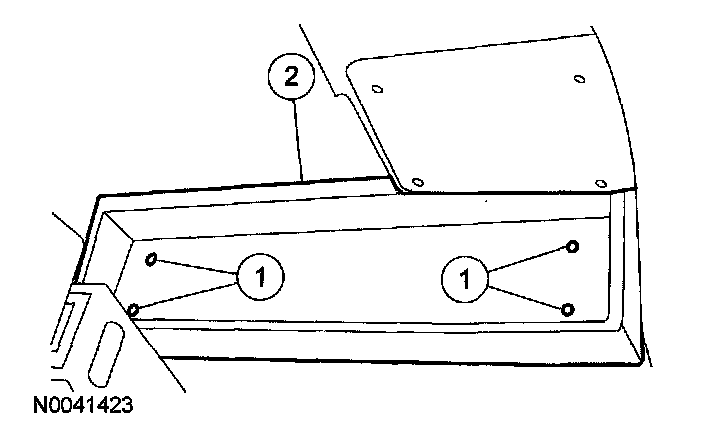
4. Remove the package tray mat.
5. Remove the package tray.
1. Remove the screws.
2. Remove the package tray.
Both B-pillar trim panels
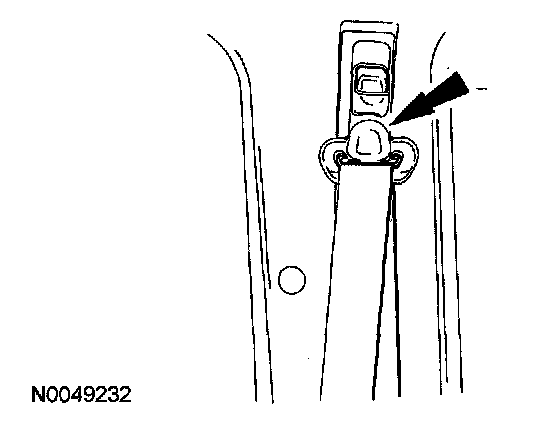
NOTE:
- If the safety belt guide cover is damaged or if it does not remain closed, install a new cover.
- Safety belt guide cover removed for clarity.
6. Remove the front safety belt guide cover.
- Release the tabs and remove the cover.
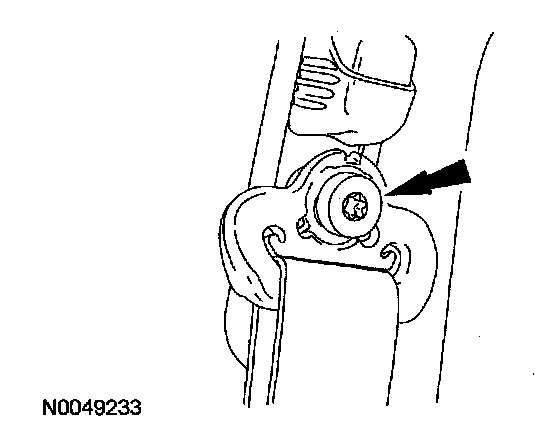
7. Remove the bolt and safety belt guide.
- Use the safety belt bolt bit to remove the bolt.
Tightening Torque: 40 Nm (4.1 kgf-m, 30 ft-lbf)
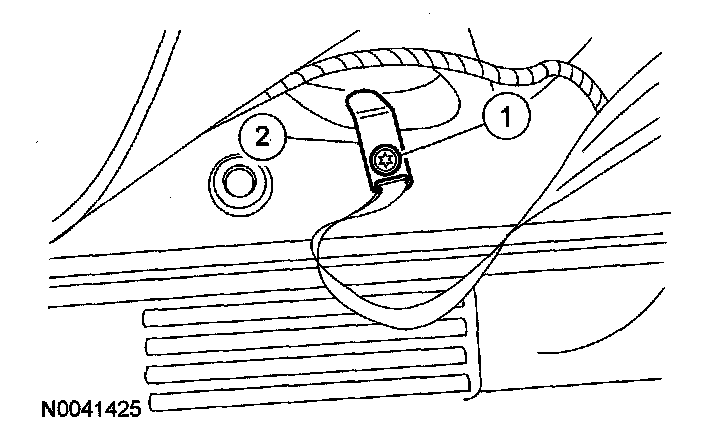
8. Disconnect the safety belt anchor.
1. Use the Safety Belt Bolt Bit to remove the bolt.
2. Disconnect the safety belt anchor.
Tightening Torque: 40 Nm (4.1 kgf-m, 30 ft-lbf)
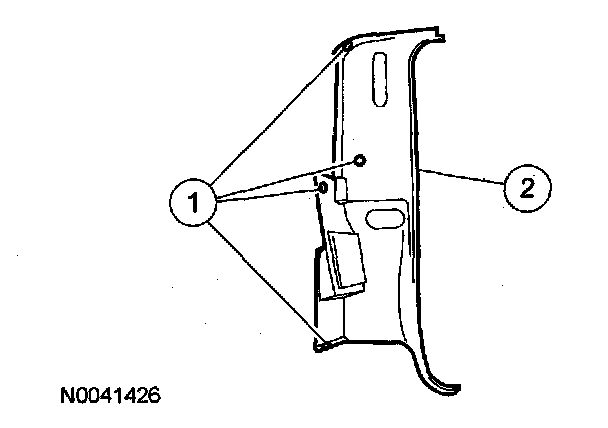
9. Reposition the B-pillar trim panel.
1. Remove the pin-type retainers.
2. Reposition the B-pillar trim panel.
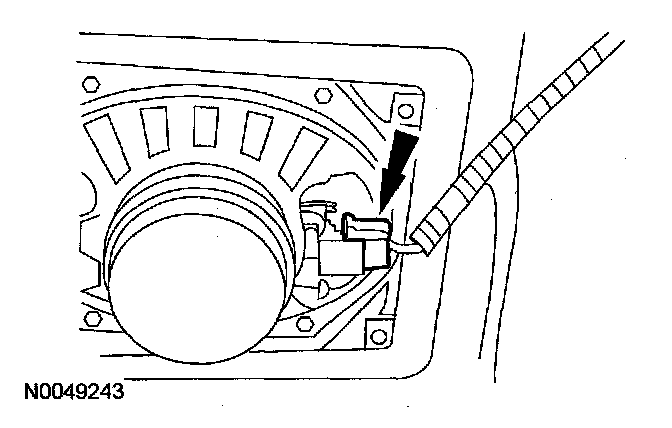
10. Disconnect the radio speaker electrical connector.
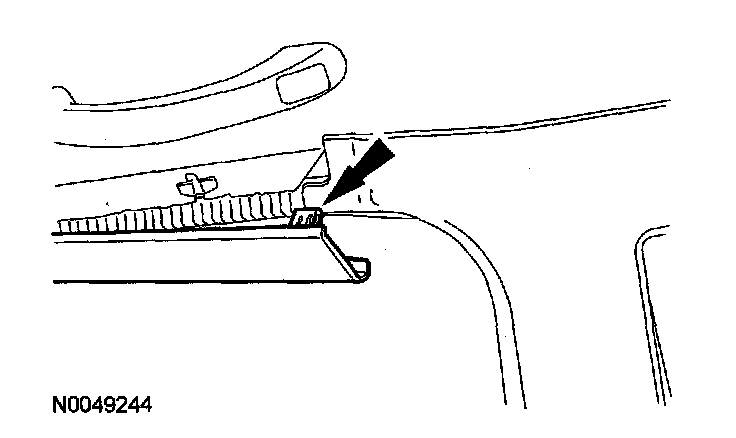
11. Lower the rear of the A-pillar trim panel to remove the B-pillar trim panel.
12. Remove the B-pillar trim panel.
13. To install, reverse the removal procedure.