Lifter / Lash Adjuster: Service and Repair
VALVE SEALS AND VALVE TAPPETS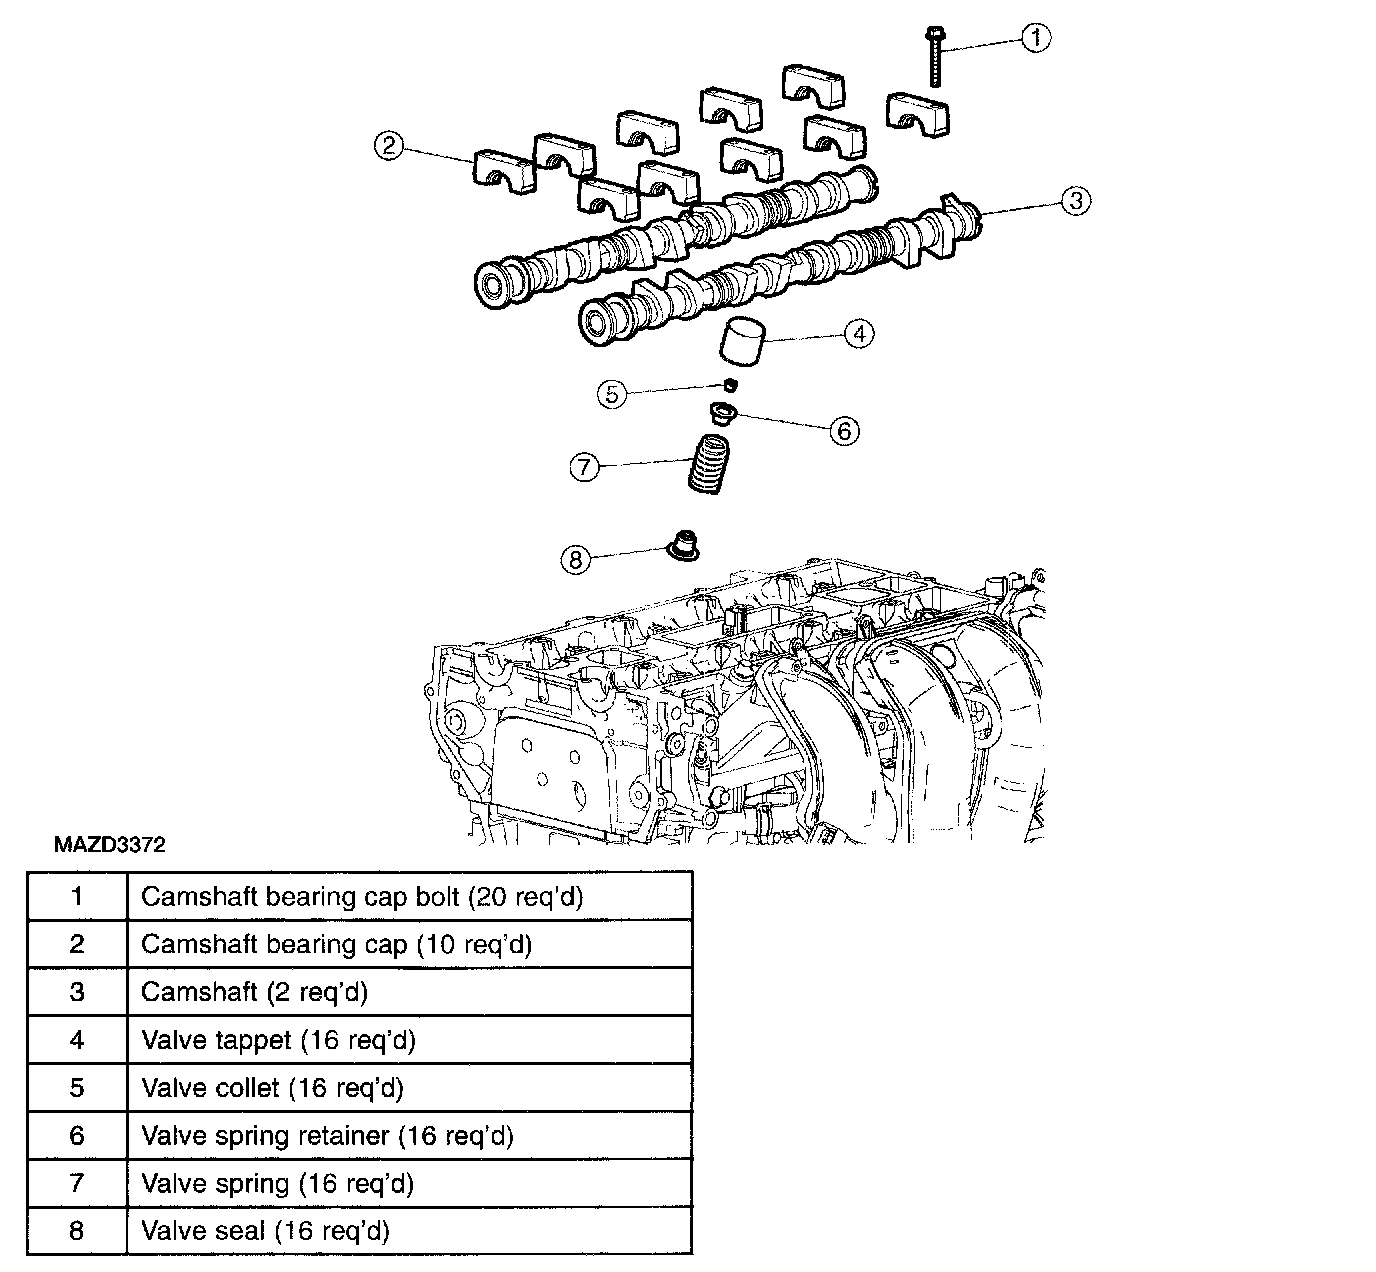
Caution:
^ During engine repair procedures, cleanliness is extremely important. Any foreign material, including any material created while cleaning gasket surfaces, that enters the oil passages, coolant passages or the oil pan can cause engine failure.
Caution:
^ The crankshaft, the crankshaft sprocket and the pulley are fitted together by friction, using diamond washers between the flange faces on each part. For that reason, the crankshaft sprocket is also unfastened if you loosen the pulley. Therefore, the engine must be retimed each time the damper is removed. Otherwise severe engine damage can occur.
1. With the vehicle in NEUTRAL, position it on a hoist.
Note:
^ Valve tappets are select fit and the valve clearance must be checked before removing the tappets.
2. If removing the valve tappets, check the valve clearance prior to removal.
3. Remove the timing chain and sprockets.
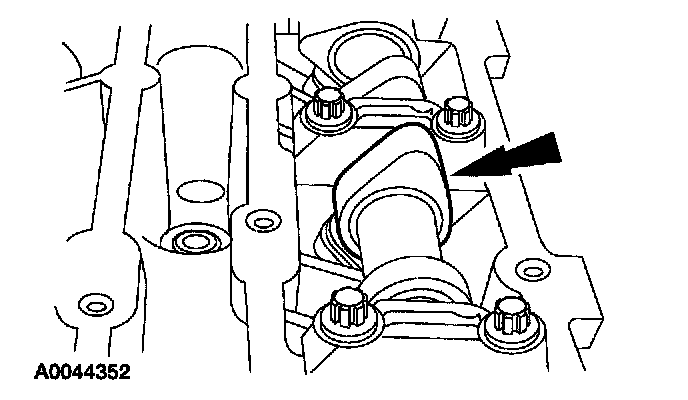
4. Mark the position of the camshaft lobes on the No. 1 cylinder for assembly reference.
Caution:
^ Failure to follow the camshaft loosening procedure can result in damage to the camshafts.
5. Remove the camshafts from the engine.
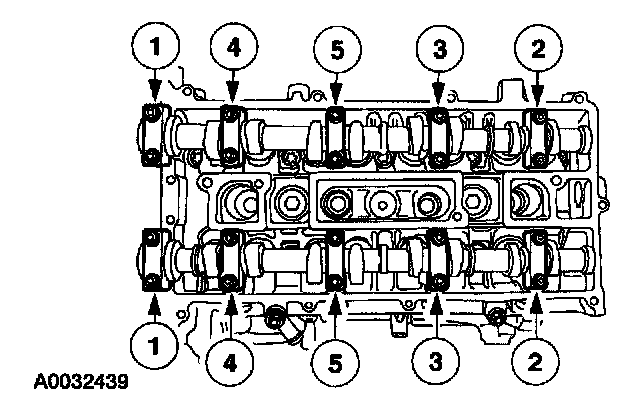
^ Loosen the camshaft bearing bolts in the sequence shown, one turn at a time. Repeat until all the tension is released.
^ Remove the camshaft bearing caps.
^ Remove the camshafts.
Caution:
^ If the camshafts and valve tappets are to be reused, mark the location of the valve tappets to make sure they are assembled in their original positions.
Note:
^ The number on the valve tappets only reflects the digits that follow the decimal. For example, a tappet with the number 0.650 has the thickness of 3.650 mm.
6. Inspect the valve tappets.
Warning:
^ Always wear protective goggles when working with compressed air. This can prevent injury. Failure to follow these instructions can result in personal injury.
Caution:
^ Use compressed air at 7 to 10 bars (100 - 150 psi). Do not disconnect the compressed air from the cylinder until the valve spring, valve spring retainer and valve collet is installed.
7. Unscrew the spark plug on cylinder No. 1 and connect the compressed air supply.
Note:
^ Place all parts in order to one side.
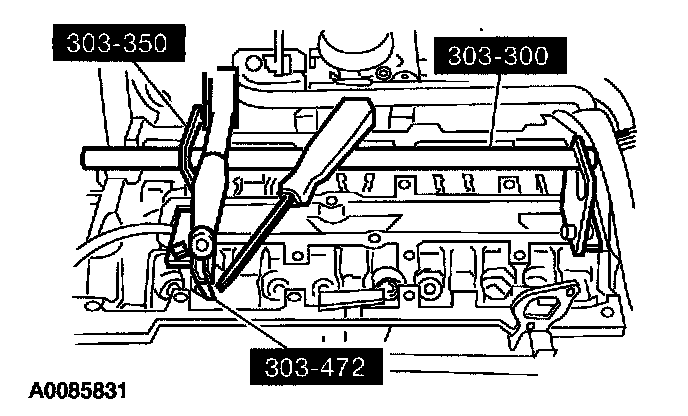
8. Apply compressed air to the cylinder and remove the valve spring.
^ Using the special tools, compress the valve spring and remove the valve collet, using some grease and a small screwdriver.
^ Remove the valve spring retainer and the valve spring.
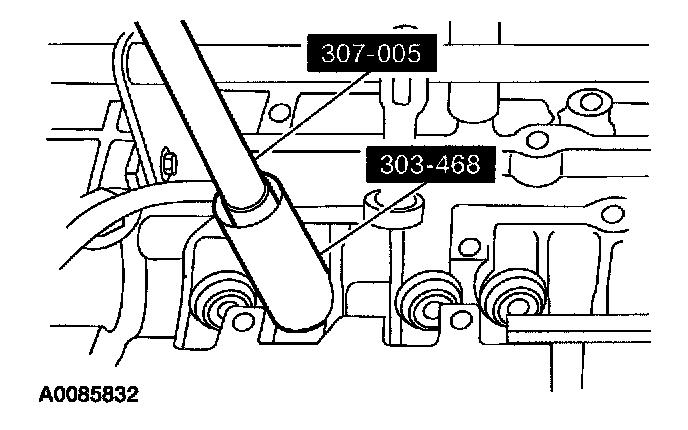
9. Using the special tools, remove and discard the valve seal.
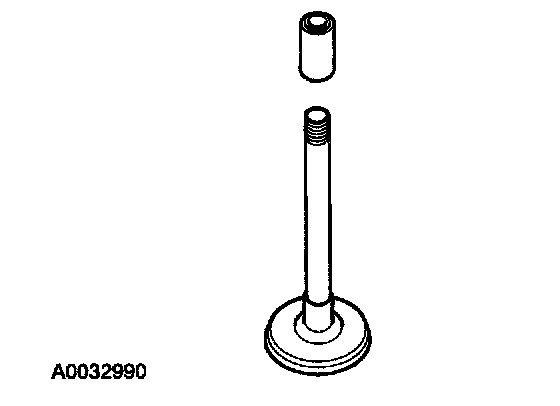
10. Install the valve stem seal installation sleeve.
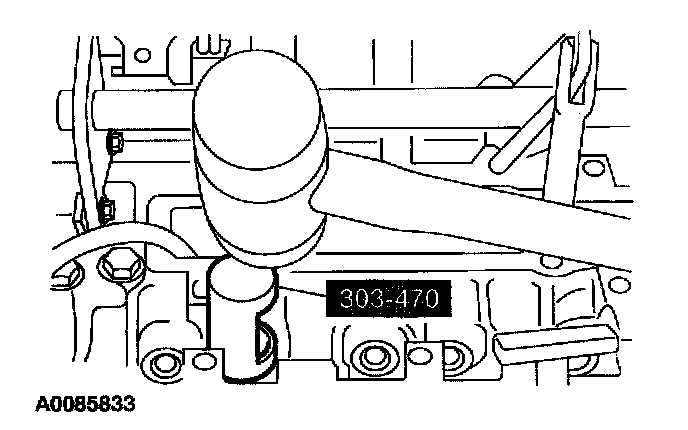
11. Using the special tool, install the valve seal.
Note:
^ Check the seating of the valve collet.
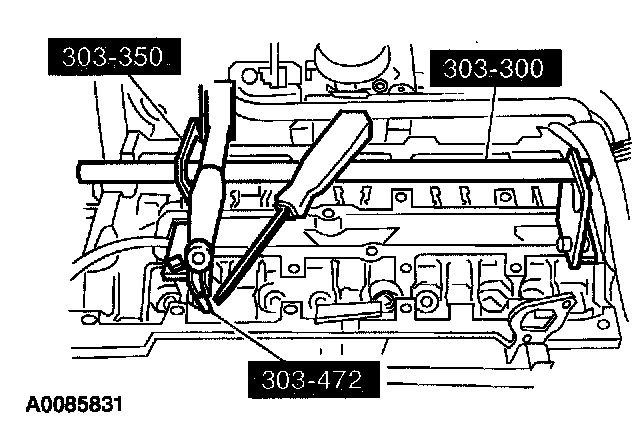
12. Using the special tools, install the valve spring.
^ Insert the valve spring and the valve spring retainer.
^ Compress the valve spring and install the valve collet using some grease and a small screwdriver.
Note:
^ Do not tighten the spark plug at this time.
13. Disconnect the compressed air supply and install the spark plug.
14. Repeat the appropriate removal and installation steps for all of the, other cylinders.
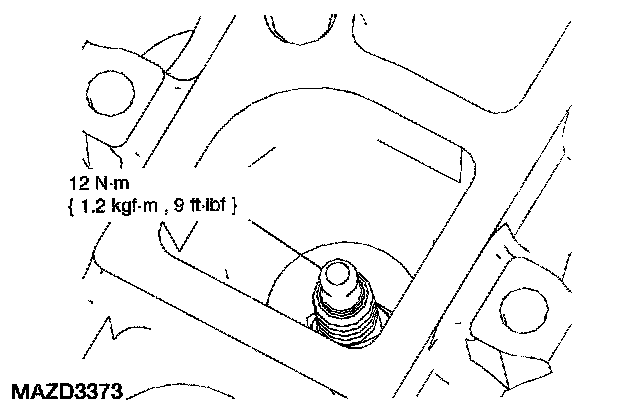
15. Tighten the spark plugs.
16. Coat the valve tappets with clean engine oil.
Caution:
^ Install the camshafts with the alignment slots in the camshafts lined up so the Camshaft Alignment Plate can be installed without rotating the camshafts. Make sure the lobes on the No. 1 cylinder are in the same position as noted in the removal procedure. Rotating the camshafts when the timing chain is removed, or installing the camshafts 180 degrees out of position can cause severe damage to the valves and pistons.
Note:
^ Lubricate the camshaft journals and bearing caps with clean engine oil.
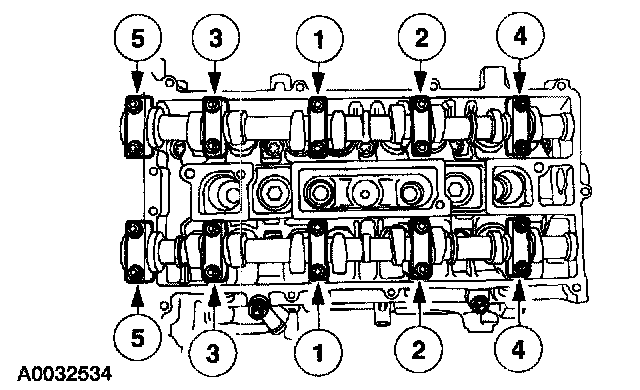
17. Install the camshafts and bearing caps. Tighten the bolts in the sequence shown in three stages.
^ Stage 1: Tighten the camshaft bearing bolt caps one turn at a time until tight.
^ Stage 2: Tighten the bolts to 7 Nm (0.71 kgf-m, 62 inch lbs.).
^ Stage 3: Tighten the bolts to 16 Nm (1.63 kgf-m, 12 ft. lbs.).
18. Install the timing chain and sprockets.