Miata 1.8L, Protege, Protege5 & 626 2.0L
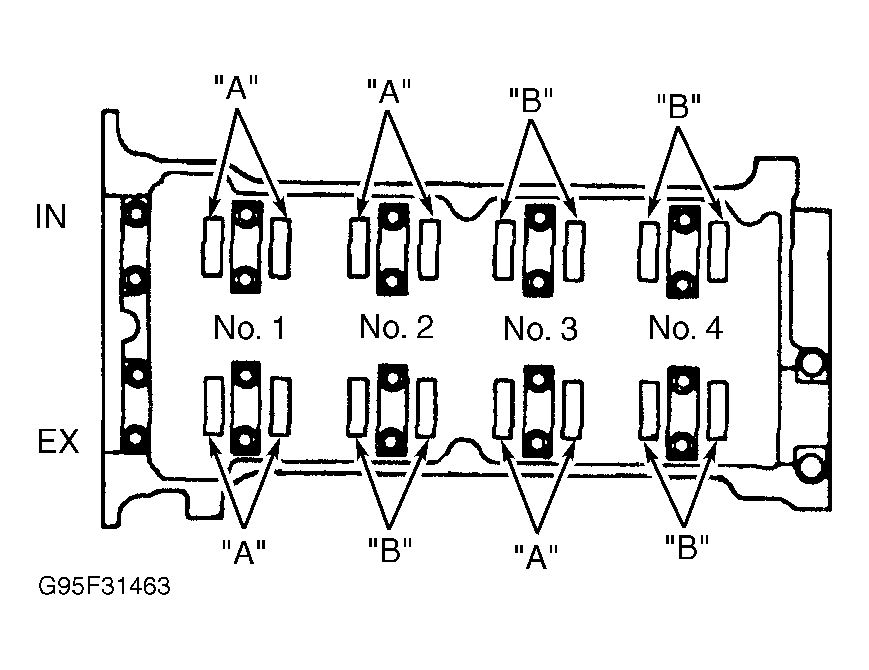
- Ensure engine is cold. Remove valve cover. Rotate crankshaft clockwise until No. 1 piston is at TDC of compression stroke. Measure valve clearance between base of camshaft lobe and valve tappets at "A". See Fig 1
. See VALVE CLEARANCE SPECIFICATIONS
table. If clearance is as specified, record valve location and clearance reading. Go to next step.
 Courtesy of MAZDA MOTORS CORP.
- Rotate crankshaft clockwise about 360 degrees, positioning No. 4 piston at TDC of compression stroke. Measure valve clearance between base of camshaft lobe and valve tappets at "B". See Fig 1
. See VALVE CLEARANCE SPECIFICATIONS
table. If clearance is not within specification, Go to next step.
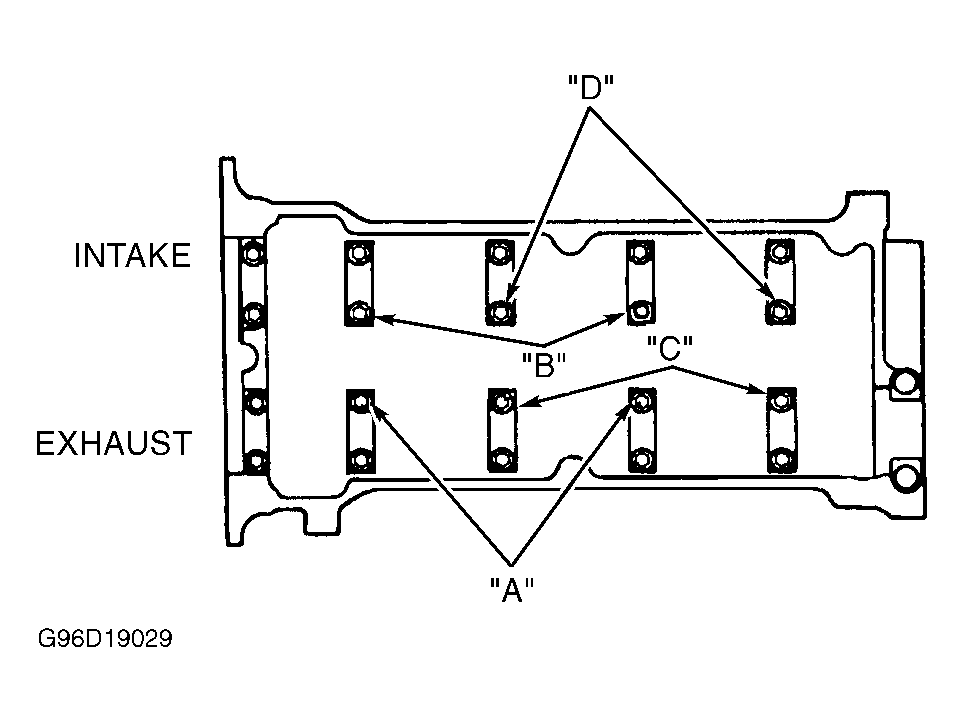
- Turn crankshaft clockwise so that camshaft lobe on valve requiring clearance adjustment is positioned straight up, away from valve. Remove appropriate camshaft cap bolts as necessary. See Fig 2
. See CAMSHAFT BOLT REMOVAL
table.
NOTE:
For No. 2 and 3 cylinder exhaust valve adjustment shim removal, remove bolts "A" or "C". For No. 2 and 3 cylinder intake valve adjustment shim removal, remove bolts "B" or "D".
 Courtesy of MAZDA MOTORS CORP.
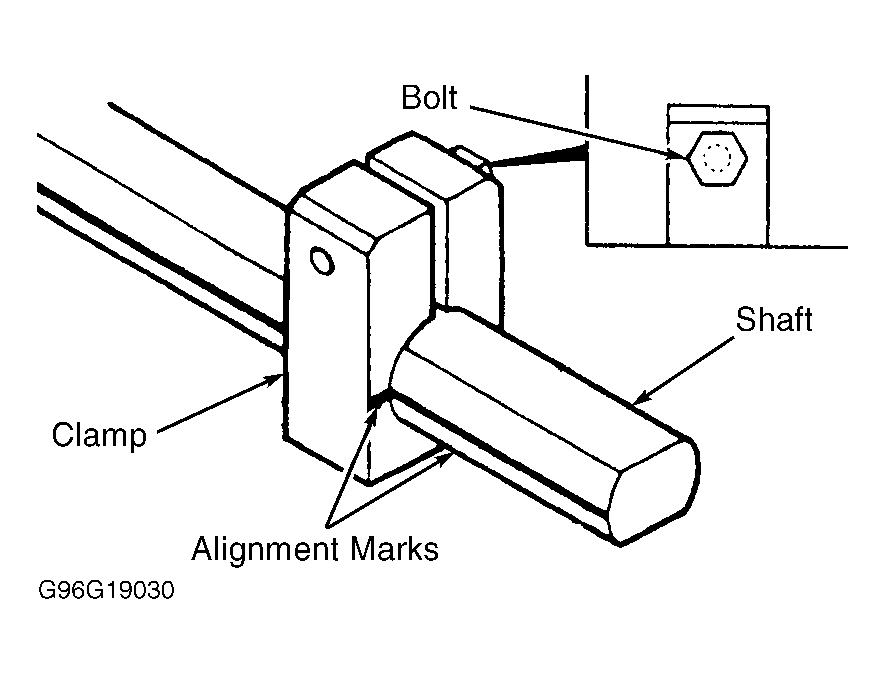
- Assemble Adjustment Tool Shaft, Clamp and Bolt (49-T012-002, 49-T012-003 and 49-T012-004), aligning marks on adjustment tool. See Fig 3
. Install shaft and clamp on appropriate camshaft using camshaft cap bolts. See Fig 2
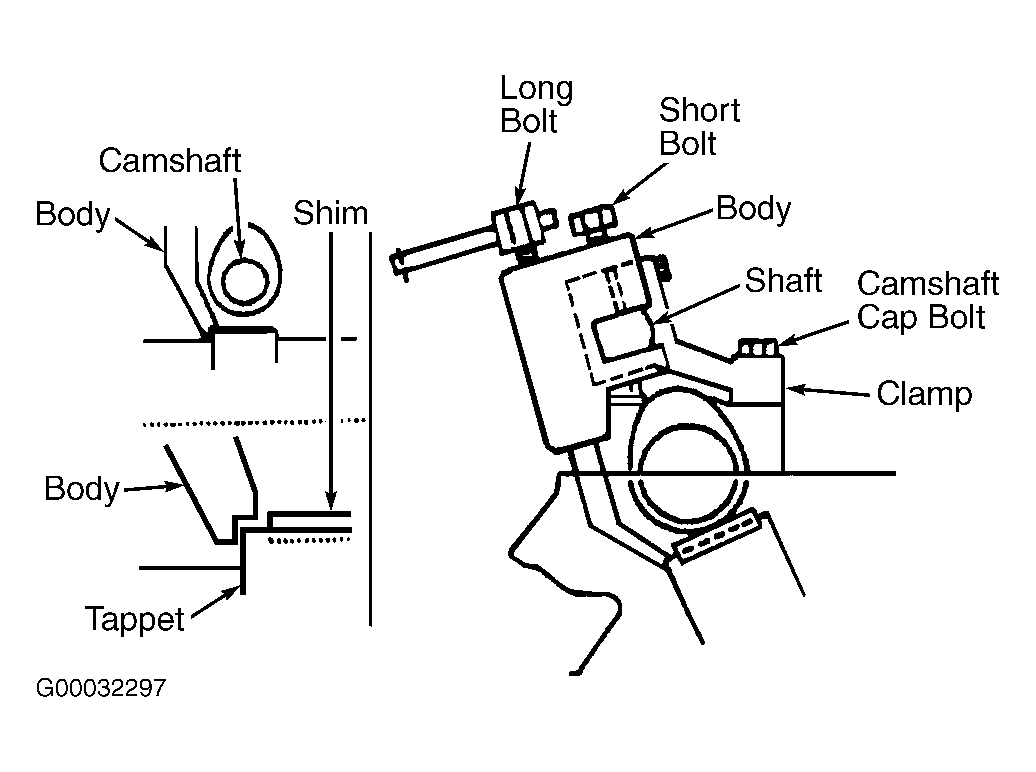
. Tighten cap bolts to 100-126 INCH lbs. (11.3-14.2 N.m). See Fig 4
. Tighten clamp bolt to secure shaft. See Fig 3
 Courtesy of MAZDA MOTORS CORP.
 Courtesy of MAZDA MOTORS CORP.
- Mount Tappet Holder Body (49 T012 001A) on shaft toward outside of head over tappet requiring shim replacement. See Fig 4
. Position notch of tappet so that thin-blade screwdriver can be inserted. See Fig 5
. Set body on tappet and align by its notch. Tighten short bolt to secure body to shaft.
CAUTION:
Use caution when depressing tappet. Cylinder head can be damaged by body tip when tappet is depressed.
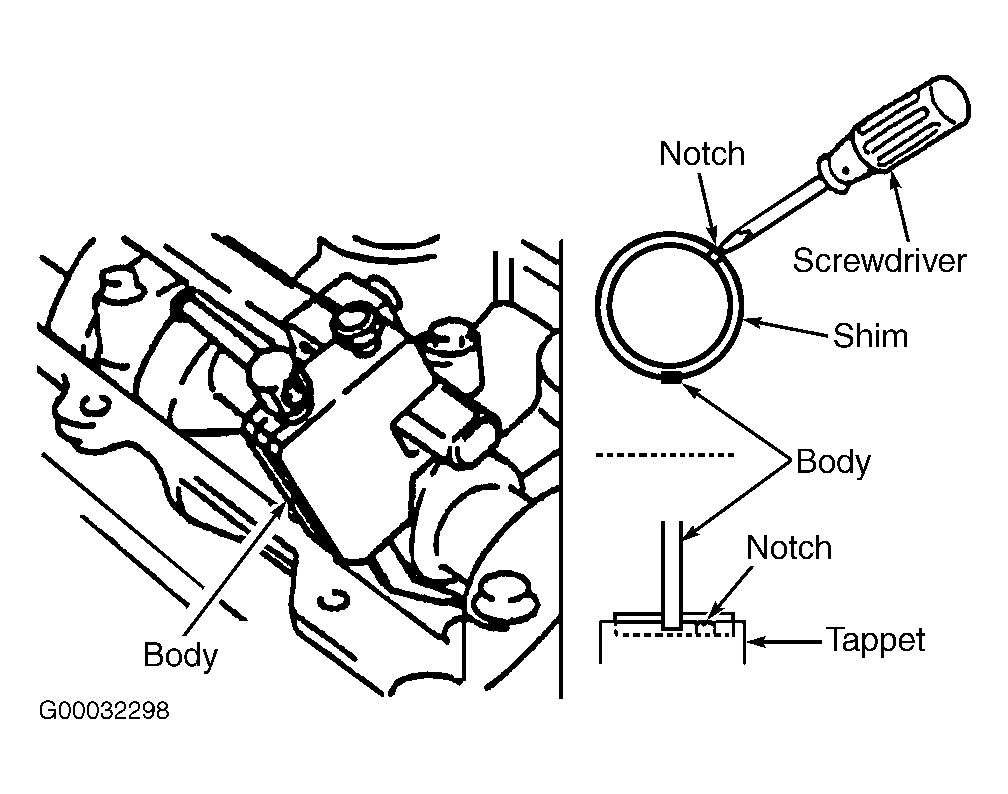 Courtesy of MAZDA MOTORS CORP.
- Tighten long bolt on tappet holder body to depress tappet. Using thin-blade screwdriver, pry up on adjustment shim through notch on tappet. Using a magnet, remove shim and measure shim thickness. Select proper adjustment shim to obtain clearance within specification. Push selected shim into tappet. Loosen long bolt to allow tappet to move up. Loosen short bolt and remove body. Remove shaft and clamp. Install camshaft cap bolts and tighten to 100-126 INCH lbs. (11.3-14.2 N.m). Recheck valve clearance.
VALVE CLEARANCE SPECIFICATIONS
| Application |
In. (mm) |
| B2300 |
| Intake |
.009-.011 (.22-.28) |
| Exhaust |
.011-.013 (.27-.33) |
| Miata |
| Intake |
.007-.009 (.18-.24) |
| Exhaust |
.011-.013 (.28-.34) |
| Millenia 2.3L |
.011-.013 (.27-.33) |
| Protege & Protege5 |
.009-.012 (.23-.30) |
| Tribute 2.0L |
| Intake |
.004-.007 (.11-.18) |
| Exhaust |
.011-.013 (.27-.34) |
| 626 |
| 2.0L |
.009-.012 (.23-.30) |
| 2.5L |
| Intake |
.010-.013 (.25-.32) |
| Exhaust |
.011-.013 (.27-.34) |
| All Others |
|
CAMSHAFT BOLT REMOVAL
| Remove Bolt |
Adjust Clearance On Cylinder No. (Valves) |
| "A" |
1, 2 & 3 (Exhaust) |
| "B" |
1, 2 & 3 (Intake) |
| "C" |
2, 3 & 4 (Exhaust) |
| "D" |
2, 3 & 4 (Intake) |