Removal (MX-3, Protege & 323)
- Disconnect negative battery cable. Raise and support vehicle. Remove right front wheel. Remove right splash panels.
- Remove drive belts and water pump pulley. See Fig 1, Fig 2 or Fig 3
. Align crankshaft pulley timing mark with cylinder No. 1 at TDC of compression stroke. Hold crankshaft stationary, and remove crankshaft pulley bolts and pulley. Remove crankshaft pulley hub bolt and hub.
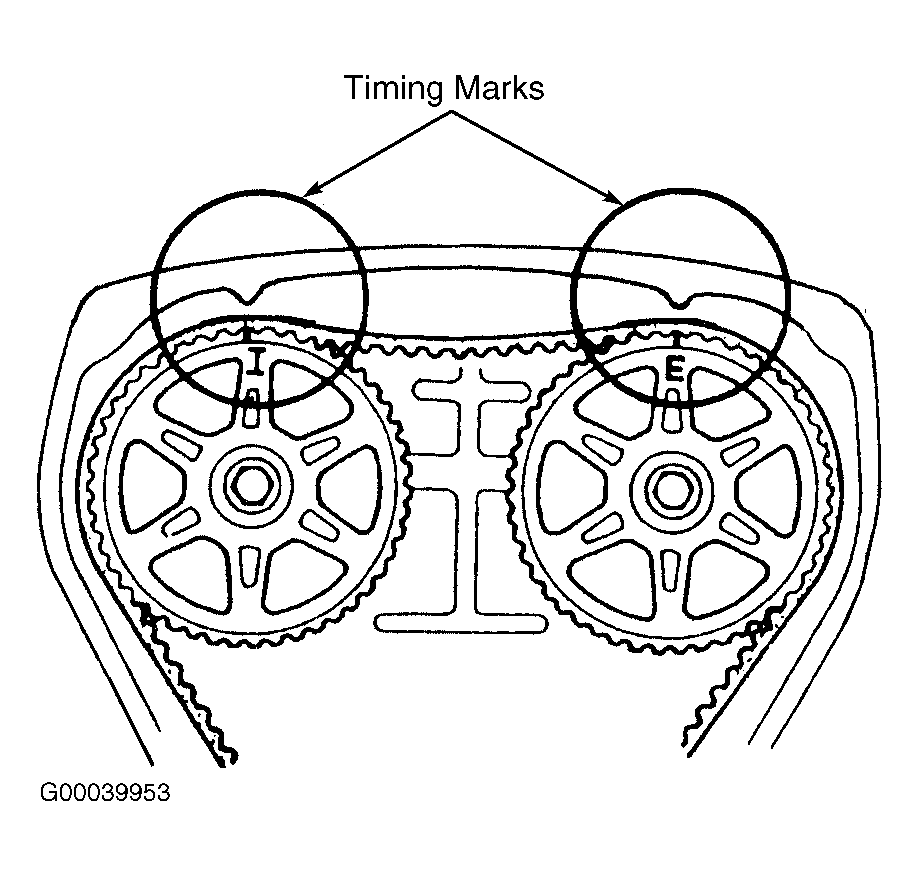
- Remove timing belt covers. If timing belt is to be reused, mark timing belt rotation direction. Align timing marks on camshaft sprocket(s). See Fig 4 (SOHC) or Fig 5 (DOHC)
. Loosen timing belt tensioner lock bolt. Temporarily secure tensioner away from belt with spring fully expanded. Remove timing belt.
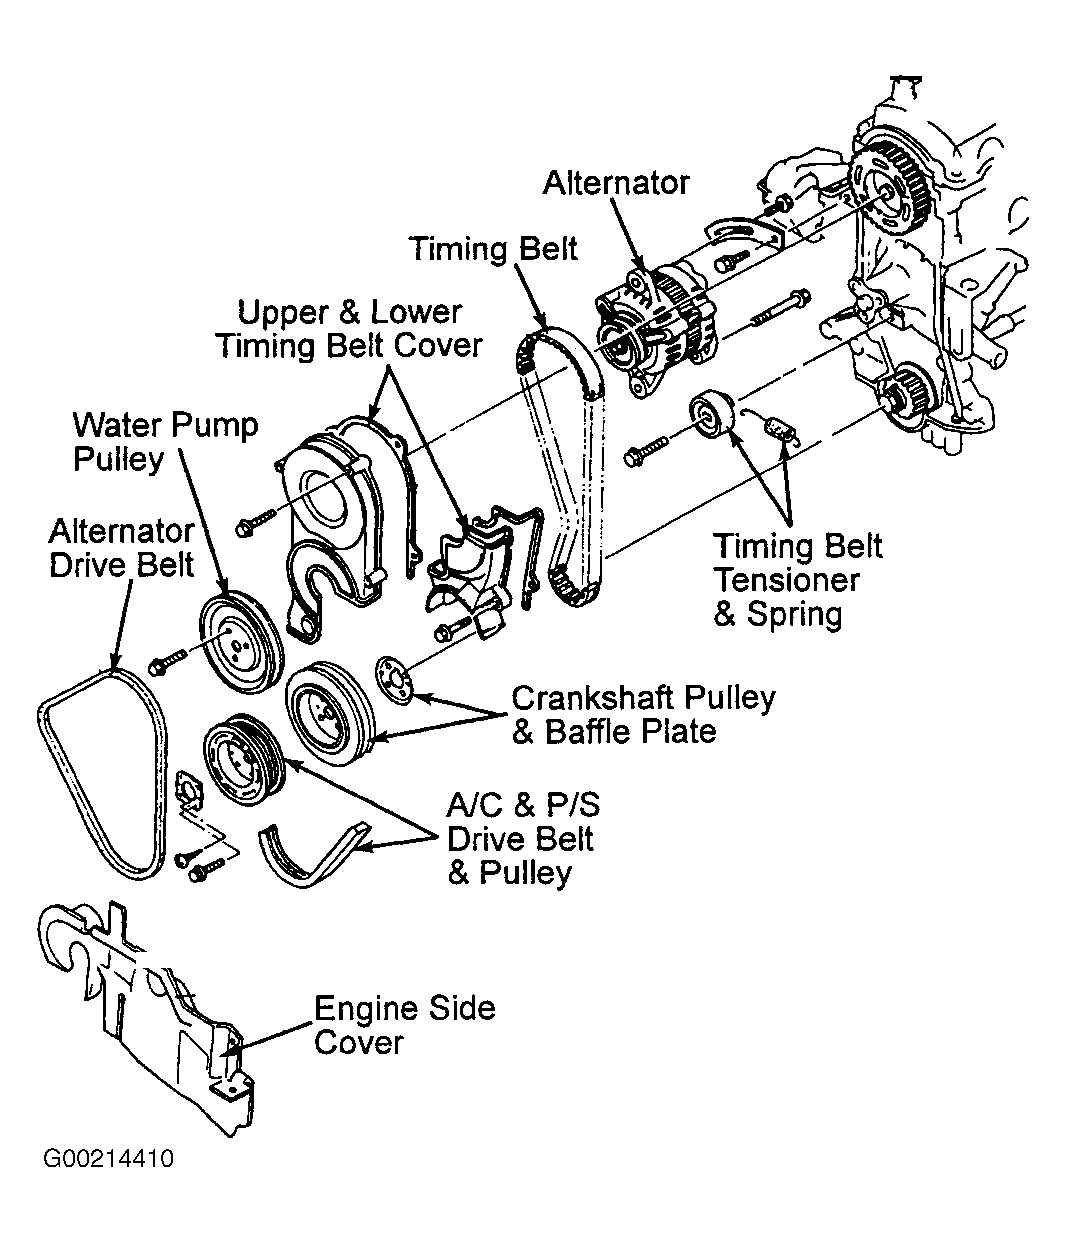 Courtesy of MAZDA MOTORS CORP.
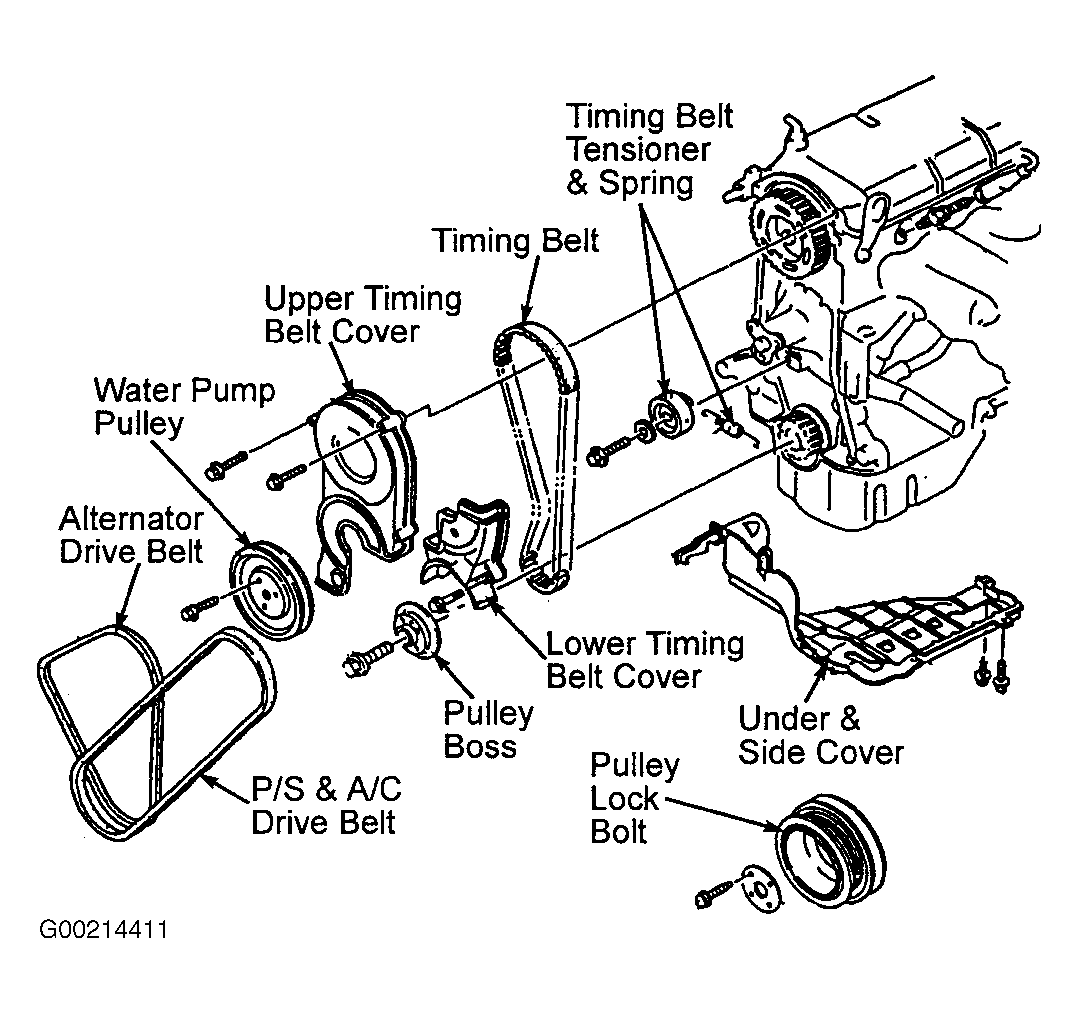 Courtesy of MAZDA MOTORS CORP.
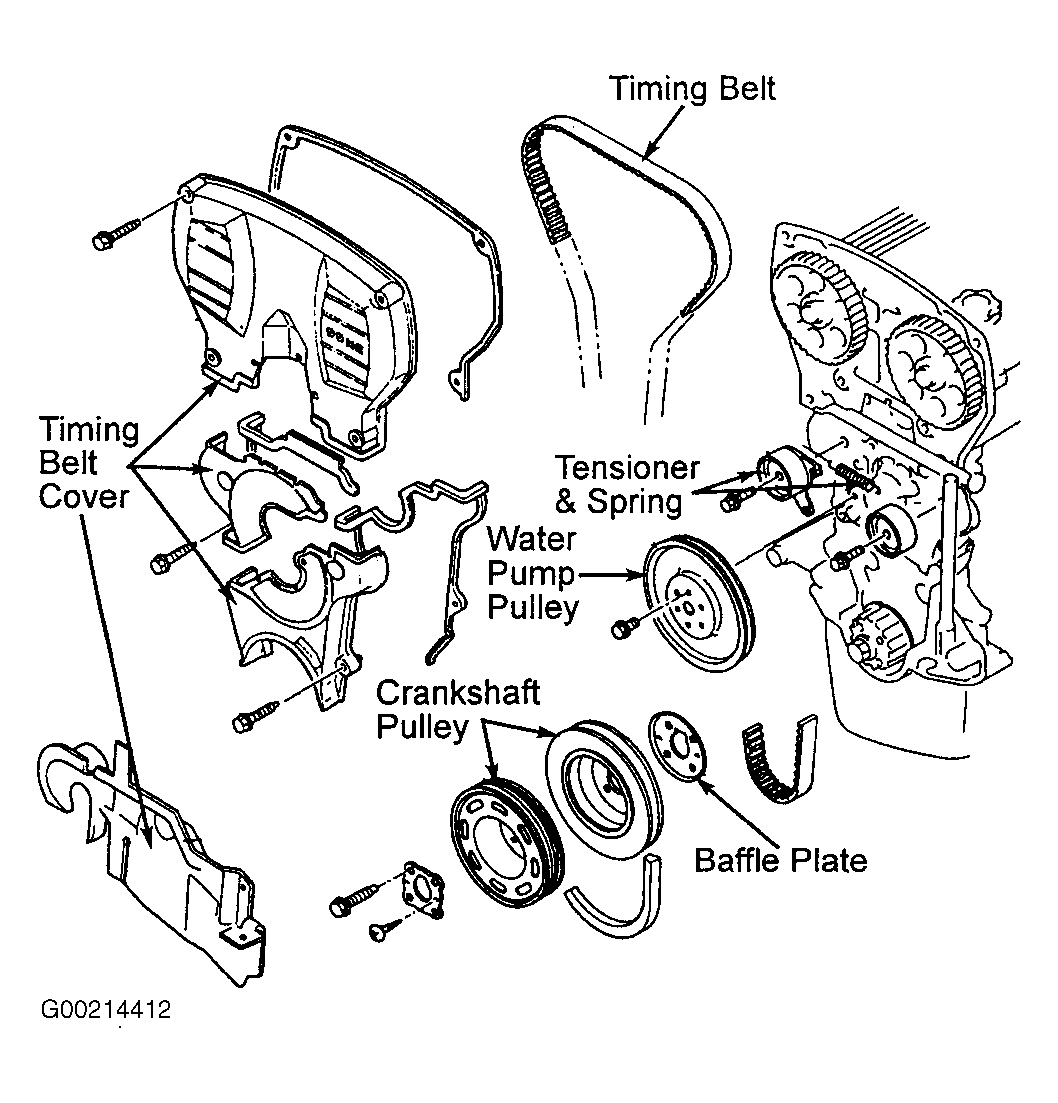 Courtesy of MAZDA MOTORS CORP.
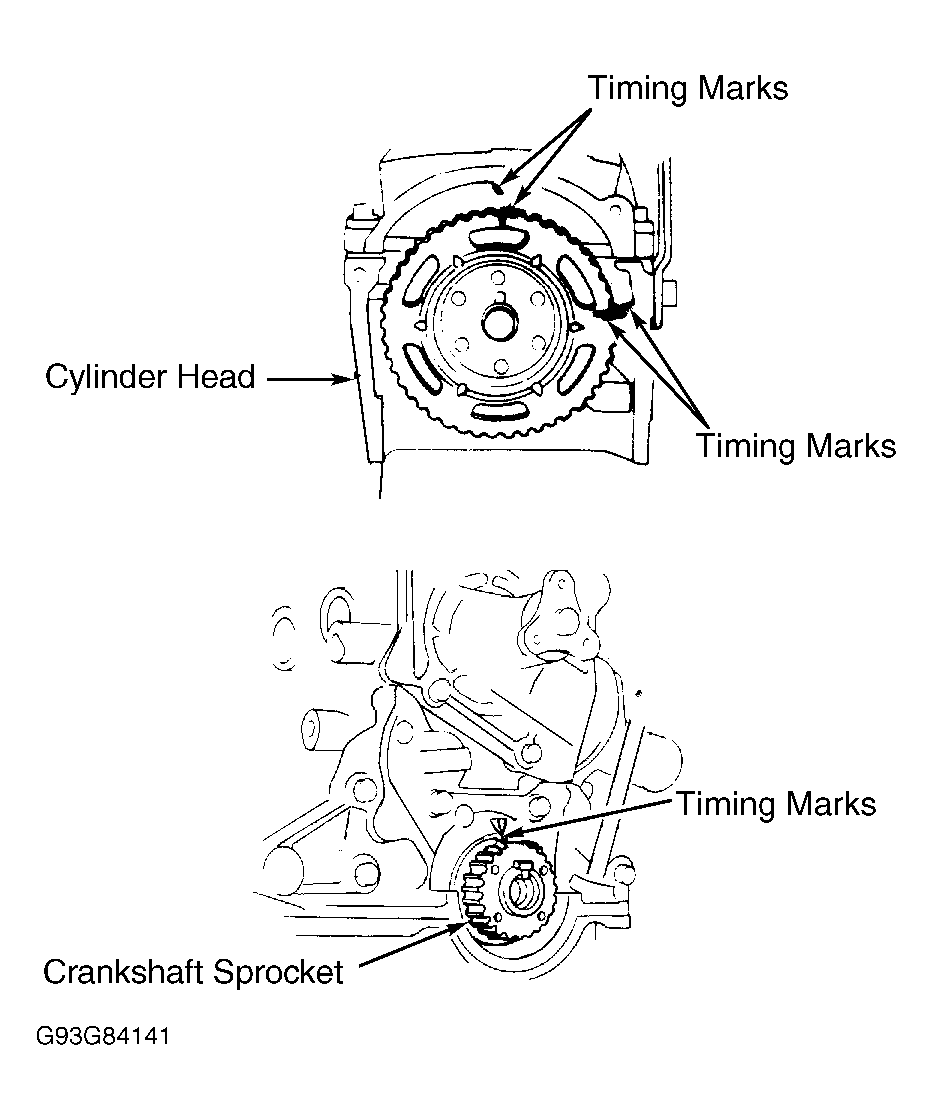 Courtesy of MAZDA MOTORS CORP.
 Courtesy of MAZDA MOTORS CORP.