Selector Lever Cable - Floor Shift: Installation
WARNING: This page is about a different car, the 2017 Lincoln Navigator and 2017 Ford Expedition. However, it is still accessible from the selected car via links, so may be relevant.
All vehicles
- 1.
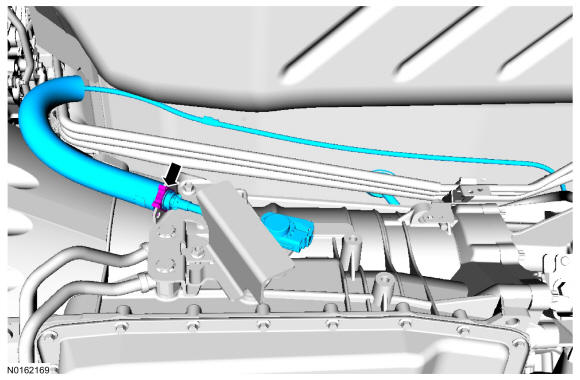
Install the selector lever cable and connect the selector lever cable to the selector lever cable bracket.
- Route the cable over the transmission and push the selector lever end of the cable through the floor.
 Courtesy of FORD MOTOR COMPANY Courtesy of FORD MOTOR COMPANY
|
- 2.
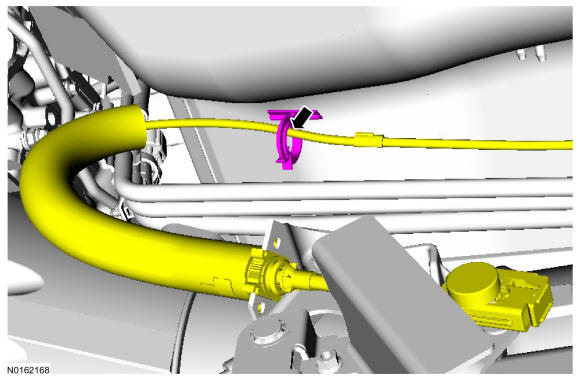
Attach the selector lever cable to the routing clip.
 Courtesy of FORD MOTOR COMPANY Courtesy of FORD MOTOR COMPANY
|
- 3.
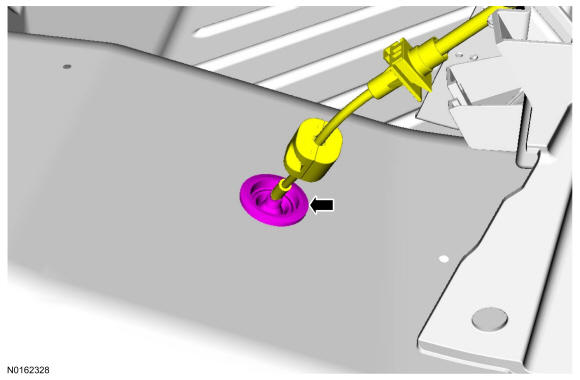
Pull the rubber grommet and selector lever cable through the floor pan.
 Courtesy of FORD MOTOR COMPANY Courtesy of FORD MOTOR COMPANY
|
Navigator
- 4.
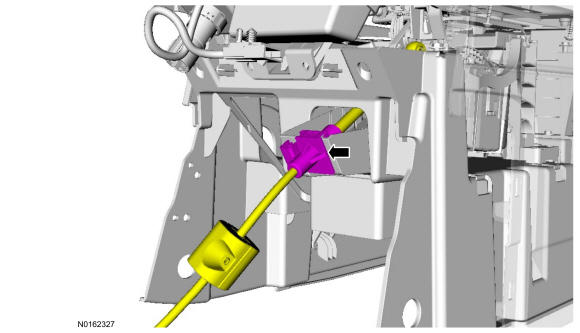
Connect the selector lever cable to the selector lever housing.
 Courtesy of FORD MOTOR COMPANY Courtesy of FORD MOTOR COMPANY
|
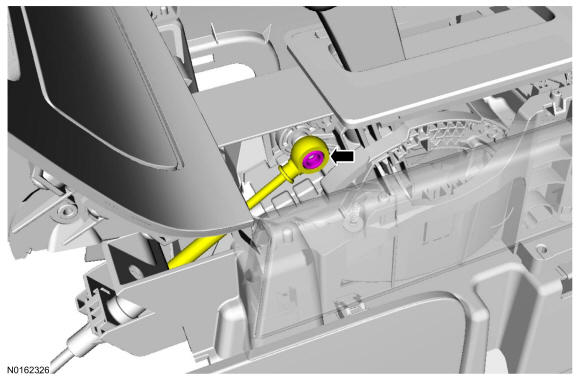
- 5.
Connect the selector lever cable to the selector lever arm.
 Courtesy of FORD MOTOR COMPANY Courtesy of FORD MOTOR COMPANY
|
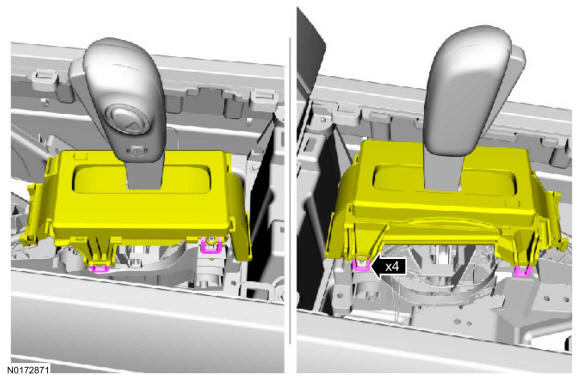
- 6.
Position and latch the selector lever bezel.
 Courtesy of FORD MOTOR COMPANY Courtesy of FORD MOTOR COMPANY
|
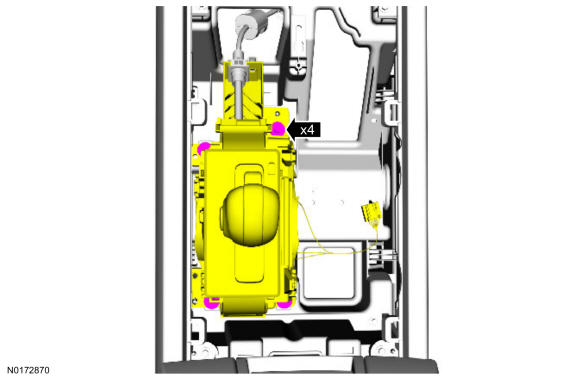
- 7.
Position the selector lever and install the bolts.
- Tighten to 8 Nm (71 lb-in).
 Courtesy of FORD MOTOR COMPANY Courtesy of FORD MOTOR COMPANY
|
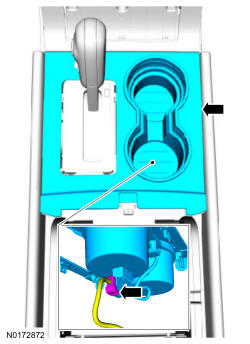
- 8.
Connect the ambient light electrical connector and install the floor console upper panel.
 Courtesy of FORD MOTOR COMPANY Courtesy of FORD MOTOR COMPANY
|
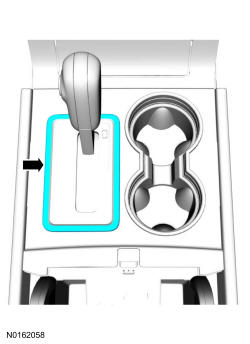
- 9.
Install the selector lever trim ring.
 Courtesy of FORD MOTOR COMPANY Courtesy of FORD MOTOR COMPANY
|
Expedition
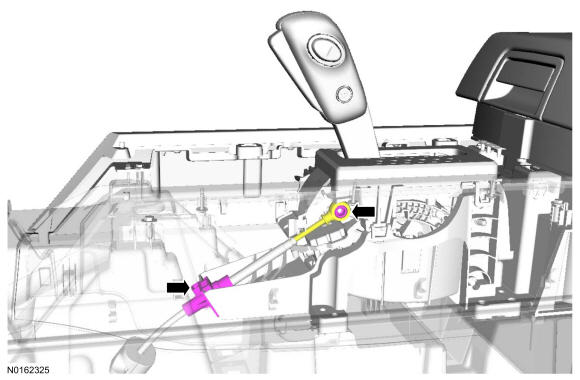
- 10.
Connect the selector lever cable to the selector lever arm and the selector lever housing.
 Courtesy of FORD MOTOR COMPANY Courtesy of FORD MOTOR COMPANY
|
- 11.
Position and latch the selector lever bezel.
Courtesy of FORD MOTOR COMPANY
|
- 12.
Position the selector lever and install the bolts.
- Tighten to 8 Nm (71 lb-in).
Courtesy of FORD MOTOR COMPANY
|
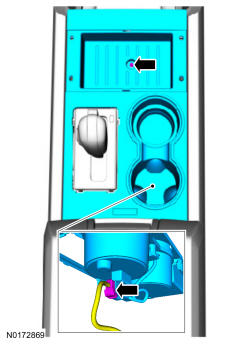
- 13.
Connect the ambient light electrical connector and install the console upper trim and the screw.
 Courtesy of FORD MOTOR COMPANY Courtesy of FORD MOTOR COMPANY
|
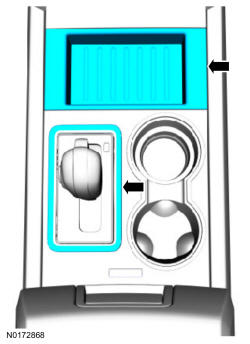
- 14.
Install the selector lever trim ring and console tray insert.
 Courtesy of FORD MOTOR COMPANY Courtesy of FORD MOTOR COMPANY
|
All vehicles
- 15.
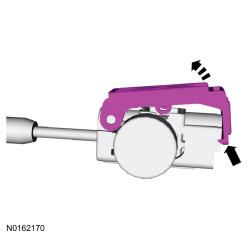
If necessary, rotate the cable adjustment lock upward.
 Courtesy of FORD MOTOR COMPANY Courtesy of FORD MOTOR COMPANY
|
- 16.
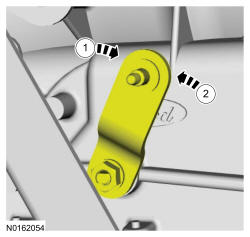
Place the manual control lever in the DRIVE position.
- 1.
Rotate the manual control lever clockwise until it stops.
- 2.
Rotate the manual control lever counterclockwise 3 detents to the DRIVE position.
 Courtesy of FORD MOTOR COMPANY Courtesy of FORD MOTOR COMPANY
|
- 17.
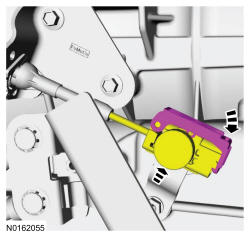
Connect the selector lever cable to the manual control lever and move the locking tab down.
- Listen for the audible click, then push back on the locking tab to verify it is locked.
- Pull back on the selector lever cable to verify it is installed correctly to the manual lever.
 Courtesy of FORD MOTOR COMPANY Courtesy of FORD MOTOR COMPANY
|
- 18.
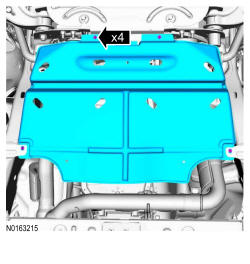
Install the transmission shield and the retainers.
 Courtesy of FORD MOTOR COMPANY Courtesy of FORD MOTOR COMPANY
|
- 19.
Verify the vehicle will start in PARK and NEUTRAL and the backup lamps illuminate in REVERSE.