Selector Lever - Floor Shift: Removal
WARNING: This page is about a different car, the 2017 Lincoln Navigator and 2017 Ford Expedition. However, it is still accessible from the selected car via links, so may be relevant.
All vehicles
- 1.
Prior to replacing the selector lever assembly for a no start or high shift effort concern, verify the selector lever cable to bracket clip is fully seated at the transmission and selector lever assembly. Unseated cables can cause selector lever cable binding and prevent the manual shaft from completely returning to the P (Park) position.
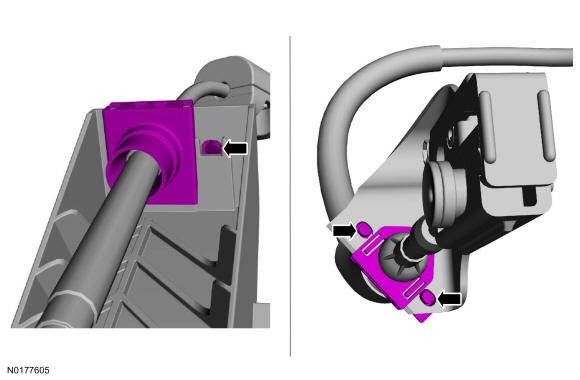 Courtesy of FORD MOTOR COMPANY Courtesy of FORD MOTOR COMPANY
|
Expedition
- 2.
Remove the selector lever trim ring and the console tray insert.
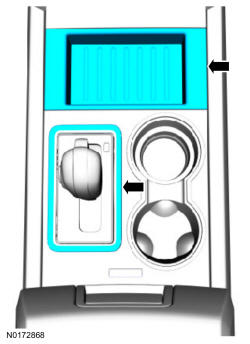 Courtesy of FORD MOTOR COMPANY Courtesy of FORD MOTOR COMPANY
|
- 3.
Remove the screw, raise the console upper trim panel and disconnect the ambient light electrical connector and remove the trim panel.
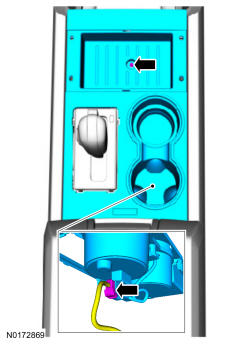 Courtesy of FORD MOTOR COMPANY Courtesy of FORD MOTOR COMPANY
|
- 4.
Remove the bolts and position the selector lever aside.
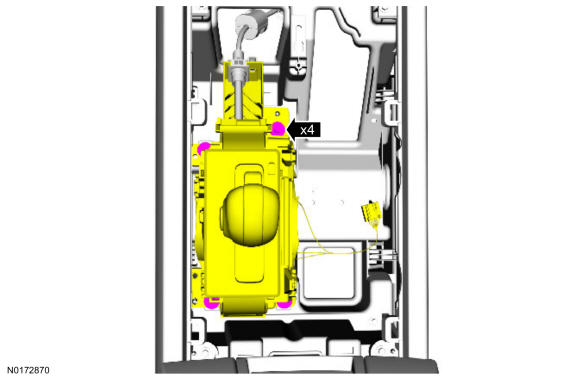 Courtesy of FORD MOTOR COMPANY Courtesy of FORD MOTOR COMPANY
|
- 5.
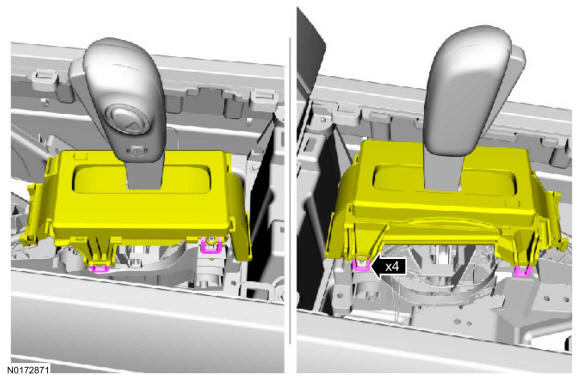
Unlatch and position aside the selector lever bezel.
 Courtesy of FORD MOTOR COMPANY Courtesy of FORD MOTOR COMPANY
|
- 6.
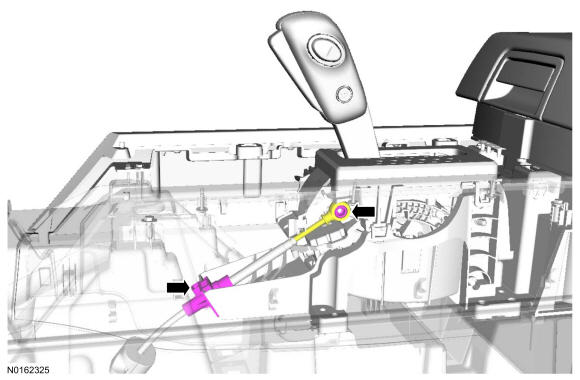
Disconnect the selector lever cable from the selector lever arm and the selector lever housing.
 Courtesy of FORD MOTOR COMPANY Courtesy of FORD MOTOR COMPANY
|
Navigator
- 7.
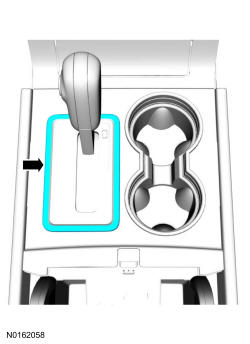
Remove the selector lever trim ring.
 Courtesy of FORD MOTOR COMPANY Courtesy of FORD MOTOR COMPANY
|
- 8.
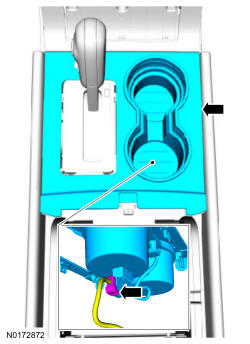
Raise the console upper trim panel and disconnect the ambient light electrical connector and remove the trim panel.
 Courtesy of FORD MOTOR COMPANY Courtesy of FORD MOTOR COMPANY
|
- 9.
Remove the bolts and position the selector lever aside.
Courtesy of FORD MOTOR COMPANY
|
- 10.
Unlatch and position aside the selector lever bezel.
Courtesy of FORD MOTOR COMPANY
|
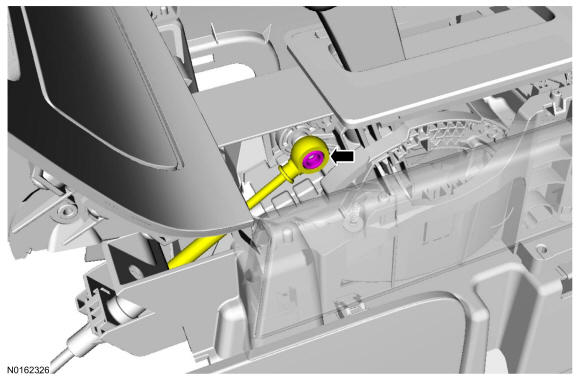
- 11.
Disconnect the selector lever cable from the selector lever arm.
 Courtesy of FORD MOTOR COMPANY Courtesy of FORD MOTOR COMPANY
|
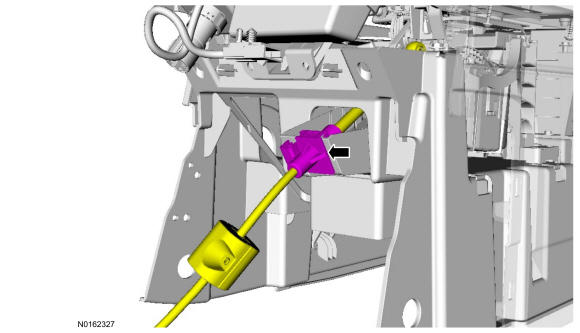
- 12.
Disconnect the selector lever cable from the selector lever housing.
 Courtesy of FORD MOTOR COMPANY Courtesy of FORD MOTOR COMPANY
|
All vehicles
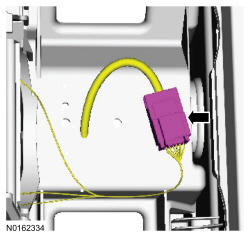
- 13.
Disconnect the selector lever electrical connector.
 Courtesy of FORD MOTOR COMPANY Courtesy of FORD MOTOR COMPANY
|
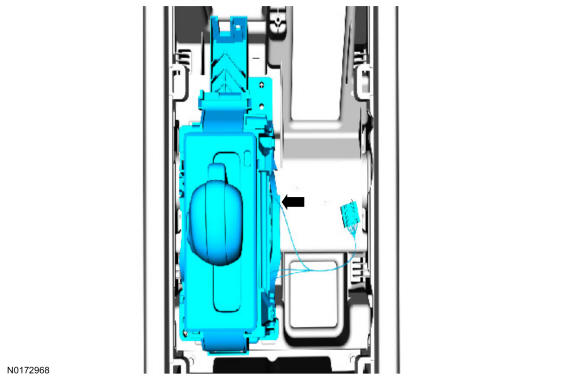
- 14.
Lift the selector lever out of the console.
 Courtesy of FORD MOTOR COMPANY Courtesy of FORD MOTOR COMPANY
|