Console - Front, Floor: Installation
WARNING: This page is about a different car, the 2016 Ford Expedition. However, it is still accessible from the selected car via links, so may be relevant.
All vehicles
- 1.
Install the front floor console.
- 2.
Connect the front floor console electrical connectors.
- Tighten the bulkhead electrical connector bolts to 3 Nm (27 lb-in).
- 3.
Install the front floor console front screws.
- Tighten to 7 Nm (62 lb-in).
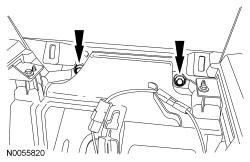 Courtesy of FORD MOTOR COMPANY Courtesy of FORD MOTOR COMPANY
|
Vehicles with floor shift
- 4.
Install the selector lever cable.
- 5.
Install the selector lever indicator bezel.
All Vehicles
- 6.
Install the floor console upper finish panel.
- Connect electrical connector(s).
- Make sure to align the trim panel retaining clips to the retaining clip holes in the floor console.
- 7.
Install the front floor console utility tray screw.
- 8.
Install the front floor console utility tray mat.
Vehicles with floor shift
- 9.
Install the selector lever trim ring.
All vehicles
- 10.
Install the 2 front floor console front bolts.
- Tighten to 7 Nm (62 lb-in).
- 11.
Install the 2 front floor console front bolt covers.
- 12.
Position the front seats forward.
- 13.
Install the 2 front floor console rear bolts.
- Tighten to 7 Nm (62 lb-in).
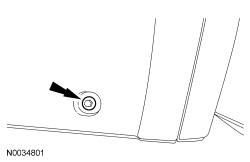 Courtesy of FORD MOTOR COMPANY Courtesy of FORD MOTOR COMPANY
|
- 14.
Position the front seats rearward.
Vehicles with floor shift
- 15.
Position the selector lever in the PARK position.
All vehicles
- 16.
Release the parking brake.