Measuring Riding Height
- Place vehicle on alignment rack. To ensure riding height is measured at a consistent point, riding height should only be measured after performing automatic mode testing and SUPER STAR II tester displays a Code 12. See AUTOMATIC MODE TESTING under SERVICE BAY DIAGNOSTICS in SUSPENSION SYSTEM - AIR
article in this section.
- After automatic mode testing is completed, turn off air suspension switch. Air suspension switch is located behind trim panel in left side of trunk. See Figure
. Remove SUPER STAR II tester, and leave ignition turned on.
- Vehicle should now be at top of trim band. Measure front suspension riding height "C" dimension. See Fig 1
. Dimension "C" is vertical difference between lower control arm inner pivot and bottom center of ball joint retainer disk.
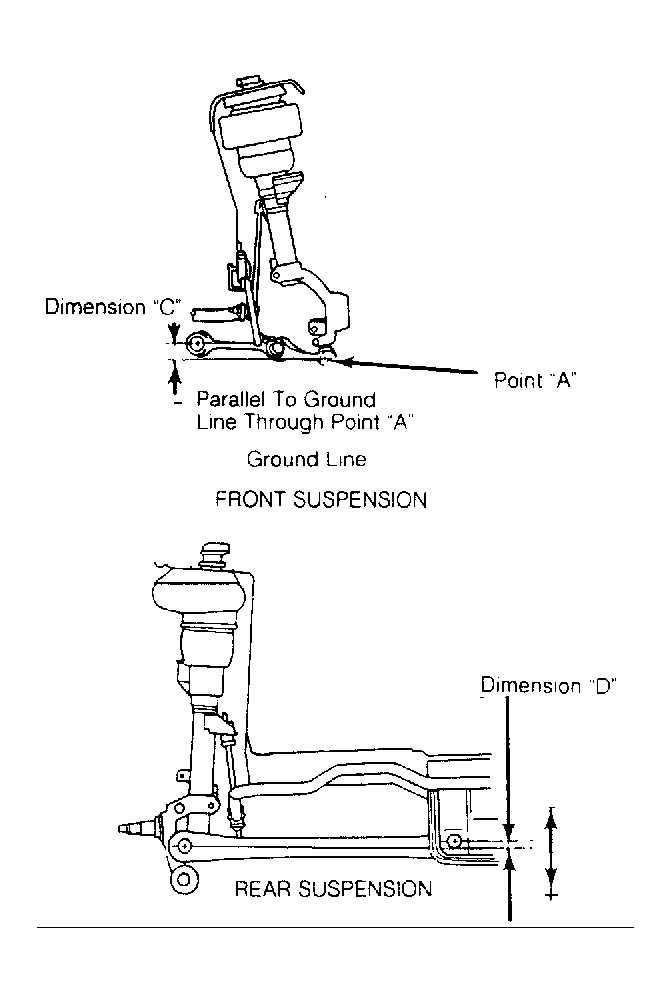 Courtesy of FORD MOTOR CO.
- Measure rear suspension dimension "D". Rear suspension riding height is vertical difference between rear lower control arm pivot attachment height and outer pivot height. See Fig 1
.
- Suspension riding heights for top of trim band are:
- "C" : 1.72" (44 mm) +/-0.39" (10 mm).
- "D" : -0.36" (-9.3 mm). Tolerance is +.39" (10 mm) and -0.20" (5mm).
- For reference purposes, riding heights at center of trim band are approximately .35" (9 mm) lower on front suspension, and .47" (12 mm) lower for rear suspension than riding heights listed in step 5).