Disassembly [11/2021 - ]: Procedure
WARNING: This page is about a different car, the 2024 Lexus IS 500, 2023 Lexus IS 500, and 2022 Lexus IS 500. However, it is still accessible from the selected car via links, so may be relevant.
- REMOVE OIL PUMP O-RING
- Remove the oil pump O-ring from the oil pump assembly.
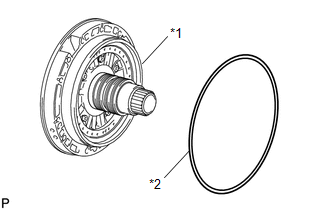 Courtesy of © TOYOTA, LICENSE AGREEMENT TMS1002 Courtesy of © TOYOTA, LICENSE AGREEMENT TMS1002
|
| *1 |
Oil Pump Assembly |
| *2 |
Oil Pump O-ring |
- SECURE OIL PUMP ASSEMBLY
- Install the oil pump assembly to the torque converter assembly.
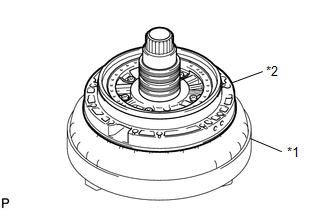 Courtesy of © TOYOTA, LICENSE AGREEMENT TMS1002 Courtesy of © TOYOTA, LICENSE AGREEMENT TMS1002
|
| *1 |
Torque Converter Assembly |
| *2 |
Oil Pump Assembly |
- REMOVE CLUTCH DRUM OIL SEAL RING
- Remove the 4 clutch drum oil seal rings from the oil pump assembly.
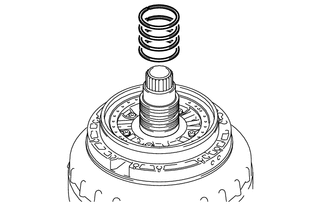 Courtesy of © TOYOTA, LICENSE AGREEMENT TMS1002 Courtesy of © TOYOTA, LICENSE AGREEMENT TMS1002
|
- REMOVE STATOR SHAFT PISTON
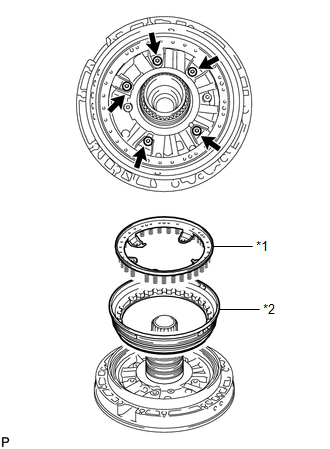 Courtesy of © TOYOTA, LICENSE AGREEMENT TMS1002 Courtesy of © TOYOTA, LICENSE AGREEMENT TMS1002
|
| *1 |
Stator Shaft Spring Sub-assembly |
| *2 |
Stator Shaft Piston |
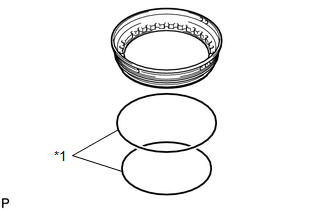
- Using a T30 "TORX" socket wrench, remove the 5 bolts, stator shaft spring sub-assembly and stator shaft piston from the oil pump assembly.
- Remove the 2 O-rings from the stator shaft piston.
 Courtesy of © TOYOTA, LICENSE AGREEMENT TMS1002 Courtesy of © TOYOTA, LICENSE AGREEMENT TMS1002
|
- REMOVE STATOR SHAFT CLUTCH DRUM THRUST WASHER
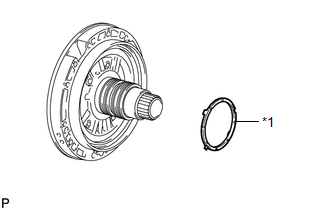
- Remove the stator shaft clutch drum thrust washer from the stator shaft assembly.
 Courtesy of © TOYOTA, LICENSE AGREEMENT TMS1002 Courtesy of © TOYOTA, LICENSE AGREEMENT TMS1002
|
| *1 |
Stator Shaft Clutch Drum Thrust Washer |
- INSPECT STATOR SHAFT SPRING SUB-ASSEMBLY
See step 1
- REMOVE STATOR SHAFT ASSEMBLY
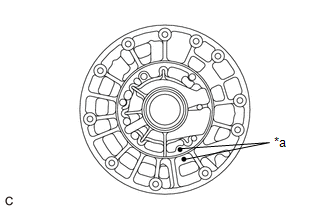
- Put matchmarks on the stator shaft assembly and the front oil pump body sub-assembly.
 Courtesy of © TOYOTA, LICENSE AGREEMENT TMS1002 Courtesy of © TOYOTA, LICENSE AGREEMENT TMS1002
|
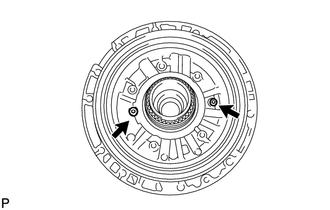
- Using a T30 "TORX" socket wrench, remove the 2 bolts and stator shaft assembly from the front oil pump body sub-assembly.
 Courtesy of © TOYOTA, LICENSE AGREEMENT TMS1002 Courtesy of © TOYOTA, LICENSE AGREEMENT TMS1002
|
- REMOVE FRONT OIL PUMP BODY SUB-ASSEMBLY
- Remove the front oil pump body sub-assembly from the torque converter assembly.
- REMOVE FRONT OIL PUMP BODY O-RING
- Remove the front oil pump body O-ring from the front oil pump body sub-assembly.
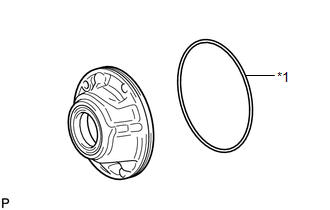 Courtesy of © TOYOTA, LICENSE AGREEMENT TMS1002 Courtesy of © TOYOTA, LICENSE AGREEMENT TMS1002
|
| *1 |
Front Oil Pump Body O-ring |
- INSPECT STATOR SHAFT ASSEMBLY
See step 3
- INSPECT FRONT OIL PUMP BODY SUB-ASSEMBLY
See step 2
- INSPECT OIL PUMP ASSEMBLY CLEARANCE
See step 4
- REMOVE FRONT OIL PUMP DRIVE GEAR
- Remove the front oil pump drive gear from the front oil pump body sub-assembly.
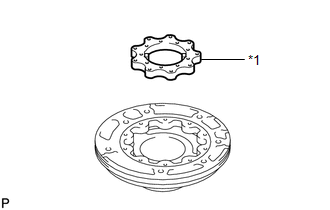 Courtesy of © TOYOTA, LICENSE AGREEMENT TMS1002 Courtesy of © TOYOTA, LICENSE AGREEMENT TMS1002
|
| *1 |
Front Oil Pump Drive Gear |
- REMOVE FRONT OIL PUMP DRIVEN GEAR
- Remove the front oil pump driven gear from the front oil pump body sub-assembly.
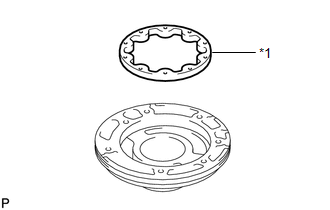 Courtesy of © TOYOTA, LICENSE AGREEMENT TMS1002 Courtesy of © TOYOTA, LICENSE AGREEMENT TMS1002
|
| *1 |
Front Oil Pump Driven Gear |
- REMOVE FRONT OIL PUMP OIL SEAL
- Using a screwdriver, remove the front oil pump oil seal from the front oil pump body sub-assembly.
NOTE:
Do not damage the front oil pump seal installation surface or front oil pump body sub-assembly.
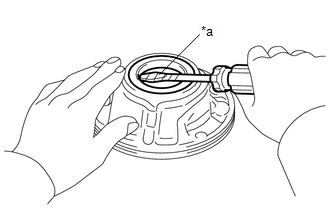 Courtesy of © TOYOTA, LICENSE AGREEMENT TMS1002 Courtesy of © TOYOTA, LICENSE AGREEMENT TMS1002
|
HINT:
Tape the screwdriver tip before use.