Disassembly [04/2013 - 08/2015]: Procedure
WARNING: This page is about a different car, the 2015 Lexus IS 250 and 2014 Lexus IS 250. However, it is still accessible from the selected car via links, so may be relevant.
- REMOVE INTAKE VALVE
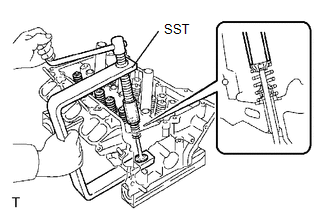
- Using SST, compress the inner compression spring and remove the 2 valve spring retainer locks.
 Courtesy of © TOYOTA, LICENSE AGREEMENT TMS1002 Courtesy of © TOYOTA, LICENSE AGREEMENT TMS1002
|
- SST: 09202-70020
- 09202-00010
- 09202-01010
- 09202-01020
- Remove the valve spring retainer, inner compression spring and intake valve.
HINT:
Arrange the removed parts in the correct order.
- REMOVE EXHAUST VALVE
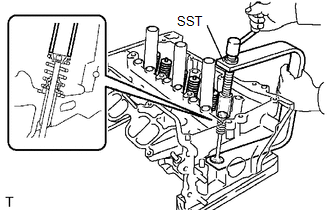
- Using SST, compress the inner compression spring and remove the 2 valve spring retainer locks.
 Courtesy of © TOYOTA, LICENSE AGREEMENT TMS1002 Courtesy of © TOYOTA, LICENSE AGREEMENT TMS1002
|
- SST: 09202-70020
- 09202-00010
- 09202-01010
- 09202-01020
- Remove the valve spring retainer, inner compression spring and exhaust valve.
HINT:
Arrange the removed parts in the correct order.
- REMOVE INTAKE VALVE STEM OIL SEAL
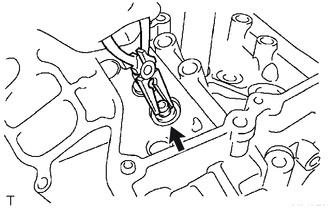
- Using needle-nose pliers, remove the intake valve stem oil seals.
 Courtesy of © TOYOTA, LICENSE AGREEMENT TMS1002 Courtesy of © TOYOTA, LICENSE AGREEMENT TMS1002
|
- REMOVE EXHAUST VALVE STEM OIL SEAL
- Using needle-nose pliers, remove the exhaust valve stem oil seals.
- REMOVE VALVE SPRING SEAT
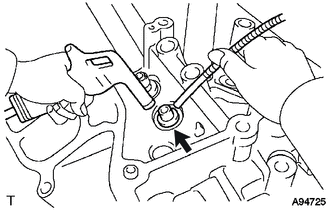
- Using compressed air and a magnet hand, remove the valve spring seats by blowing air onto them.
 Courtesy of © TOYOTA, LICENSE AGREEMENT TMS1002 Courtesy of © TOYOTA, LICENSE AGREEMENT TMS1002
|
- REMOVE NO. 1 STRAIGHT SCREW PLUG
- Using a 10 mm hexagon wrench, remove the 4 No. 1 straight screw plugs and 4 water hole gaskets.
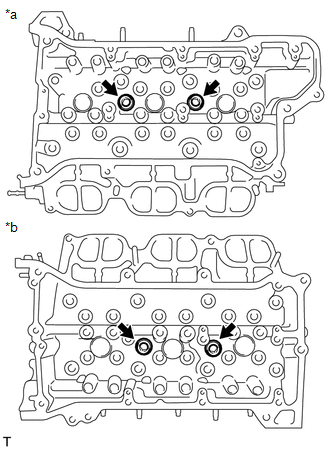 Courtesy of © TOYOTA, LICENSE AGREEMENT TMS1002 Courtesy of © TOYOTA, LICENSE AGREEMENT TMS1002
|
| *a |
for Bank 1 |
| *b |
for Bank 2 |
NOTE:
If water leaks from a No. 1 straight screw plug or the No. 1 straight screw plug is corroded, replace it.
- REMOVE NO. 2 STRAIGHT SCREW PLUG
- Using a 14 mm hexagon wrench, remove the 2 No. 2 straight screw plugs and 2 cylinder head screw plug gaskets.
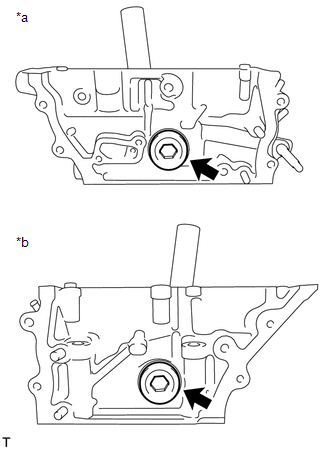 Courtesy of © TOYOTA, LICENSE AGREEMENT TMS1002 Courtesy of © TOYOTA, LICENSE AGREEMENT TMS1002
|
| *a |
for Bank 1 |
| *b |
for Bank 2 |
NOTE:
If water leaks from a No. 2 straight screw plug or the No. 2 straight screw plug is corroded, replace it.
- REMOVE UNION
HINT:
It is not necessary to remove the union unless it is being replaced.
- REMOVE STUD BOLT
HINT:
If the stud bolt is deformed or the threads are damaged, replace it.