Installation [03/2012 - 07/2012]
- INSTALL COMBINATION METER MIRROR ECU
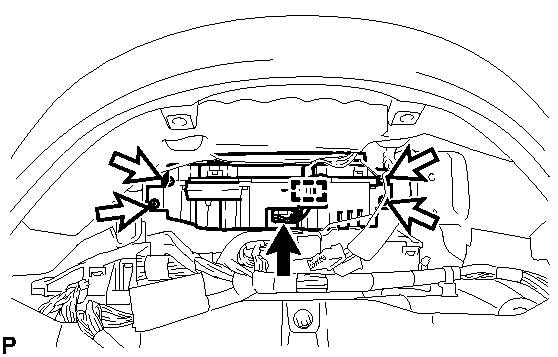
- Install the combination meter mirror ECU with the 4 screws.
 Courtesy of © TOYOTA, LICENSE AGREEMENT TMS1002
NOTE:
- Make sure that the ECU is installed securely.
- Do not drop the screws.
- Engage the clamp.
- Connect the connector.
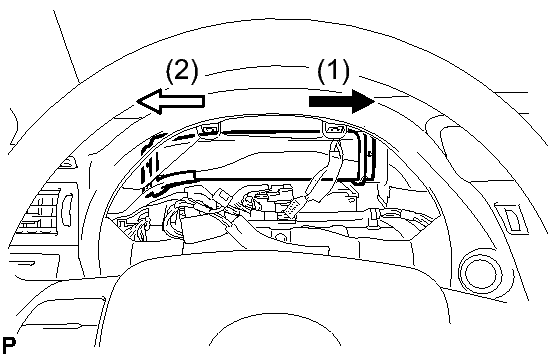
- Insert the No. 1 heater to register duct in the order indicated in the illustration to temporarily install it.
 Courtesy of © TOYOTA, LICENSE AGREEMENT TMS1002
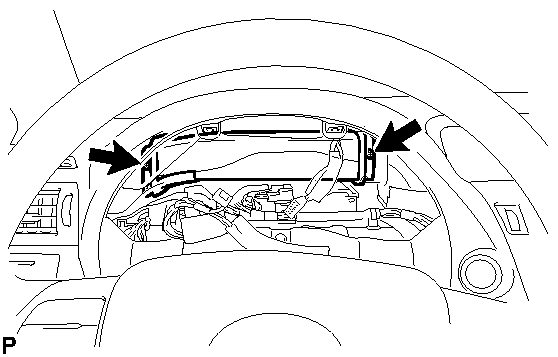
- Install the No. 1 heater to register duct with the 2 screws.
 Courtesy of © TOYOTA, LICENSE AGREEMENT TMS1002
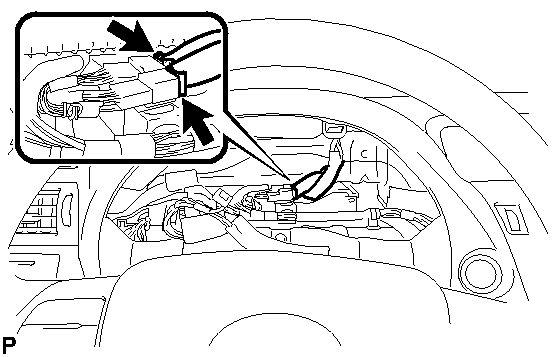
- Connect the connectors.
 Courtesy of © TOYOTA, LICENSE AGREEMENT TMS1002
- INSTALL COMBINATION METER ASSEMBLY
See step 1
- INSTALL NO. 1 INSTRUMENT CLUSTER FINISH PANEL
See step 2
- INSTALL NO. 2 INSTRUMENT PANEL HOLE COVER
. Refer to INSTALLATION [03/2012 - 07/2012] - Step 36
- INSTALL NO. 1 INSTRUMENT PANEL HOLE COVER
. Refer to INSTALLATION [03/2012 - 07/2012] - Step 35
- INSTALL LOWER INSTRUMENT PANEL FINISH PANEL SUB-ASSEMBLY
. Refer to INSTALLATION [03/2012 - 07/2012] - Step 41
- INSTALL NO. 1 SWITCH HOLE BASE
. Refer to INSTALLATION [03/2012 - 07/2012] - Step 42
- INSTALL INSTRUMENT PANEL GARNISH LH
. Refer to INSTALLATION [03/2012 - 07/2012] - Step 43
- CONNECT CABLE TO NEGATIVE BATTERY TERMINAL